MySQL Workbench represents each active data model as an icon in the
models view of the home screen tab. The following figure shows the
sakila_full and world
database models. Both models derive from MySQL database samples
(see https://dev.mysql.com/doc/index-other.html), which you
can download and use to explore the MySQL Workbench modeling
interface.
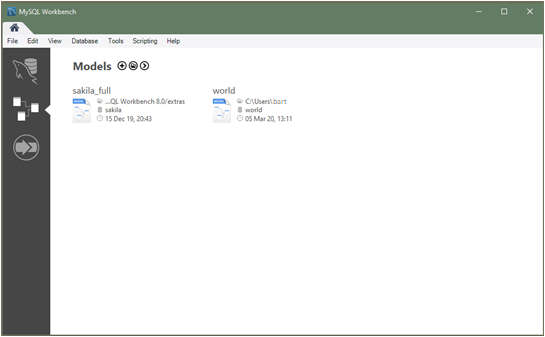
The sakila database sample includes a model
file (sakila.mwb) in the product package.
After you set up the database using the instructions provided on
the download page, MySQL Workbench adds the
sakila_full icon to the models view
automatically. For all of the other database samples, such as
world or employee data, you
must create the MySQL Workbench (.mwb) file first
before you can view the database objects in a model or add an EER
diagram for it.
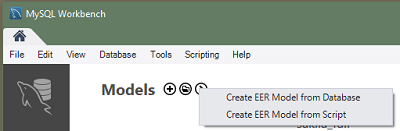
To create a MySQL Workbench model file for MySQL database samples:
Download the MySQL database you intend to use as a model. Each database has a setup guide (see https://dev.mysql.com/doc/index-other.html).
Start MySQL Workbench and select the models view (
 ) from the side panel of the home screen
tab.
) from the side panel of the home screen
tab.
Click the arrow icon and select as shown in the figure that follows.
A wizard-like dialog presents the following steps: Connection Options, Connect to DBMS, Select Schemas, Retrieve Objects, Select Objects, Reverse Engineer, and Results. Click to assist with the operations.
Modify the default values as needed, select a schema (and objects), and then click to close the wizard. MySQL Workbench adds an icon for each model you create.
Modeling concepts and interface elements are described in the next sections.