3 Install Enterprise Manager Cloud Control (EMCC)
This chapter shows an example of a new installation of Enterprise Manager Cloud Control (EMCC). If you are using an existing EMCC installation, you can proceed to Chapter 5, "Import the JD Edwards Application Pack OPAR".
An Oracle database must be installed expressly for use by EMCC prior to installing EMCC. For reference purposes, this chapter shows an example of installing the Oracle database for use by Enterprise Manager. However, Oracle strongly recommends that you use the OEM Oracle database installation software instructions under the direction of an Oracle DBA.
Note:
This procedure assumes you have obtained the software component for the Oracle EMCC as described in the chapter of this guide entitled: Section 1.5, "Obtaining Oracle Software Components from the Oracle Software Delivery Cloud".On the machine where you have downloaded the Oracle Enterprise Manager 12c Cloud Control installer:
-
Change directory to directory where you downloaded the installer. For example:
cd u01/downloads/emgc12c/numeric_date/Disk1where
numeric_dateis the date of the installer; for example:110728. -
Launch the installer using this command:
./runInstaller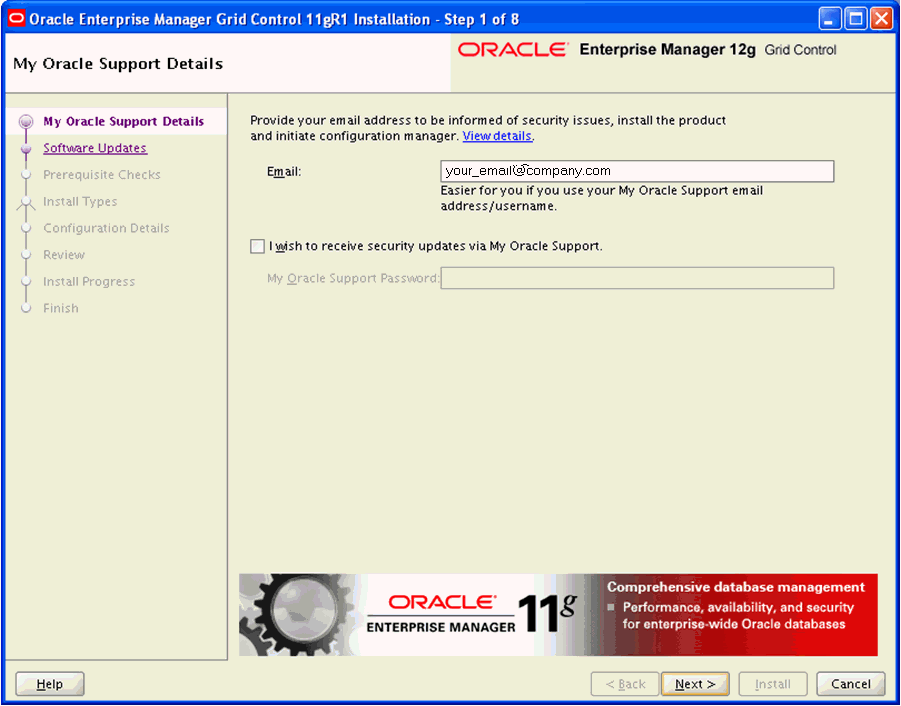
-
On My Oracle Support Details, in order to be informed of security issues you must either provide an email address or choose to receive security updates via My Oracle Support. If you have an Oracle Support account, it will be easier if click the checkbox to choose to receive security updates via My Oracle Support.
-
Click the Next button.
-
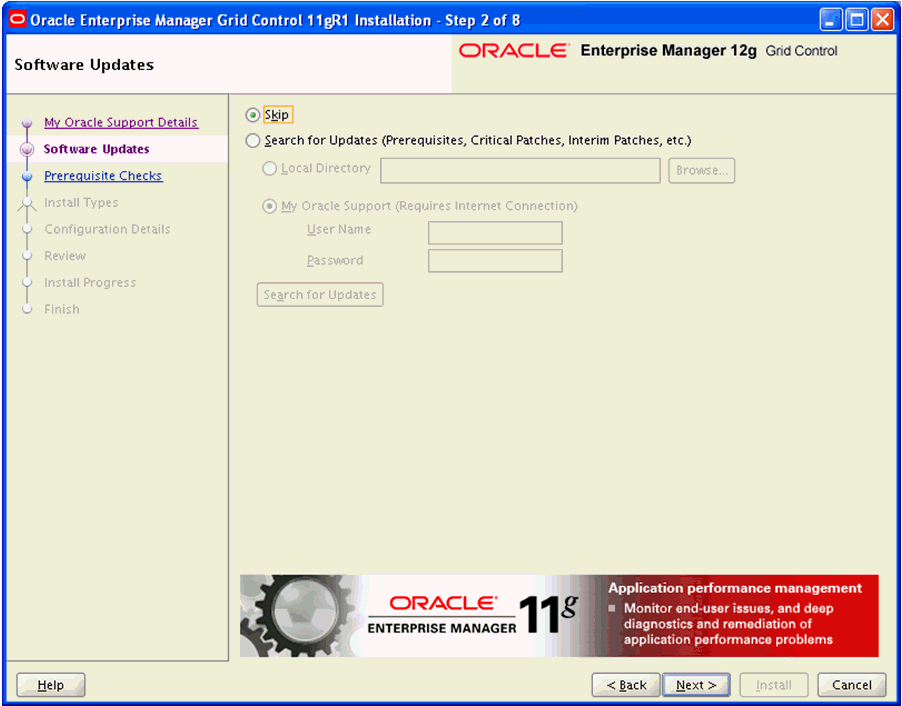
On Software Updates:
-
Press the Skip radio button to skip the search for Updates (Prerequisites, Critical Patches, Interim Patches, etc.).
-
Press the Search for Updates (Prerequisites, Critical Patches, Interim Patches, etc.) button to choose to search in a local directory if you have previously downloaded patches, or if you have an Oracle support account and Internet access, you can choose to search My Oracle Support.
-
-
Click the Next button.
-
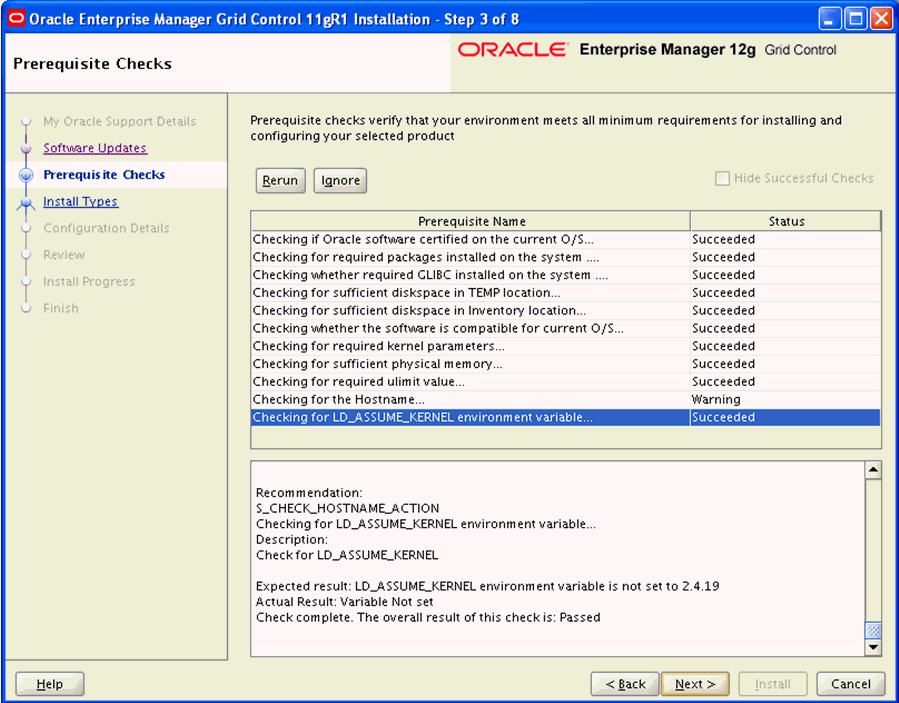
On Prerequisite Checks, verify the last line of the displayed log reads:
Check complete: The overall result of this check is: Passed
Also review the list of Prerequisite Names and their Status, where values can be Succeeded, Warning, or Failed. A status of Warning does not necessarily indicate an overal failure status. If you fix a Warnings or Failure, you can further choose the Rerun or Ignore buttons.
If you had a failed check of prerequisites, you will receive this error message.
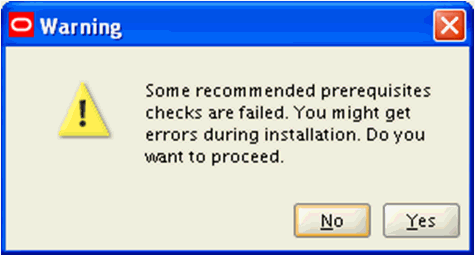
On Warning, you can click Yes to proceed with the installation. If you click No, you can fix the error and then click Rerun to verify the fix.
-
Click the Next button.
-
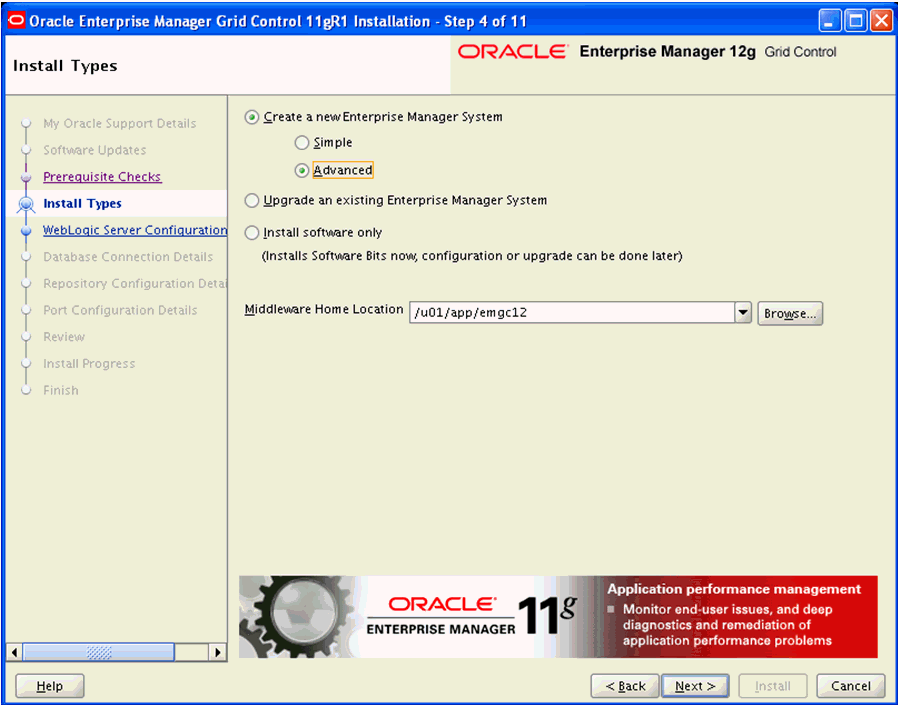
On Install Types, click this radio button:
Create a new Enterprise Manager System
Under the above radio button, click this radio button:
Advanced
-
In the field Middleware Home Location, either browse or enter a location into which the WebLogic Server will be installed. This location must exist and be empty. For example:
/u01/app/emgc12 -
Click the Next button.
-
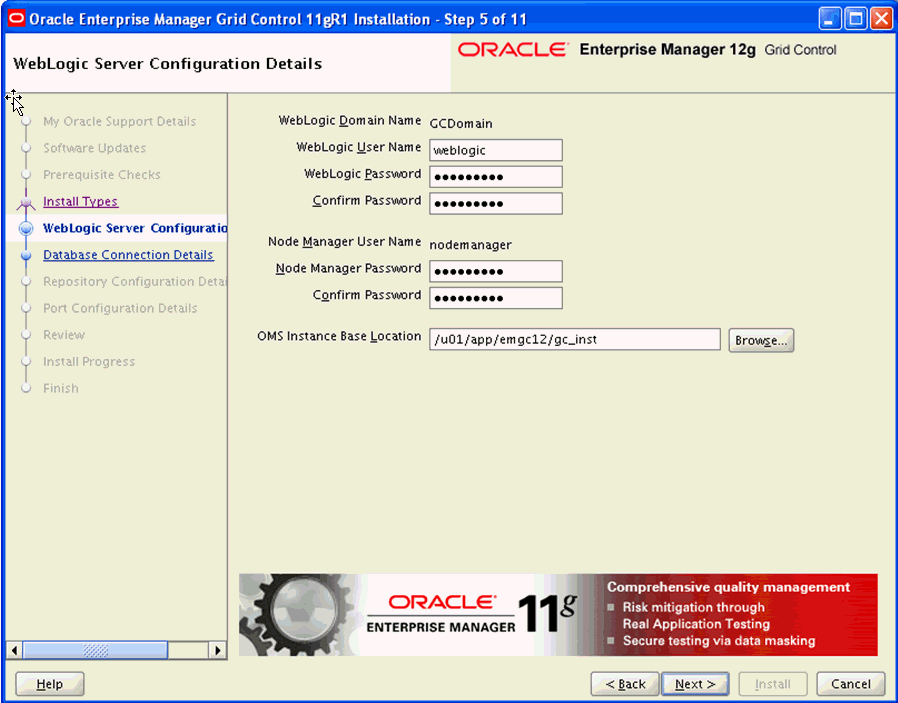
On WebLogic Server Configuration Details, complete these fields:
-
WebLogic User Name
Enter a name for your WebLogic Server. For example:
weblogic
Enter and confirm a password for the WebLogic User.
-
Node Manager User Name
This value is populated by default from the existing Node Manager installation. You must enter and confirm a password.
-
OMS Base Installation
By default this value is populated with the Middleware Home Location path you entered on the previous screen. You should append the path with a directory name for the OMS Base Installation. For example, where
gc_instis the appended value:/u01/app/emgc12/gc_inst
-
-
Click the Next button.
-
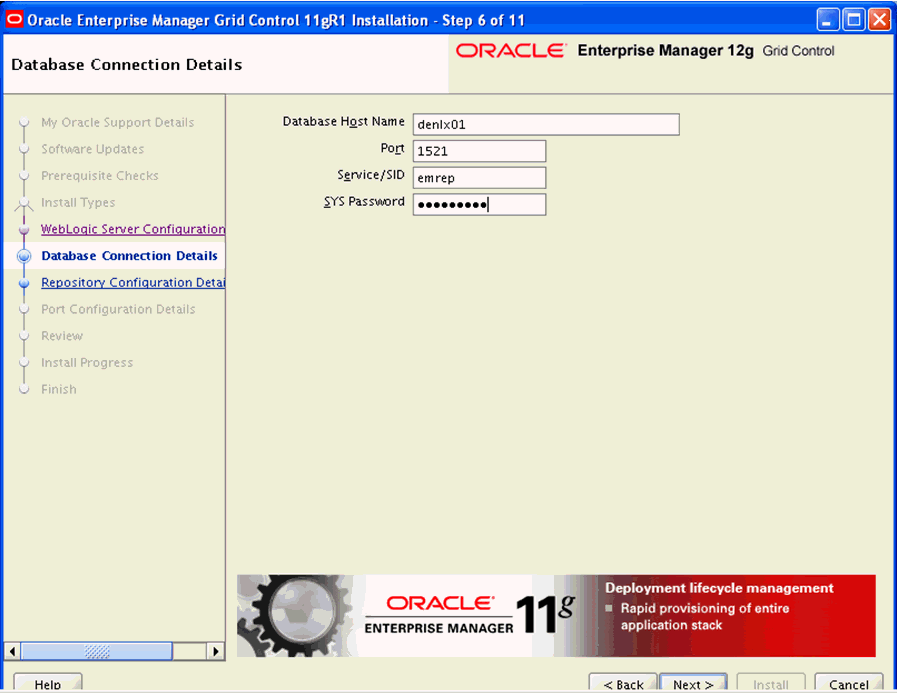
On Database Connection Details, complete these fields:
Note:
These values can be derived from the tnsnames.ora file for the Oracle database for the Management Repository.-
Database Host Name
Enter the name of the machine on which your Oracle database for the Management Repository. For example:
denlx01
-
Port
Enter the port on which the Oracle database for the Management Repository is listening. For example:
1521
-
Service/SID
Enter the Service/SID for the Oracle database for the Management Repository. For example:
emrep
-
SYS Password
Enter the SYS user password for the Oracle database for the Management Repository.
-
-
Click the Next button.
-
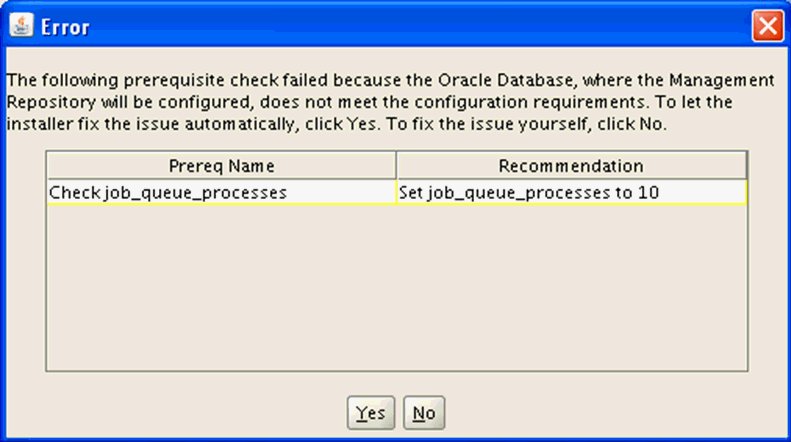
You may receive the above Error dialog indicating that a prerequisite check failed because the Oracle database, where the Management Repository will be configured, does not meet the configuration requirements.
To let the installer fix the issue automatically, click the Yes button. To fix the issue yourself, click the No button.
-
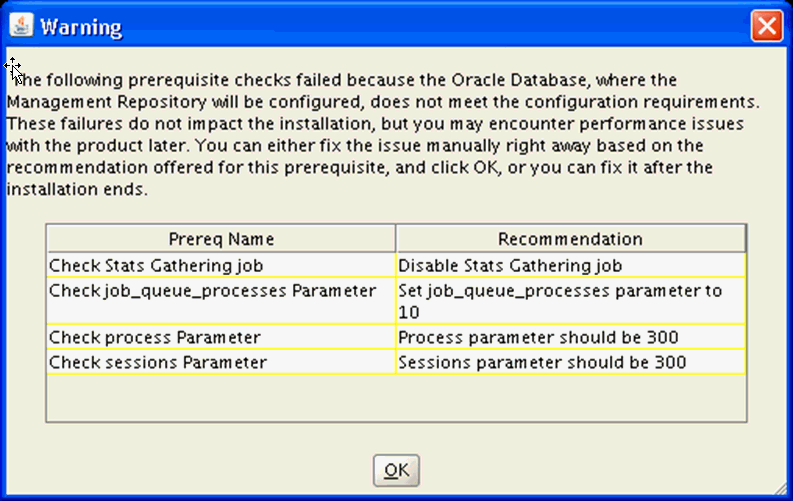
You may receive the above Warning dialog indicating that prequisite checks failed because receive the above Error dialog indicating that a prerequisite check failed because the Oracle database, where the Management Repository will be configured, does not meet the configuration requirements.
These failures do not impact the installation, but you may encounter performance issues with the product later.
You can either fix the issue manually right away based on the recommended offered for this prerequisite, and click the OK button, or you can fix it after the installation ends.
-
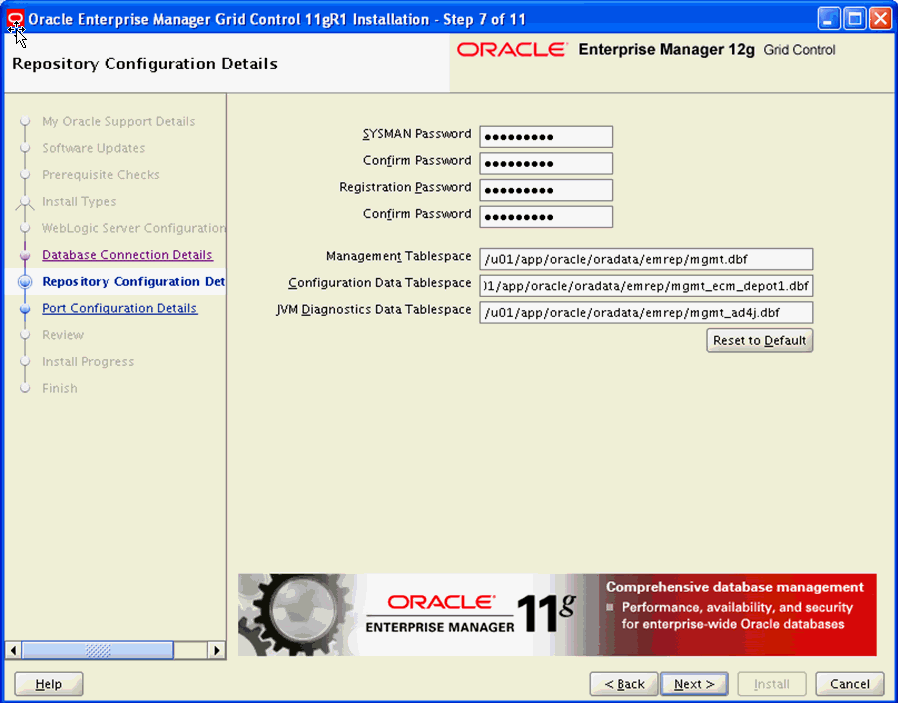
On Repository Configuration Details, complete these fields:
-
SYSMAN Password
Enter and confirm a password for the EMCC system manager.
-
Registration Password
Enter and confirm a password for the EMCC registration.
-
Management Tablespace
Enter the path to the Management Tablespace. This can be derived from the
tnsnames.orafile for the Oracle database for the Management Repository. For example:/u01/app/oracle/oradata/emrep/mgmt.dbf -
Configuration Data Tablespace
Enter the path to the Configuration Data Tablespace. This can be derived from the
tnsnames.orafile for the Oracle database for the Management Repository. For example:/u01/app/oracle/oradata/emrep/mgmt_ecm_depot1.dbf -
JVM Diagnostics Data Tablespace
Enter the path to the JVM Diagnostics Data Tablespace. This can be derived from the
tnsnames.orafile for the Oracle database for the Management Repository. For example:/u01/app/oracle/oradata/emrep/mgmt_ad4j.dbf
-
-
Click the Next button.
-
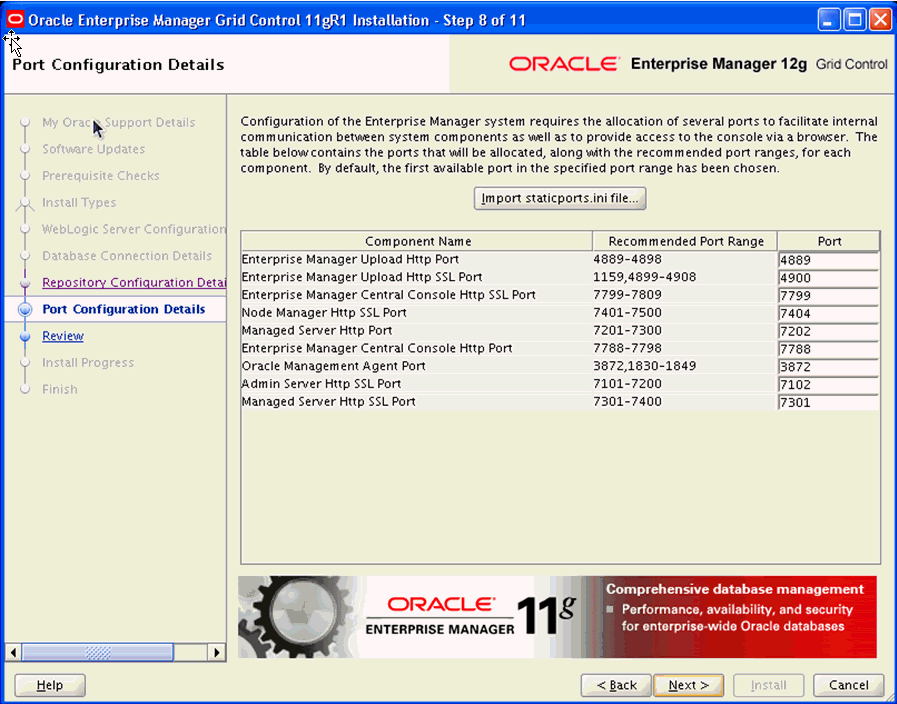
On Port Configuration Details, review the default port assignments.
Note:
Configuration of the Enterprise Manager system requires the allocation of several ports to facilitate internal communication between system components as well as to provide access to the console via a browser. The table on this screen contains the ports that will be allocated, along with the recommend port ranges, for each component.By default, the first available port in the specified port range has been chosen.
Alternatively, you can click the Import staticports.ini file button.
-
Click the Next button.
-
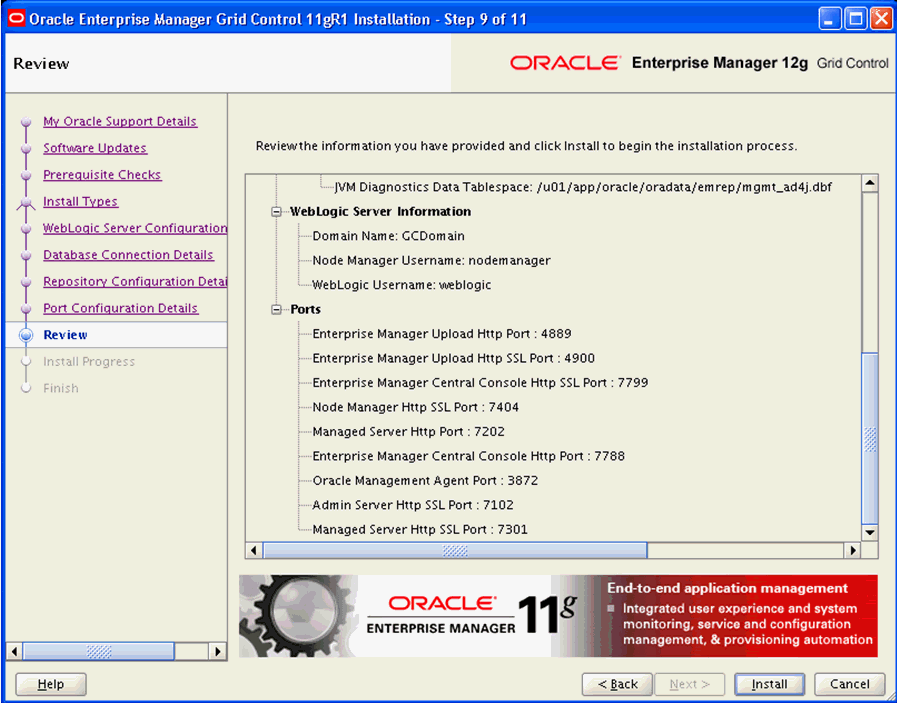
On Review, review the information you have provided.
-
Click the Install button to begin the installation process.
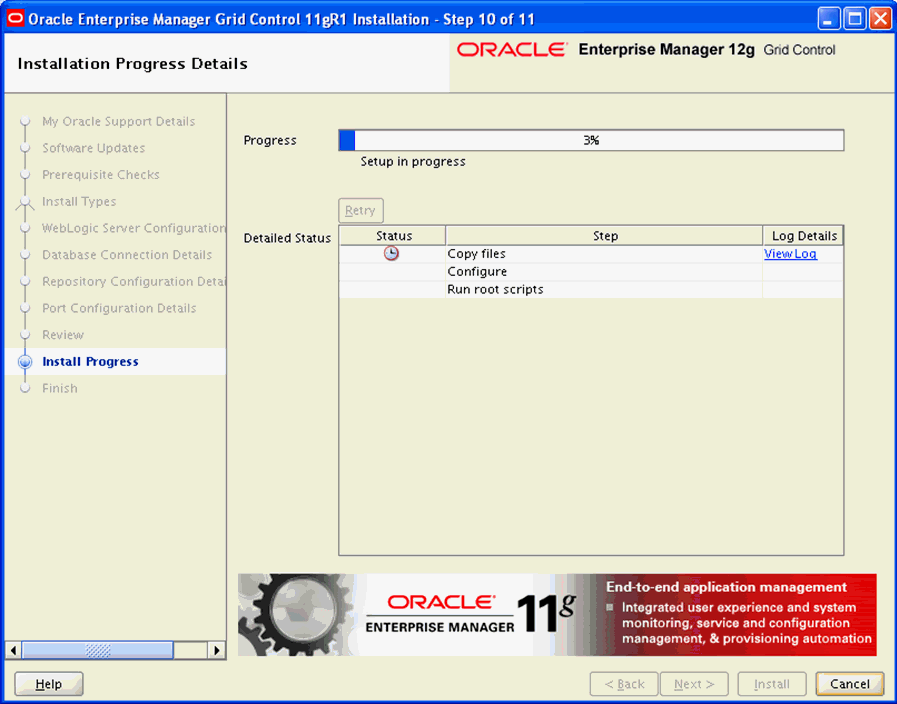
The installer displays the Installation Progress Details screen that shows detailed status.
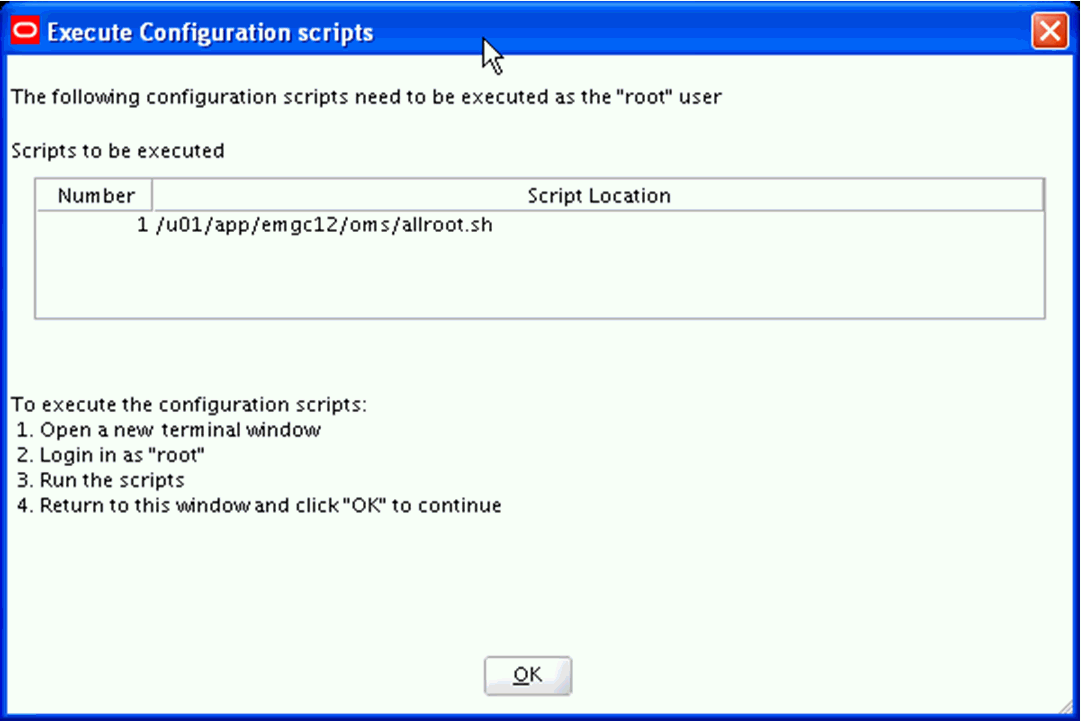
On the Xterm window for Execute Configuration scripts, you must execute the configuration scripts as the "root" user. To execute the configuration scripts:
-
Open a terminal window.
-
Log in as "root".
-
Run the script and verify that it ran successfuly.
-
Return to this window.
-
-
On Execute Configuration Scripts, after you have executed the script as described in the preceding step, click the OK button to continue.
-
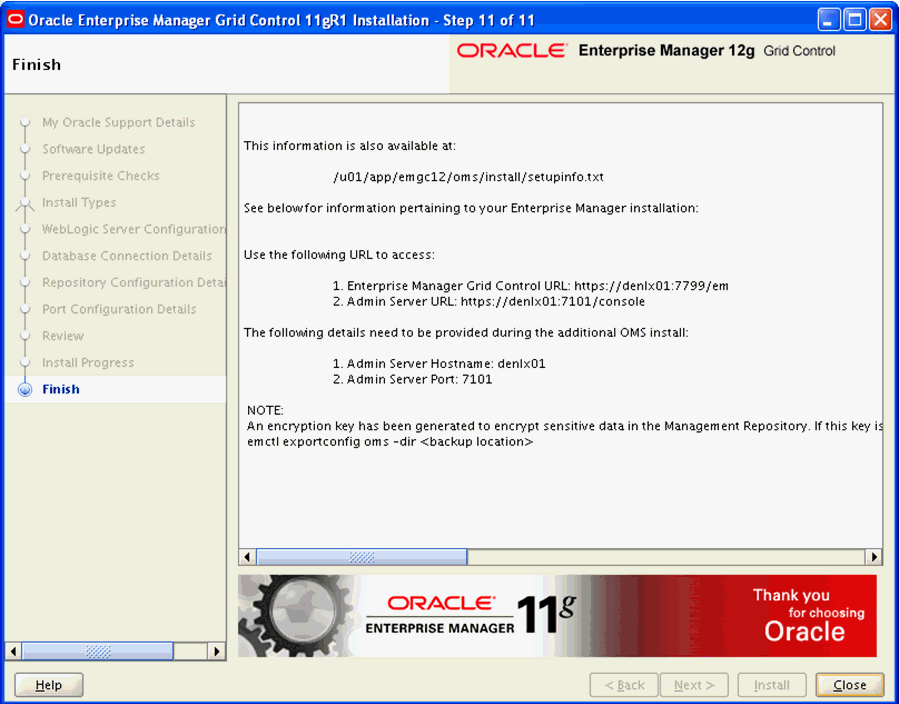
On Finish, verify the installation has completed with no errors. Click the Close button to exit the installer.
Note:
Thesetupinfo.txtfile contains information about the setup. This screen indicates the location of the file. For example:/u01/app/emgc12/oms/install/setupinfo.txtThis screen also displays the URL you can use to access EMCC and the Admin server. Also listed are the details that need to be provided during the subsequent OMS install:
-
Admin Server Hostname
For example:
denlx01
-
Admin Server Port
For example:
7101
The screen also states the encryption key has been generated to encrypt snesitive data in the Management Repository. You can determine this key by issuing this command as the root user:
emctl exportconfg oms -dir <backup location> -