Release 12.1
Part Number E13670-05
Contents
Previous
Next
| Oracle Enterprise Asset Management User's Guide Release 12.1 Part Number E13670-05 | Contents | Previous | Next |
This chapter covers the following topics:
You can integrate Oracle Enterprise Asset Management with ESRI to view assets and work spatially on an ESRI map viewer. You can also perform various actions on the assets.
Important: You must purchase a license from ESRI to use this feature.
By using the ESRI map viewer, you can:
Search and locate geocoded assets on a map.
Locate work orders associated with assets on a map.
Perform actions on work orders located on a map.
Important: Mozilla Firefox is the recommended browser to use with the ESRI integration feature.
Prerequisites
Purchase a license from ESRI for online or server access.
Set up the ESRI profiles using the System Administrator responsibility.
Enter the geocode information for assets.
You can add the geocode information using one of the following options:
Mass Geocode Entry page (Maintenance Super User > Assets > Mass Geocode Entry)
Define Asset Numbers page (Enterprise Asset Management > Asset Numbers > Asset Numbers > Define Asset Number)
Mass Geocode Import API
Related Topics
See Entering Geocodes for EAM Assets
For more information regarding adding geocode information using the EAM responsibility, see Entering and Viewing Geocode Information Using the EAM Responsibility.
For more information regarding the Mass Geocode Entry API, see Import Geocode API, eAM Open Interfaces and APIs, Oracle Enterprise Asset Management Implementation Guide.
Perform the following steps to setup the ESRI profile. You must perform this step in order to use the ESRI map viewer.
Important: You must purchase a license to use the online or server version of the ESRI map viewer to use this feature.
Important: Mozilla Firefox is the recommended browser to use with the ESRI integration feature.
To set up the ESRI profile value
Navigate to the System Administrator responsibility, and access the Find System Profile Values page (System Administrator > System Profiles Values > Find System Profile Values).
Perform a query to search for <CSI%MAP%.
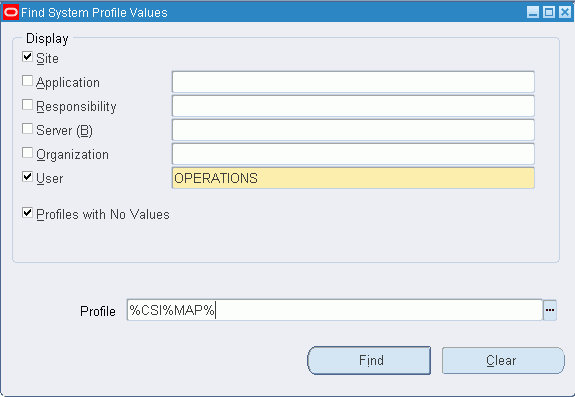
Select the CSI:Mapviewer Name profile option name.
The System Profile Values page appears.
Select the ESRI value in the User column.
By default the profile is updatable only at the seed level. You can use the Application Developer responsibility to set the profile as updatable at the User and Responsibility levels.
Click the Save button.
Setting up the ESRI service
You will need to set up:
CSI: ESRI Default Service profile option. See Oracle Install Base System Profile Options and Debug Information, Oracle Install Base Implementation Guide.
The ESRI function name.
Follow these steps to specify the ESRI default service.
Selecting the CSI: ESRI Default Service
After you have set up the CSI: ESRI Default Service profile option, you must associate the profile to your site, responsibility or user.
Navigate to the System Administrator responsibility, and access the Find System Profile Values page (System Administrator > System Profiles Values > Find System Profile Values).
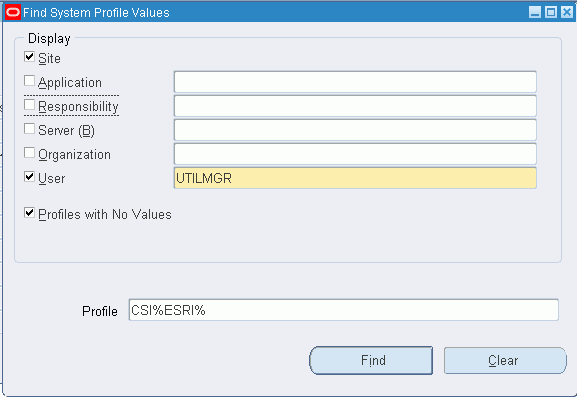
Perform a query for CSI%ESRI%.
The System Profile Values page appears.
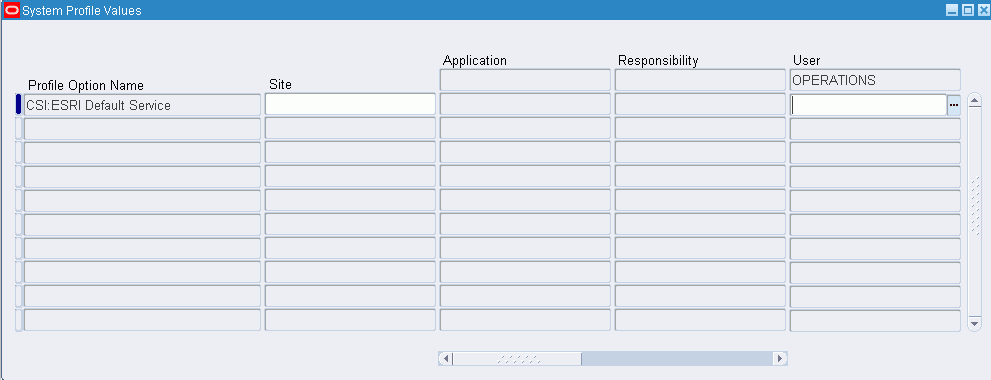
Select STREET MAP in the User column. This is the seeded service delivered with the application.
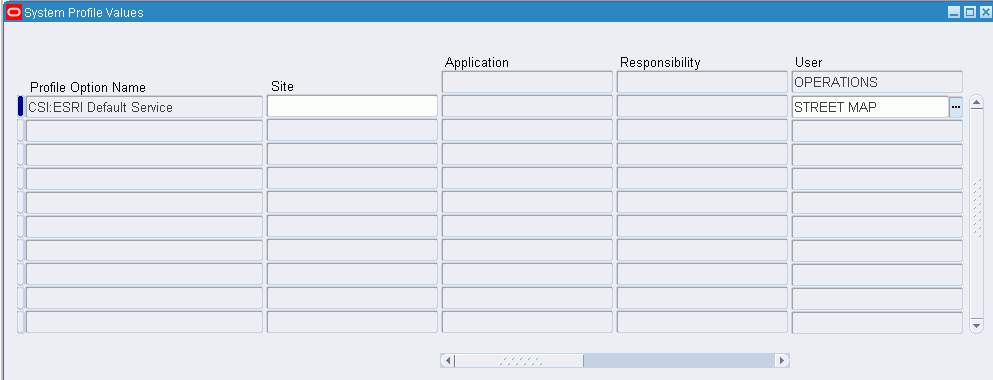
Save your work.
Follow these steps to define the ESRI functions.
Defining the ESRI Function Information
Use the FND functions to register the different services offered by ESRI with Oracle EAM and Oracle Asset Tracking.
Navigate to the System Administrator responsibility, and access the Find Functions page (System Administrator > Application > Function).
The Form Functions page appears.
Enter a Function Name and User Function Name, such as CSI_ESRI_URL_1.
Add a Description for the function.
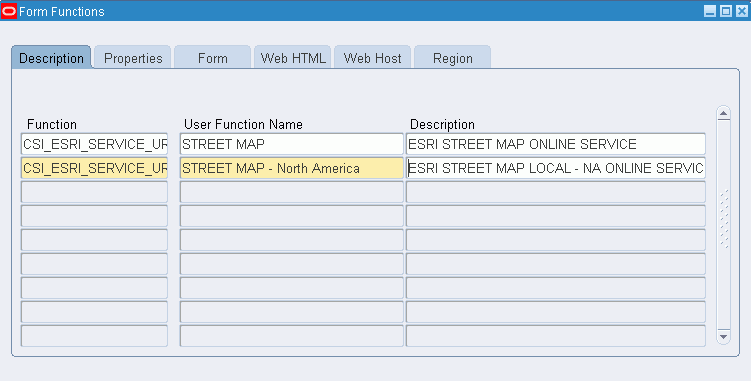
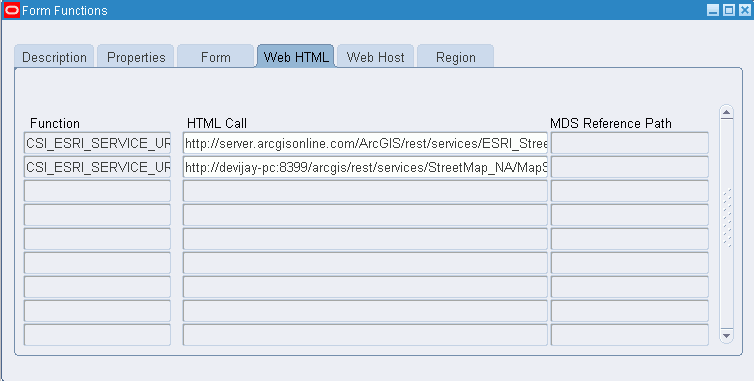
Click the Web HTML tab, and enter the ESRI service URL in the HTML Call field.
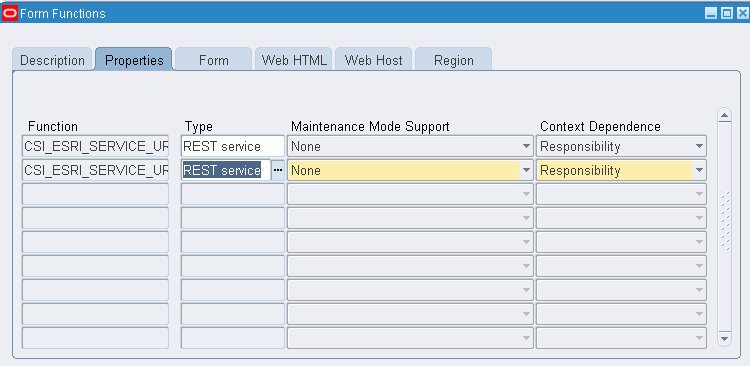
Click the Properties tab, and define the function as 'Rest Service.'
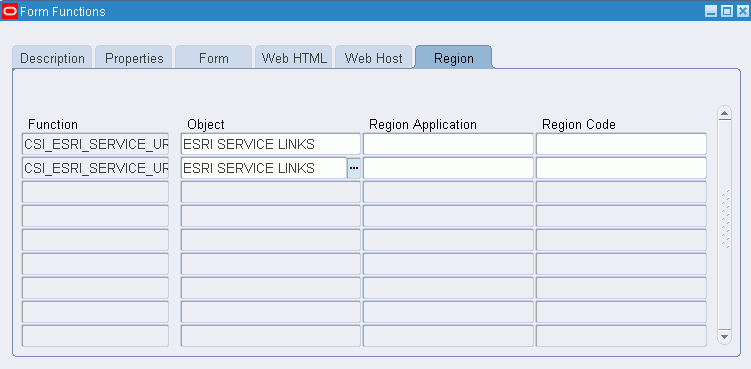
Click the Region tab, and associate the function to the object, ESRI Service Links.
Save your work.
You can enter geocodes for EAM assets by using:
Mass Geocode Entry page (Maintenance Super User > Home >Assets).
Define Asset Numbers page (Enterprise Asset Management > Asset Numbers > Asset Numbers > Define Asset Number).
See Entering and Viewing Geocode Information Using the EAM Responsibility..
Mass Geocode Import API
See Import Geocode API, eAM Open Interfaces and APIs, Oracle Enterprise Asset Management Implementation Guide
Use the Asset Numbers page to locate and map assets using the ESRI map viewer.
To locate and map assets using the ESRI map viewer
Navigate to the Maintenance Super User - Home page.
Select an organization, and then click the Go button.
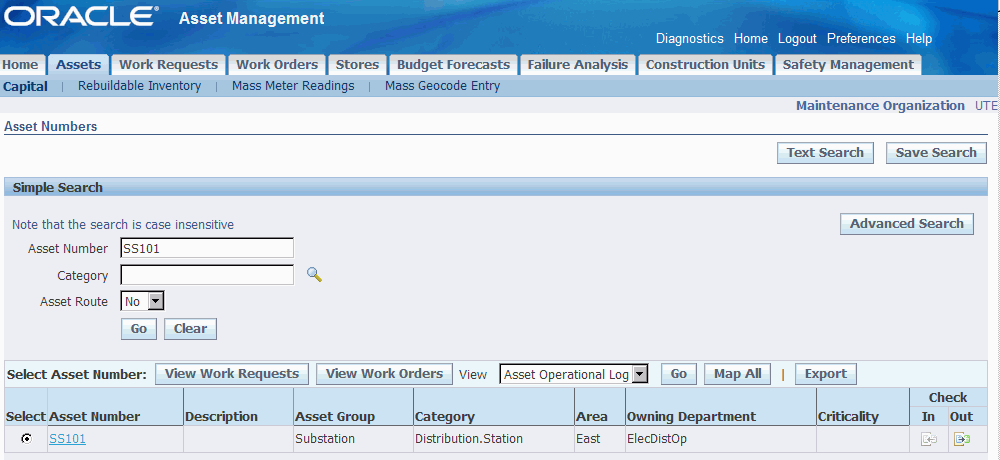
Click the Assets tab, and then click the Capital link.
The Asset Numbers page appears.
Search for assets that have geocoded location information.
Click the Map All button.
A map is rendered with all the assets that met your search criteria. Assets appear as blue colored icons.
Double-click near an asset to zoom in.
Click an asset icon to view additional information.
You can view additional asset information by clicking the asset number link.

Click the vertical scroll bar to access additional pages to perform actions such as:
Create Work Order
View Open Work Orders
Create Work Request
View Open Work Requests
Graphical Hierarchy
You can view and transact work when using the ESRI map viewer.
Important: The assets associated with the work orders must have geocoded information in order to map the locations of the work orders using the ESRI map viewer.
You can perform the following tasks on work orders using the ESRI map viewer:
View asset details.
View work details.
Update work orders
Debrief work orders.
Assign employees based on operations.
To view and transact work using the ESRI map viewer
Navigate to the Work Orders page (Maintenance Super User > Home> Work Orders).
Select the appropriate organization, and then click the Go button.
Search for work orders that you want to display using an ESRI map viewer.
The Work Orders - All page appears.
Click the Map All button.
All the work orders associated with geocoded assets are rendered on a map.
Click a work order icon to view additional information.
Work orders displayed on the map are displayed in a table form below the map. You can view additional work order information by clicking the work order link.
Click the vertical scroll bar and select the Assign Employee link for an operation.
The Assign Employee page appears.
Select an employee to assign to the operation.
Click the Assign Enabled check box.
Save your work.
A confirmation message appears that indicates that the employee has been successfully assigned to the work order.
You can also update and debrief work orders, and view asset and work order details.
![]()
Copyright © 2010, Oracle and/or its affiliates. All rights reserved.