Administering Counters
This chapter covers the following topics:
- Introduction
- Setting the Time Based Counters Engine
- Setting Profile Options
- Using the Counter Readings Open Interface
Introduction
This chapter consists of the following topics:
Setting the Time Based Counters Engine
You must set the Time Based Counters Engine concurrent program to run periodically to advance and update all active time-based counters and to expire those counters that have passed their effective end dates.
Setting Profile Options
The following are profile options associated with counters:
CS: Counter Webview Allowed? has a value of Yes or No. Set the option to Yes if you wish to enable counter views from Oracle iSupport.
CTR: Inactive Item Statuses can be populated with an item status selected from the profile list of values. Inventory items with this status are excluded from the list of items available for association to a counter group or a counter template.
CSI: Counters Enabled - If set to "Y", this enables counters to be instantiated after creating the associated item instance.
CTR: Display reading valid flag in HTML - If set to "Y", the reading valid flag column will be displayed in Oracle Install Base HTML pages.
Using the Counter Readings Open Interface
Through the Counter Readings Open Interface program, you have the ability to import significant volumes of data into counter readings and counter property readings tables. The data may be from multiple source including external legacy systems.
For general information about the Open Interface, see Using the Open Interface Program.
The complete process is as follows:
-
Load data into the counter readings and counter property readings interface tables.
For column details, see The Open Interface Tables appendix.
-
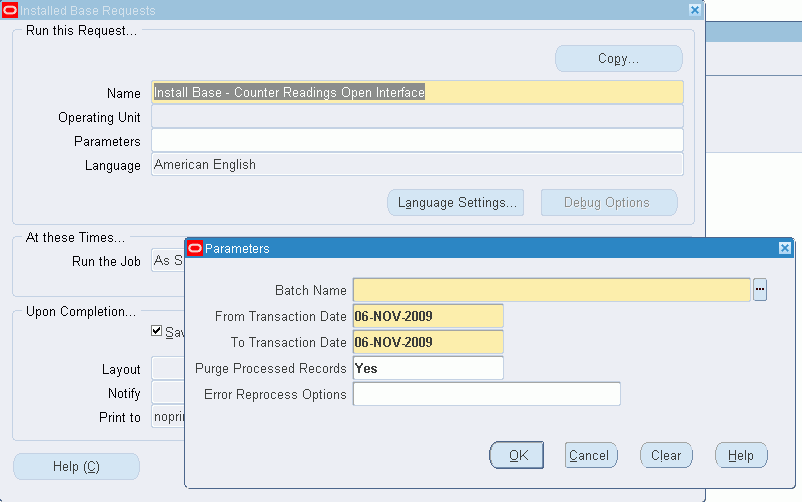
Run the Install Base - Counter Readings Open Interface concurrent program that reads, validates, and posts the data from the interface tables into the counter readings and counter property readings tables in Oracle Install Base.

-
If you want the processed records to be cleared from the interface tables after processing, select Yes for Purge Processed Records.
-
If errors occur during the running of the program, the failed records will be loaded into the Open Interface error table, where you will be able to reprocess them.
The Error Reprocess Options field controls the selection of records to reprocess in the Counter Readings Open Interface Error Details page - a later step in this process.
If you select All, then all the records in the error details page will be reprocessed automatically, without the need to select any.
If you select Selected, or leave the field blank, you will have to explicitly select the records to reprocess in the error details page.
-
After you run the program, failed records go to the Open Interface error table.
-
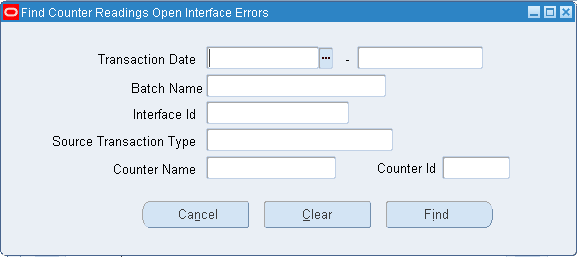
To review and edit failed records, select the Open Interface Error Details from the Oracle Install Base Admin menu options.

-
Select values to filter the error rows, and click Find.
The Counter Readings Open Interface Error Details page displays the error records in the interface tables.
-
Select a row in the Readings area to see associated records in the Property Readings area.
-
In this page, scroll across to see all the fields, and edit the records that you want to change.
-
If the program that produced these errors was run with the Error Reprocess Options not set to All, click the Process Flag for all the records that you want to reprocess.
-
Click the Save icon in the Counter Readings Open Interface Error Details page.
The rows selected, either automatically or explicitly, are reprocessed.