| Oracle® Argus Insight Cognos Installation Guide, Release 6.0 E18251-01 |
|
 Previous |
 Next |
This chapter provides information for configuring the Argus Insight application and the Argus Insight scheduling service.
Use the following procedure to configure the Argus Insight profile switches. For more information about setting common profiles switches, see the CMN_PROFILE Guide (CMN_PROFILE.pdf).
Log on with administrative rights to a workstation from where you can access the Argus Insight application.
Start Internet Explorer.
In the Address bar, type the URL http://<Argus Insight Web Server Name> :< port number>/default.asp and press Enter.
When the system opens the Argus Insight login screen:
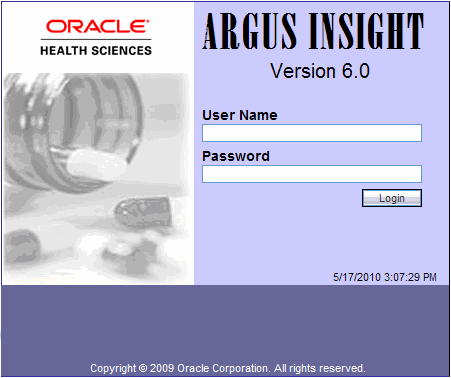
Type administrator in the User Name field.
Type password in the Password field.
Click Login.
|
Note: If you have logged-in to the system for the first time, it is recommended that you change your login credentials. For account security reasons, ensure that you change your password after logging in for the first time. |
When the system opens the following window, click the Tools tab in the upper-right corner of the main to open the Administration Tools page.

Click the List Maintenance tab. When the system opens the List Maintenance tab:
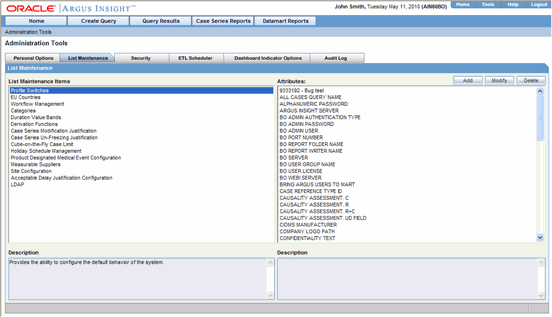
Select Profile Switches from the List Maintenance Items list.
Select COMPANY LOGO PATH from the Attributes list.
Click Modify.
When the system opens the following dialog box:
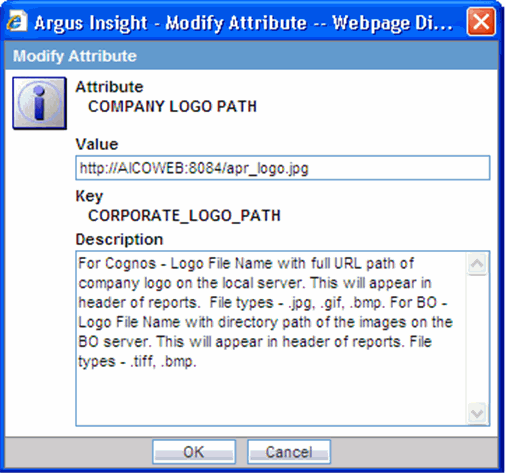
Enter http://argusinsightwebserver:8084/apr_logo.jpg in the Value field. This is the company logo path name.
Click OK to save the modification and return to the List Maintenance tab.
Select COGNOS CUBE SERVER from the Attributes list on the List Maintenance tab. Click Modify.
When the system opens the following dialog box:
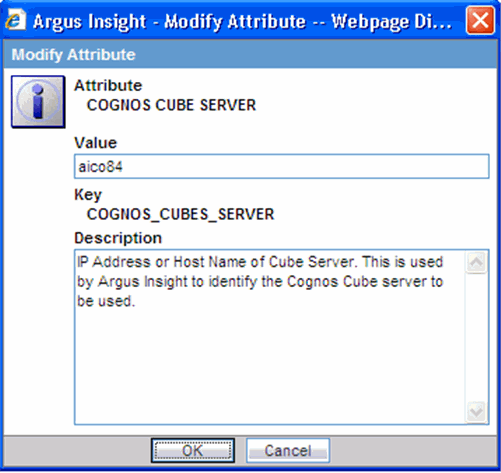
Type the Cognos 8/Cognos Cube Server name in the Value field.
Click OK to save the modification and return to the List Maintenance tab.
|
Note: Enter Cognos 8 Server name if you are using Cognos 8 Transformer.Enter Cognos Cube Server name if you are using Cognos Series 7.4 softwares. |
Select Cognos Cube Version from the Attributes list on the List Maintenance tab. Click Modify.
When the system opens the following dialog box:
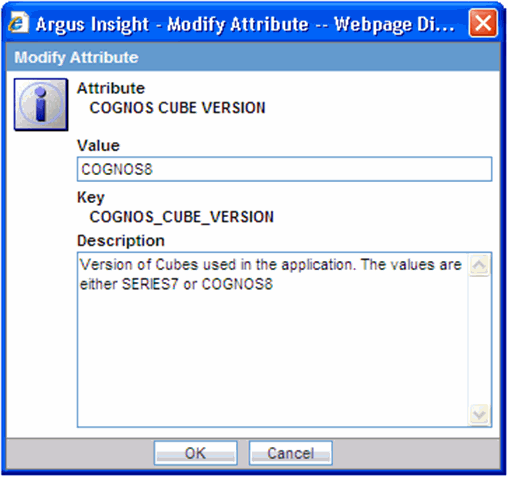
Depending on the Cube version, enter COGNOS8 or SERIES7 in the Values field
Click OK.
Select COGNOS SERVER from the Attributes list on the List Maintenance tab. Click Modify.
When the system opens the following dialog box:
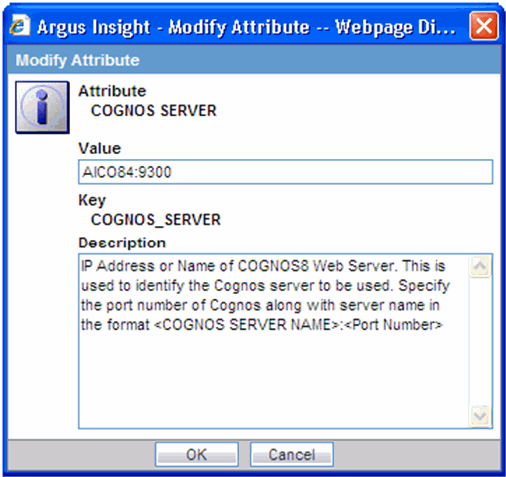
Enter the Cognos 8 server name and Port number in the Value field in the following format: ServerName:PortNumber.
Click OK to save the modification and return to the List Maintenance tab.
|
Note: Value of Cognos server will be like Cognos 8 Server:Cognos 8 Port number (srv001:9300). 9300 is the default port for Cognos 8 application. |
Select COGNOS CUBE Password from the Attributes list on the List Maintenance tab. Click Modify.
When the system opens the following dialog box:
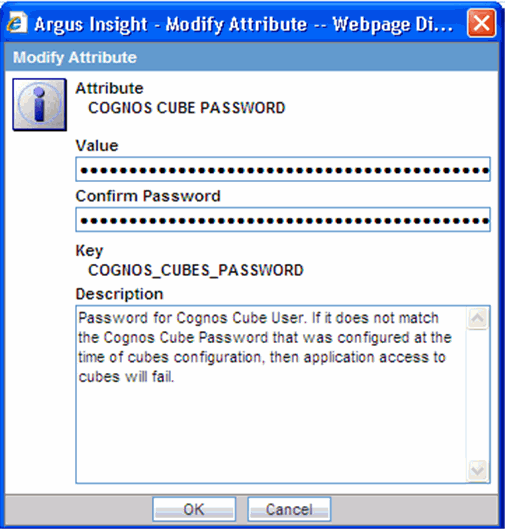
Enter the Cognos Cube password in the Value field. This is the password you specify in Access Manager Administration.
For verification, re-enter the password in the Confirm Password field.
Click OK to save the modification and return to the List Maintenance tab.
|
Note: The values listed in the preceding configuration apply only if you are using Series 7 software for Cubes. |
Select COGNOS CUBE USER from the Attributes List on the List Maintenance tab. Click Modify.
When the system opens the following dialog box:
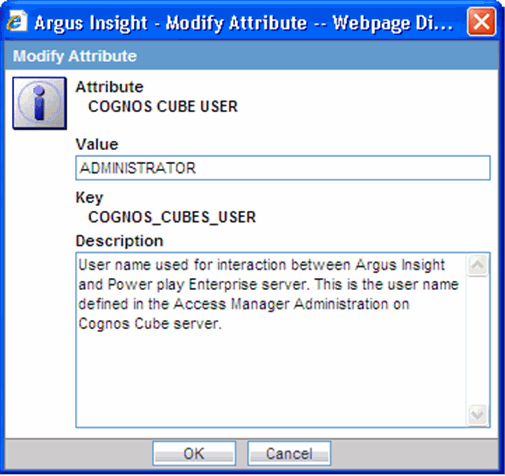
Enter the name of Cognos Cube User. The default is administrator.
Click OK to save the modification and return to the List Maintenance tab.
Select ARGUS INSIGHT SERVER from the Attributes List on the List Maintenance tab. Click Modify.
When the system opens the following dialog box:
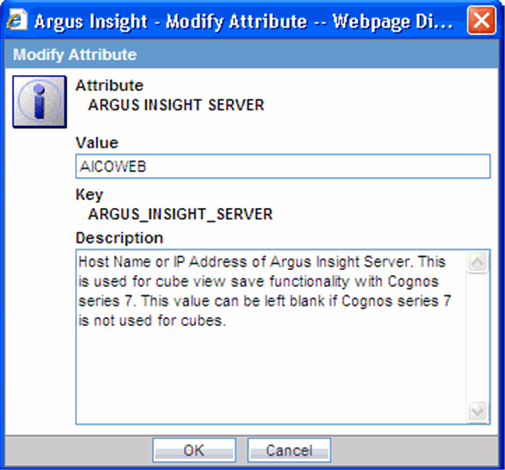
Enter the name of Argus Insight Server in the Values field.
Click OK to save the modification and return to the List Maintenance tab.
Select POPULATE CUBES FACT DATA from the Attributes List on the List Maintenance tab. Click Modify.
When the system opens the following dialog box:
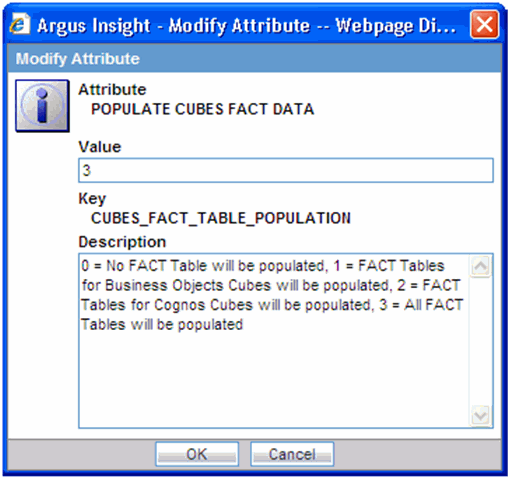
Enter the value as “1” or “3” in the Value field.
Click OK to save the modification and return to the List Maintenance tab.
|
Note: For Argus Insight with BOXI, set this value to 1.For Argus Insight with Cognos, set this value to 2. For populating all tables of cubes, set this value to 3. |
Select POPULATE AFFILIATE DATA from the Attributes List on the List Maintenance tab. Click Modify.
When the system opens the following dialog box:
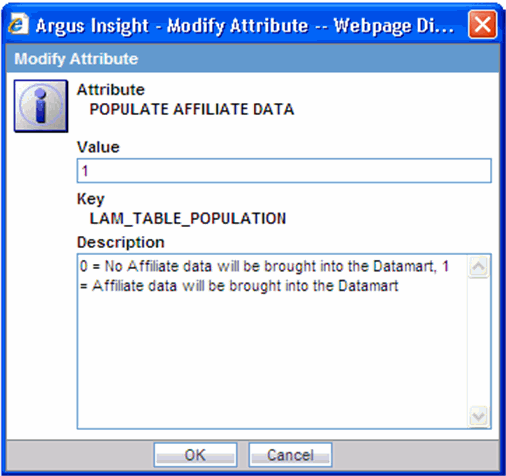
Enter the value of the Affiliate data in the Value field.
Click OK to save the modification and return to the List Maintenance tab.
Select POPULATE DLL SLL REPORTS TABLE DATA from the Attributes List on the List Maintenance tab. Click Modify.
When the system opens the following dialog box:
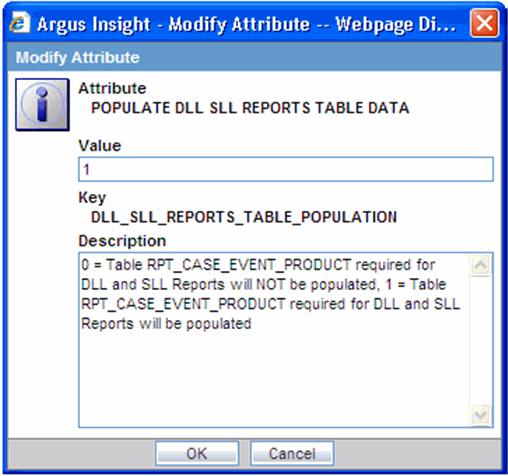
Enter the value of the DLL SLL Reports Table Data in the Value field.
Click OK to save the modification and return to the List Maintenance tab.
Select POPULATE INTERCHANGE DATA from the Attributes List on the List Maintenance tab. Click Modify.
When the system opens the following dialog box:
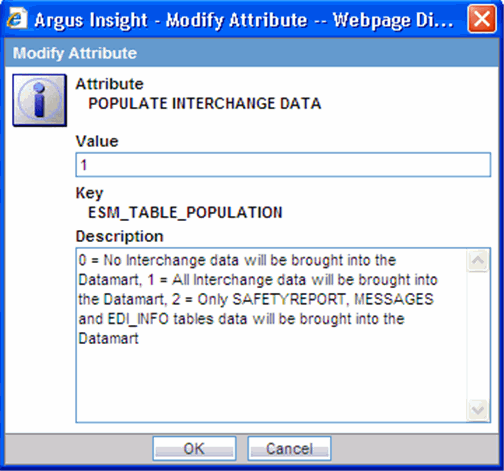
Enter the value of the Interchange Data in the Value field.
Click OK to save the modification and return to the List Maintenance tab.
Select POPULATE WHO DRUG C DATA from the Attributes List on the List Maintenance tab. Click Modify.
When the system opens the following dialog box:
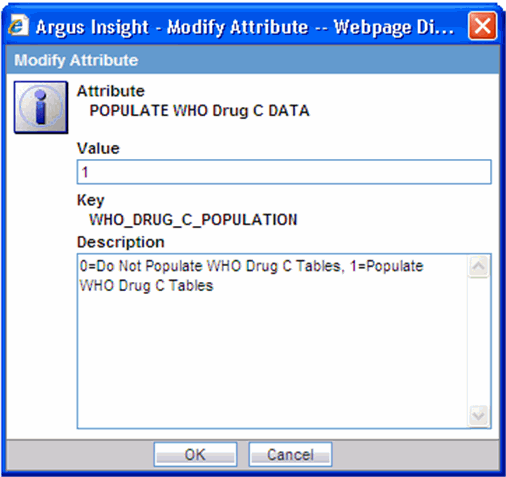
Enter the value of the Populate WHO Drug C Data in the Value field. If you want to populate the WHO Drug C tables, enter 1; otherwise, enter a 0.
Click OK to save the modification and return to the List Maintenance tab.
Select WHO DRUG BROWSER FORMAT from the Attributes List on the List Maintenance tab. Click Modify.
When the system opens the following dialog box:
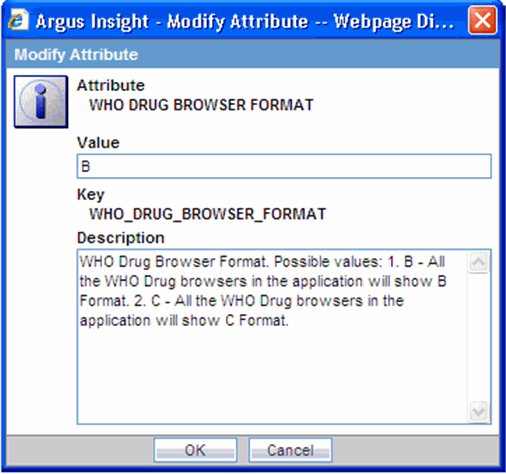
Enter the value of the WHO Drug Browser Format in the Value field. This entry will be used to open the WHO Drug B/C Format, as configured in the following dialog box.
Click OK to save the modification and return to the List Maintenance tab.
Select ETL EMAIL SETUP from the Attributes List on the List Maintenance tab. Click Modify.
When the system opens the following dialog box:
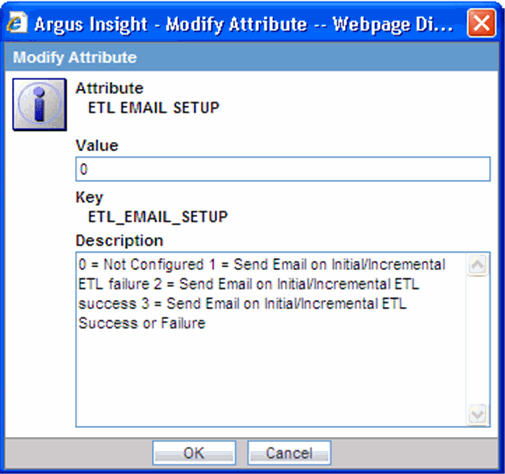
Enter the value for the ETL Email Setup in the Value field.
Click OK to save the modification and return to the List Maintenance tab.
Select ETL EMAIL SENDER ADDRESS from the Attributes List on the List Maintenance tab. Click Modify.
When the system opens the following dialog box:
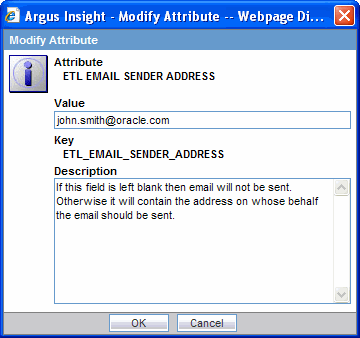
Enter the email address of the person sending ETL status email messages in the Value field.
Click OK to save the modification and return to the List Maintenance tab.
Select ETL EMAIL RECEIVER ADDRESS from the Attributes List on the List Maintenance tab. Click Modify.
When the system opens the following dialog box:
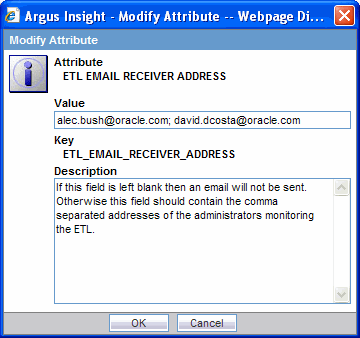
Enter the email address of the person receiving ETL status email messages in the Value field.
Click OK to save the modification and return to the List Maintenance tab.
Select Populate Perceptive Data from List Maintenance tab to populate the Perceptive data.
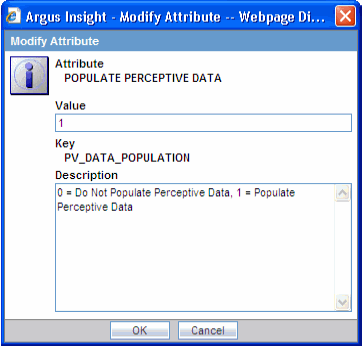
Enter the Perceptive data population switch value in the Value field.
Click OK to save the modification and return to the List Maintenance tab.
Populate Optional Table switches used for different Argus Insight Reports
Set the following switches to “1” only if you are using the corresponding reports as mentioned with the switch name.
POPULATE RPT_REG_REPORTS COLUMNS:
0 = Extra columns of table RPT_REG_REPORTS will NOT be populated, 1 = Extra columns of table RPT_REG_REPORTS will be populated (These columns are used in Business Objects version, Compliance category report "Regulatory Submission and Distribution Compliance")
POPULATE NARRATIVE LANGUAGES TABLE:
0 = Tables RPT_CNL_MLINGUAL and RPT_CNL_ENGLISH will NOT be populated, 1 = Tables RPT_CNL_MLINGUAL and RPT_CNL_ENGLISH will be populated. These tables are used by General Category Reports 'Case Narrative Listing - Multilingual" and "Case Narrative Listing - English".
POPULATE DATA QUALITY INDICATOR:
0= Table DATA_QUALITY_INDICATOR required for Data Quality Indicator report will NOT be populated, 1 = Table DATA_QUALITY_INDICATOR required for “Data Quality Indicator report” will be populated.
Note: Ensure that you run the initial ETL after updating any of the ETL Population switches. The only exception to this is the Populate WHO Drug C Data switch, for which you need not run the initial ETL.
Select LOGO IMAGE from Attributes List on the List Maintenance tab to configure the logo for Argus Reports.
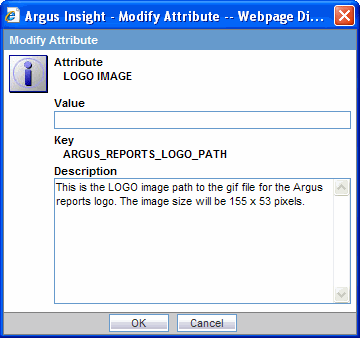
Enter the logo image path from Insight Web Server in the Value field. For example, enter the Value as C:\apr_logo.gif. Ensure that the size of this file is 155x53 pixels.
Click OK to save the modification and return to the List Maintenance tab.
|
Note: The following profile switch configuration steps need to be performed only by customers who are using the validation package supplied by Oracle. |
Select DAYS TO LOCK from the Attributes List on the List Maintenance tab. Click Modify.
When the system opens the following dialog box:
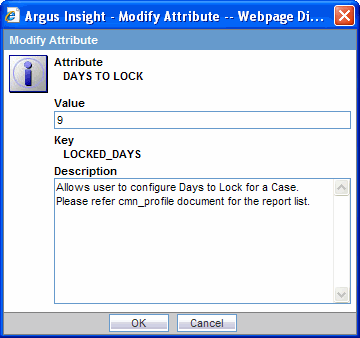
Enter an appropriate value in the Value field.
Click OK to save the modification and return to the List Maintenance tab.
Select FOLLOW-UP ACTION CODE from the Attributes List on the List Maintenance tab. Click Modify.
When the system opens the following dialog box:
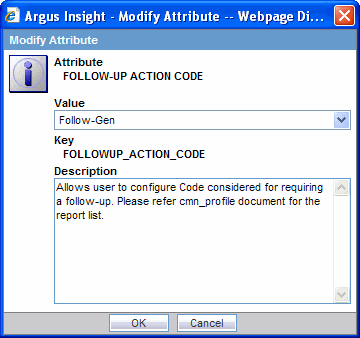
Enter the Follow-up Action Code in the Value field.
Click OK to save the modification and return to the List Maintenance tab.
Select FOLLOW GEN from the Attributes List on the List Maintenance tab. Click Modify.
When the system opens the dialog box:
Select Follow-Gen from the list box.
Click OK to save the modification and return to the List Maintenance tab.
Use the following procedure to configure workflow management for the Argus Insight application. Workflow is company-specific and your company may not use all the Workflow states.
Select Workflow Management from the List Maintenance Items list.
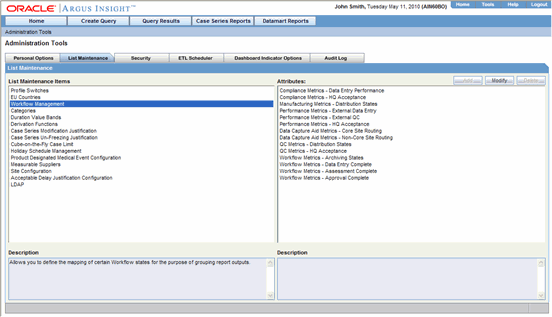
Select Archiving States from the Attributes list. Click Modify.
When the system opens the following dialog box:
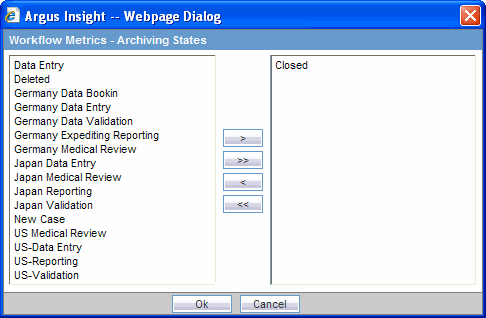
Select Germany Expediting Reporting, US-Reporting and Japan Reporting from the list on the left.
Click > to add them as Archiving States.
Click OK to save the modification and return to the List Maintenance tab.
Select Data Entry Complete from the Attributes list on the List Maintenance tab. Click Modify.
When the system opens the following dialog box:
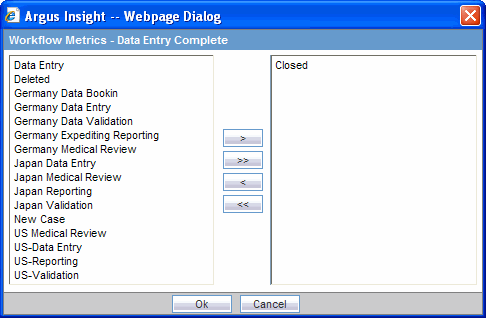
Select Germany Data Validation, US-Validation, and Japan Validation from the list on the left.
Click > to add them as Data Entry Complete.
Click OK to save the modification and return to the List Maintenance tab.
Remove the Closed item from the list on the right by selecting Closed and clicking <.
Click OK to save the modification and return to the List Maintenance page.
Select Assessment Complete from the Attributes list on the List Maintenance tab. Click Modify.
When the system opens the following dialog box:

Select Germany Medical Review, US Medical Review, and Japan Medical Review from the list on the left.
Click > to add them as Assessment Complete.
Click OK to save the modification and return to the List Maintenance tab.
Remove the Closed item from the list on the right by selecting Closed and clicking <.
Click OK to save the modification and return to the List Maintenance page.
Select Approval Complete from the Attributes list on the List Maintenance tab. Click Modify.
When the system opens the following dialog box:
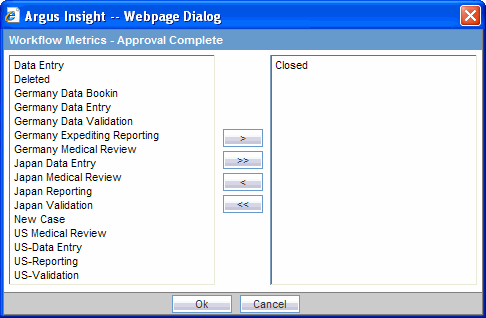
Select Germany Medical Review, US Medical Review, and Japan Medical Review from the list on the left.
Click > to add them as Approval Complete.
Click OK to save the modification and return to the List Maintenance tab.
Remove the Closed item from the list on the right by selecting Closed and clicking <.
Click OK to save the modification and return to the List Maintenance page.
Click the Logout icon in the upper-left corner of the page to exit Argus Insight.
Use the following procedure to configure the product datasheet.
Login to Argus Insight.
Go to Admin Tools -> List Maintenance tab.
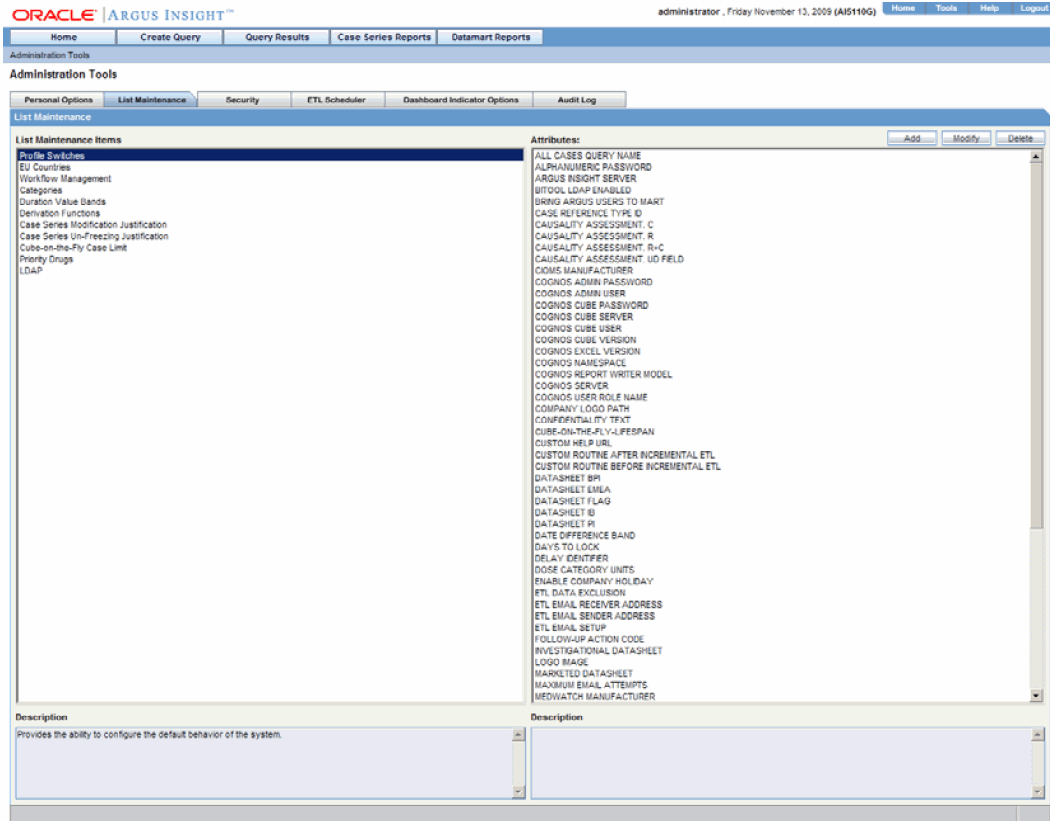
Select Datasheet fields from the attribute list.
Specify the DATASHEET BPI, EMEA, IB and PI fields value column of CASE_PRODUCT through Profile Switches as shown in the following illustration.
In order to get dimensional data from the Medical Analysis, Clinical Trial Analysis, and Overdose-Pregnancy-Interaction cubes, these attributes must be configured before initial ETL
|
Note: These attributes need to be configured before Initial ETL, in order to get data in dimensions with respect to the Medical Analysis, Clinical Trial Analysis and Overdose-Pregnancy-Interaction Cubes. |
Investigational Datasheet
The Listedness of the events corresponding to the configured investigational datasheet will be displayed in the "Event Listedness" dimension of the Clinical Trial Analysis Cube.
Marketed Datasheet
The Listedness of the events corresponding to the configured Marketed datasheet will be displayed in the "Event Listedness" dimensions of the Medical Analysis and Overdose-Pregnancy-Interaction Cubes.
Date Difference Band
The Listedness of the events corresponding to the configured Date Difference Band allows the user to configure the highest value of the dimensions which have Date Difference columns as data source in Administration Statistics and Submission Statistics Cube
For specific information on configuring Investigational Datasheet, Marketed Datasheet and Date Difference Band, please refer the Configuration base document (CBD) provided with the CD.
In Argus Insight, the time values (entered in Argus Safety) in the Product Tab > Drug Duration of Administration, Events Tab > Time to Onset from First Dose, and Events Tab > Time to Onset from Last Dose fields can be mapped to specific ranges called Duration Value Bands. This enables you to specify querying criteria based on ranges instead of specific values for the above fields.
The Duration Values Bands item on the List Maintenance page enables you to configure the duration value bands in the hours, days, weeks, months, and years categories. In each category, the system enables you to specify multiple ranges by entering maximum and minimum value for each range item. Any value that falls within a configured range will map to that range.
In the Duration Value Bands Configuration dialog box, you can delete an existing range by clicking the Delete icon or you can modify a range by editing the values in the Higher Range (<) columns. Note that the lowest band cannot be deleted. Additionally, the highest value band includes values that are greater than the highest range value that you specify. To add a range, enter a higher range compared to the previous highest range in Higher Range (<) and press TAB. This adds a new row.
If you delete an intermediate range, the system automatically converts the highest value of the deleted to the lowest value in the next range. The range labels do not change.
|
Note: Duration Value Band configuration must be done before running the Initial ETL.If Duration Value Bands are modified after Initial ETL, you must re-run the Initial ETL. |
Use the following procedure to configure Duration Values Bands.
On the List Maintenance tab, select the Duration Values Bands item from the List Maintenance Items list.
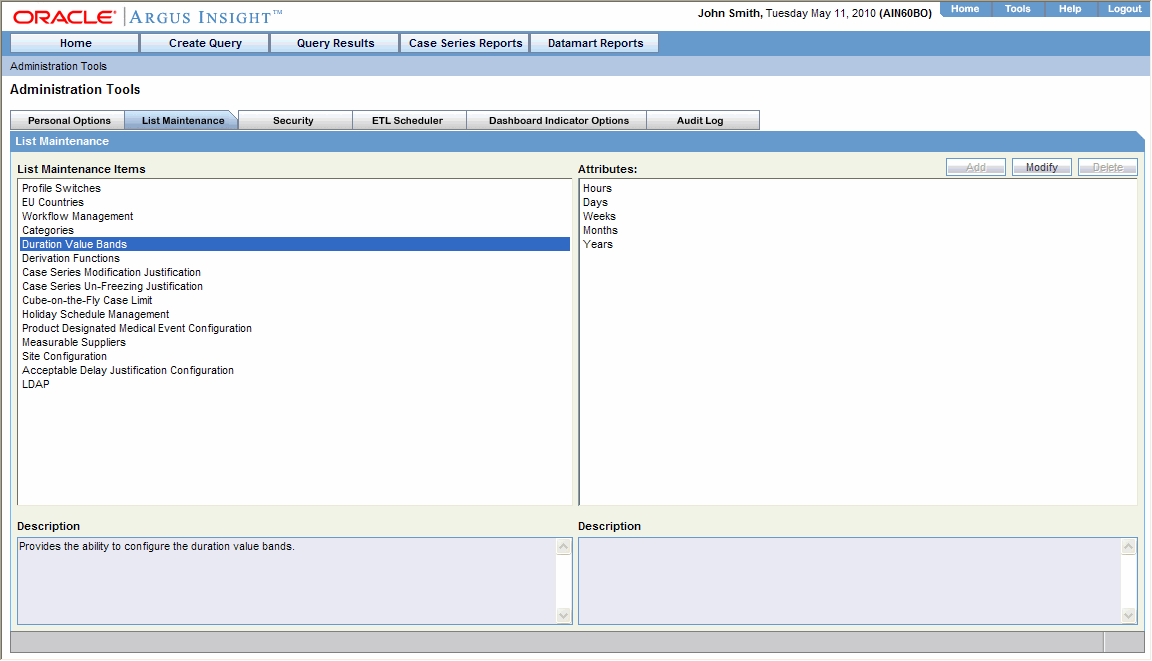
The Attributes list displays the existing categories. These are default categories and cannot be modified.
Select an Attributes category. Click Modify.
When the system opens the Duration Value Bands Configuration dialog box, the system displays the factory-configure date ranges.
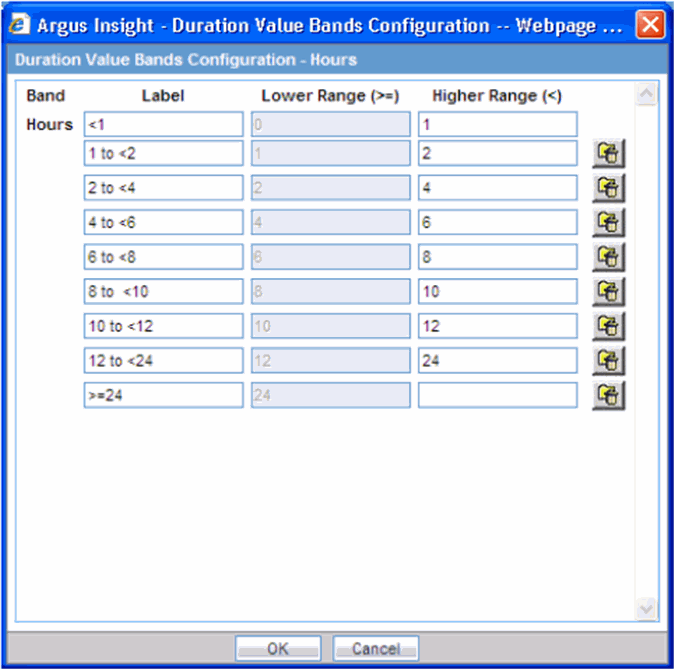
The Label column is the name of the range.
The Lower Range (>=) and Higher Range (<) columns contain the minimum and maximum values, respectively.
Modify these values as appropriate.
Click OK to save the changes.
Argus Insight lets you create a new List Maintenance item and derive specific cases to this item based on case attributes. These attributes are supplied to the system as an SQL.
For example, you can create a new List Maintenance item called Report Type 1 and derive to this item, all the cases that have the Report Type attribute as Spontaneous, Literature, and Compassionate Use. As a result, the Report Type 1 List Maintenance item appears as an option in the query tool interface corresponding to the Report Type attribute. When you select the Report Type 1 from the Report Type list and execute your query, the system returns only those cases that have the report type attribute as Spontaneous, Literature, and Compassionate Use.
You can also create a specialized List Maintenance item called Report Type 1 US and derive to this item, all the cases that have the Report Type attribute as Spontaneous, Literature, and Compassionate Use and the Country of Incidence attribute as United States.
|
Note: There can be situations where two different List Maintenance items you create contain similar attributes in the SQL criteria. In this case, you can assign a priority level to individual List Maintenance items. The priority level determines which LM item SQL is executed first. |
The Argus Field Mapping derivation rules are applicable as follows:
ANALYSIS->BfArM Information -> Causality
ANALYSIS->Case Assessment -> Listedness Determination
ANALYSIS->Case Assessment -> Case Outcome
ANALYSIS->Case Assessment -> Case Seriousness
EVENTS->Event Information -> Lack of Efficacy
GENERAL->General Information ->Report Type
GENERAL->General Information -> Pregnancy
PATIENT->Patient Information -> Age Group
PATIENT->Patient Information -> Patient weight BMI desc
PATIENT->Patient Information -> Patient Gender
PRODUCTS->Product Drug -> Derived Overdose
PRODUCTS->Product Drug -> Derived Drug Abuse
PRODUCTS->Product Drug ->Derived Drug Interaction
PRODUCTS->Product Drug ->Last daily dose
|
Note: Age Group, Causality, Last daily dose and Report Type are comma separated Derivation rules. |
Use the following procedure to configure derivation functions:
In the List Maintenance tab page, select the Derivation Functions item from the List Maintenance Items list.
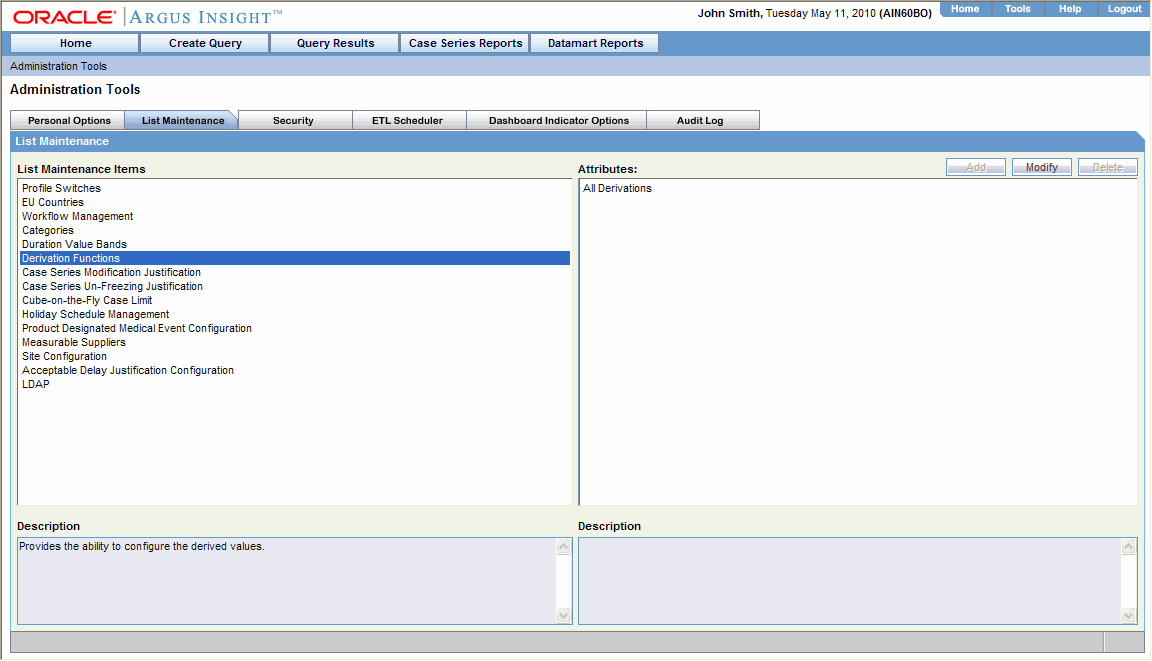
The Attributes list displays the existing categories. This is a default category and cannot be modified.
Select All Derivations. Click Modify.
When the system opens the Derivation Fields dialog box, use the icons (described below) to add/delete/rearrange rows in the Derivation Fields window.
| Click on... | To... |
|---|---|
 |
add a row above |
 |
add a row below |
 |
delete a row |
 |
arrange rows |
The following table lists and describes the fields that display in the Derivation Fields dialog box. 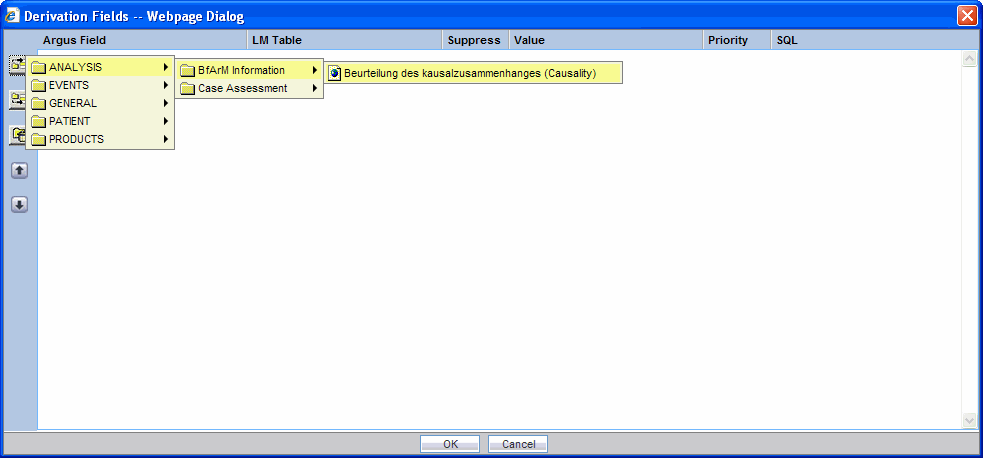
| Field | Description |
|---|---|
| LM Table | This field is the table name of the selected Argus field i.e. automatically populated. |
| Suppress | Suppress functionality is available for fields associated with the list maintenance data. When suppress is enabled for a field, the corresponding list maintenance values which are not present in any case are deleted and thus not available for querying.
Note: This is applicable only if the condition specified in the SQL text box covers all the cases having the selected LM field. |
| Value | This is a textbox which captures the value for the new derivation field.
Note: For the following rules the system expects the user to enter the rule's new value as a comma separated value. Make sure that the values for the rules are entered as follows. Unexpected results and/or ETL error may result if the values are not entered as specified. |
| Age Group rule | Parameters: VALUE, GROUP_LOW, GROUP_HIGH |
| Parameter | Parameter Description |
| VALUE | New value for the rule |
| GROUP_LOW | Lower value of the Group |
| GROUP_HIGH | Higher value of the Group |
| Example: NewAgeGroup,25,50
If you do not want to specify the High Value then the comma is mandatory in the end. For example, Unknown,70, |
|
| Causality | Parameters: VALUE, REPORTABILITY |
| Parameter | Parameter Description |
| VALUE | New value for the rule |
| REPORTABILITY | Lower value of the Group |
| Example: NewCausality,1 | |
| Last Daily Dose | Parameters: VALUE, DAILY_DOSE_SORTING_ORDER |
| Parameter | Parameter Description |
| VALUE | New value for the rule |
| DAILY_ DOSE_SORTING_ORDER | 1 or 2 or 3 and so on to define the sorting order if there are more than 1 rule for Last Daily Dose field |
| Examples:
Example:1 -> 0to1,1 Example:2 -> 2to3,2 Example:3 -> 5to8,3 |
|
| Report Type | Parameters: VALUE, INC_LIT, INC_TRIAL,ABRV |
| Parameter | Description |
| VALUE | New value for the rule |
| INC_LIT | 1 if Literature Report Type else 0 |
| INC_TRIAL | 1 if Clinical Trial Report Type else 0 |
| ABRV | A 3 letter abbreviation for the Report Type |
| Example: NewReportType,0,1,NRT | |
| Priority | This field captures the priority for a list of derivation rules applied to a single LM field. The value should be from 1 to 255.
Note: The priority for derivation rules applicable to a single LM filed should be unique. |
| SQL | Specify the SQL statement to capture the cases for which the derivation rule is applicable.
Note: The SQL statement should follow the correct syntax. The UI does not validate the length of the new values against the database. Make sure that new values being inserted into the MART do not exceed the limit defined in the database. The SQL query configured against a rule should only have the primary key column name(s) of the field in the SELECT clause. It should also not contain the table name. Example: select case_id from rpt_case where ….. (CORRECT) select rpt_case.case_id from rpt_case where …. (INCORRECT) Make sure that there is only one space after the select clause in the SQL query. Example: select case_id, seq_num from rpt_product where ….. (CORRECT) select case_id, seq_num from rpt_product where …. (INCORRECT) Make sure that no oracle keyword (such as distinct) is used after the select clause in the SQL query. Example: select case_id, seq_num from rpt_product where ….. (CORRECT) select distinct case_id, seq_num from rpt_product where.. (INCORRECT) |
Use the following procedure to configure the Argus Insight scheduling service.
Log on to the Argus Insight Server as an Admin user.
Open the MailConfig.xml in Notepad from the following location on the Argus Insight Web Server:
<Argus Insight Installation Path>/<Bin folder>
Modify the tags in the MailConfig.xml file as follows:
| Existing Tag | Modify To |
|---|---|
| <AdminId>Administrator@oracle.net</AdminId> | <AdminId><EmailID></AdminId> where EmailID is the email ID used for sending Scheduled Reports |
| <epwd>Password</epwd> | <epwd><Email Password></AdminId> where Email Password is the email access password for the email ID provided in <AdminId><EmailID></AdminId>
If you want to send emails to external domains, provide a valid password. Else, you can enter any value as password. Secure Connections require a valid password. |
| <SMTPServer>172.16.10.46</SMTPServer> | <SMTPServer><Mail Server IP></SMTPServer> where Mail Server IP is the IP address of your Email Server |
| <Authenticate>NO</Authenticate> | <Authenticate> User Authentication for sending Emails </Authenticate>
If a secure connection is needed ,mark this entry as YES. If a non- secure connection is needed, mark this as NO. Example: Dominos server should mark this entry as no and Microsoft Exchange server should mark this entry as either yes or no |
| <MaxMailSizeKB>1024</MaxMailSizeKB> | Maximum size allowed for mail attachment on email server. |
| <SMTPPORT>25</SMTPPORT> | <SMTPPORT><Port Number></SMTPPORT>
where Port Number is the SMTP Port Number |
| <SMTPConnTimeOut>100</ SMTPConnTimeOut> | < SMTPConnTimeOut><TimeOutin Seconds></ SMTPConnTimeOut >
where Timeout is the time in seconds for SMTP Connection Timeout. |
| <ReplyTo>administrator@oracle.net</ReplyTo | <ReplyTo><EmailID></ReplyTo where EmailID is the id to which the reply will be sent via e-mail |
| FailedRecipientsMailTo | <FailedRecipientsMailTo>EmailID</FailedRecipientsMailTo>
Configure the email address of user who will receive email for information regarding un-delivered emails due to invalid email id or any other error. |
| <OracleService_InsightURL> | <OracleService_InsightURL> contains URL for Argus Insight application for accessing reports which can not be sent to configured mail id due to mail size limit. |
Save the file and close it.
Go to Start->Run on the Argus Insight web server.
Type Sevices.msc in the textbox and press enter.
Services window will be displayed on the screen.
Go to Argus Insight Service.
Right click the Argus Insight Service and select properties.
Set the startup type as Automatic.
Start the Argus Insight Service.
Press OK to close the Argus Insight Service Properties dialog window.
|
Note: For changing the interval of different service tasks, please modify the entries in Service.config file present under Bin folder of Insight. All the times mentioned in this file are in seconds. |
IMPORTANT! Ensure that the user who runs this service has administrative privileges. If the user does not have administrative privileges, either the Scheduled CIOMS Reports might not return or an LDAP user might not be able to log in to the Argus Insight web application.
These are required settings because PwReports.exe file is responsible for LDAP authentication along with CIOMS and MedWatch reports.
Go to Start -> Run and type dcomcnfg and press Enter.
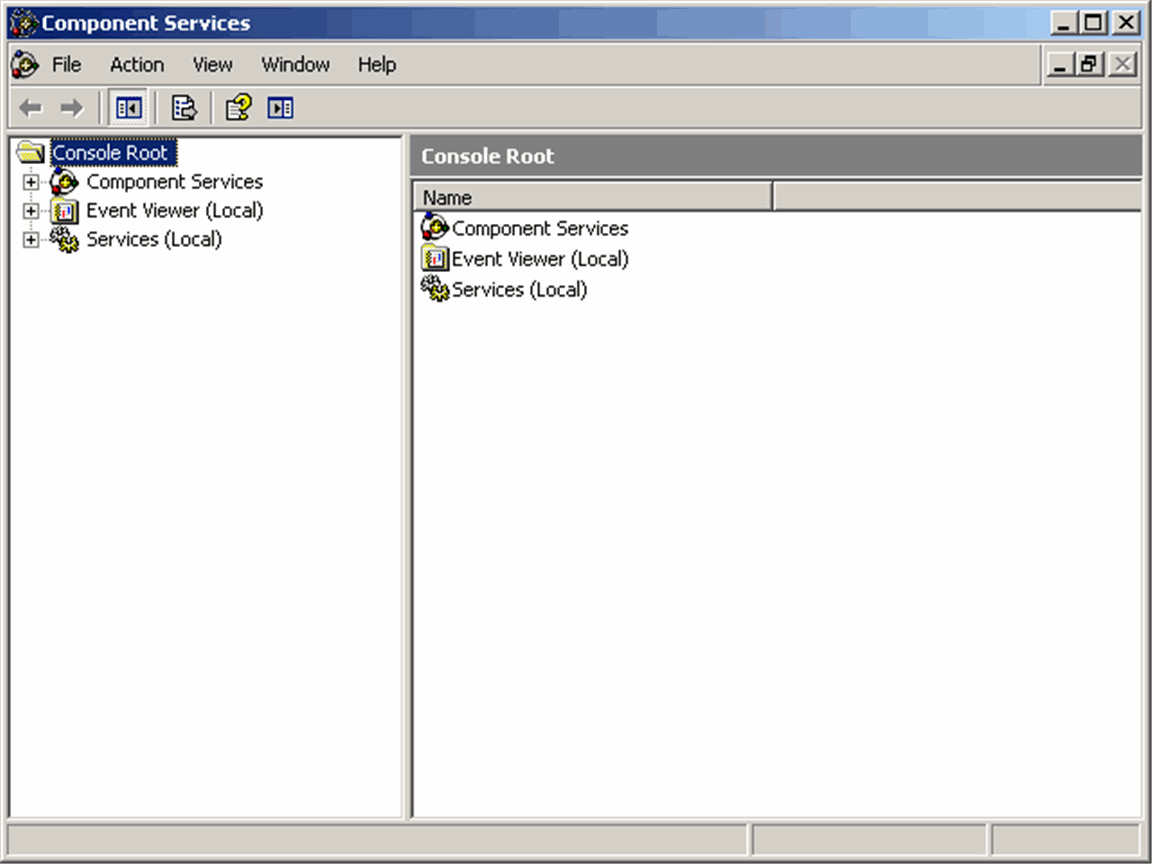
In the tree under Console root>Component Services>Computer>My Computer>DCOM Config.
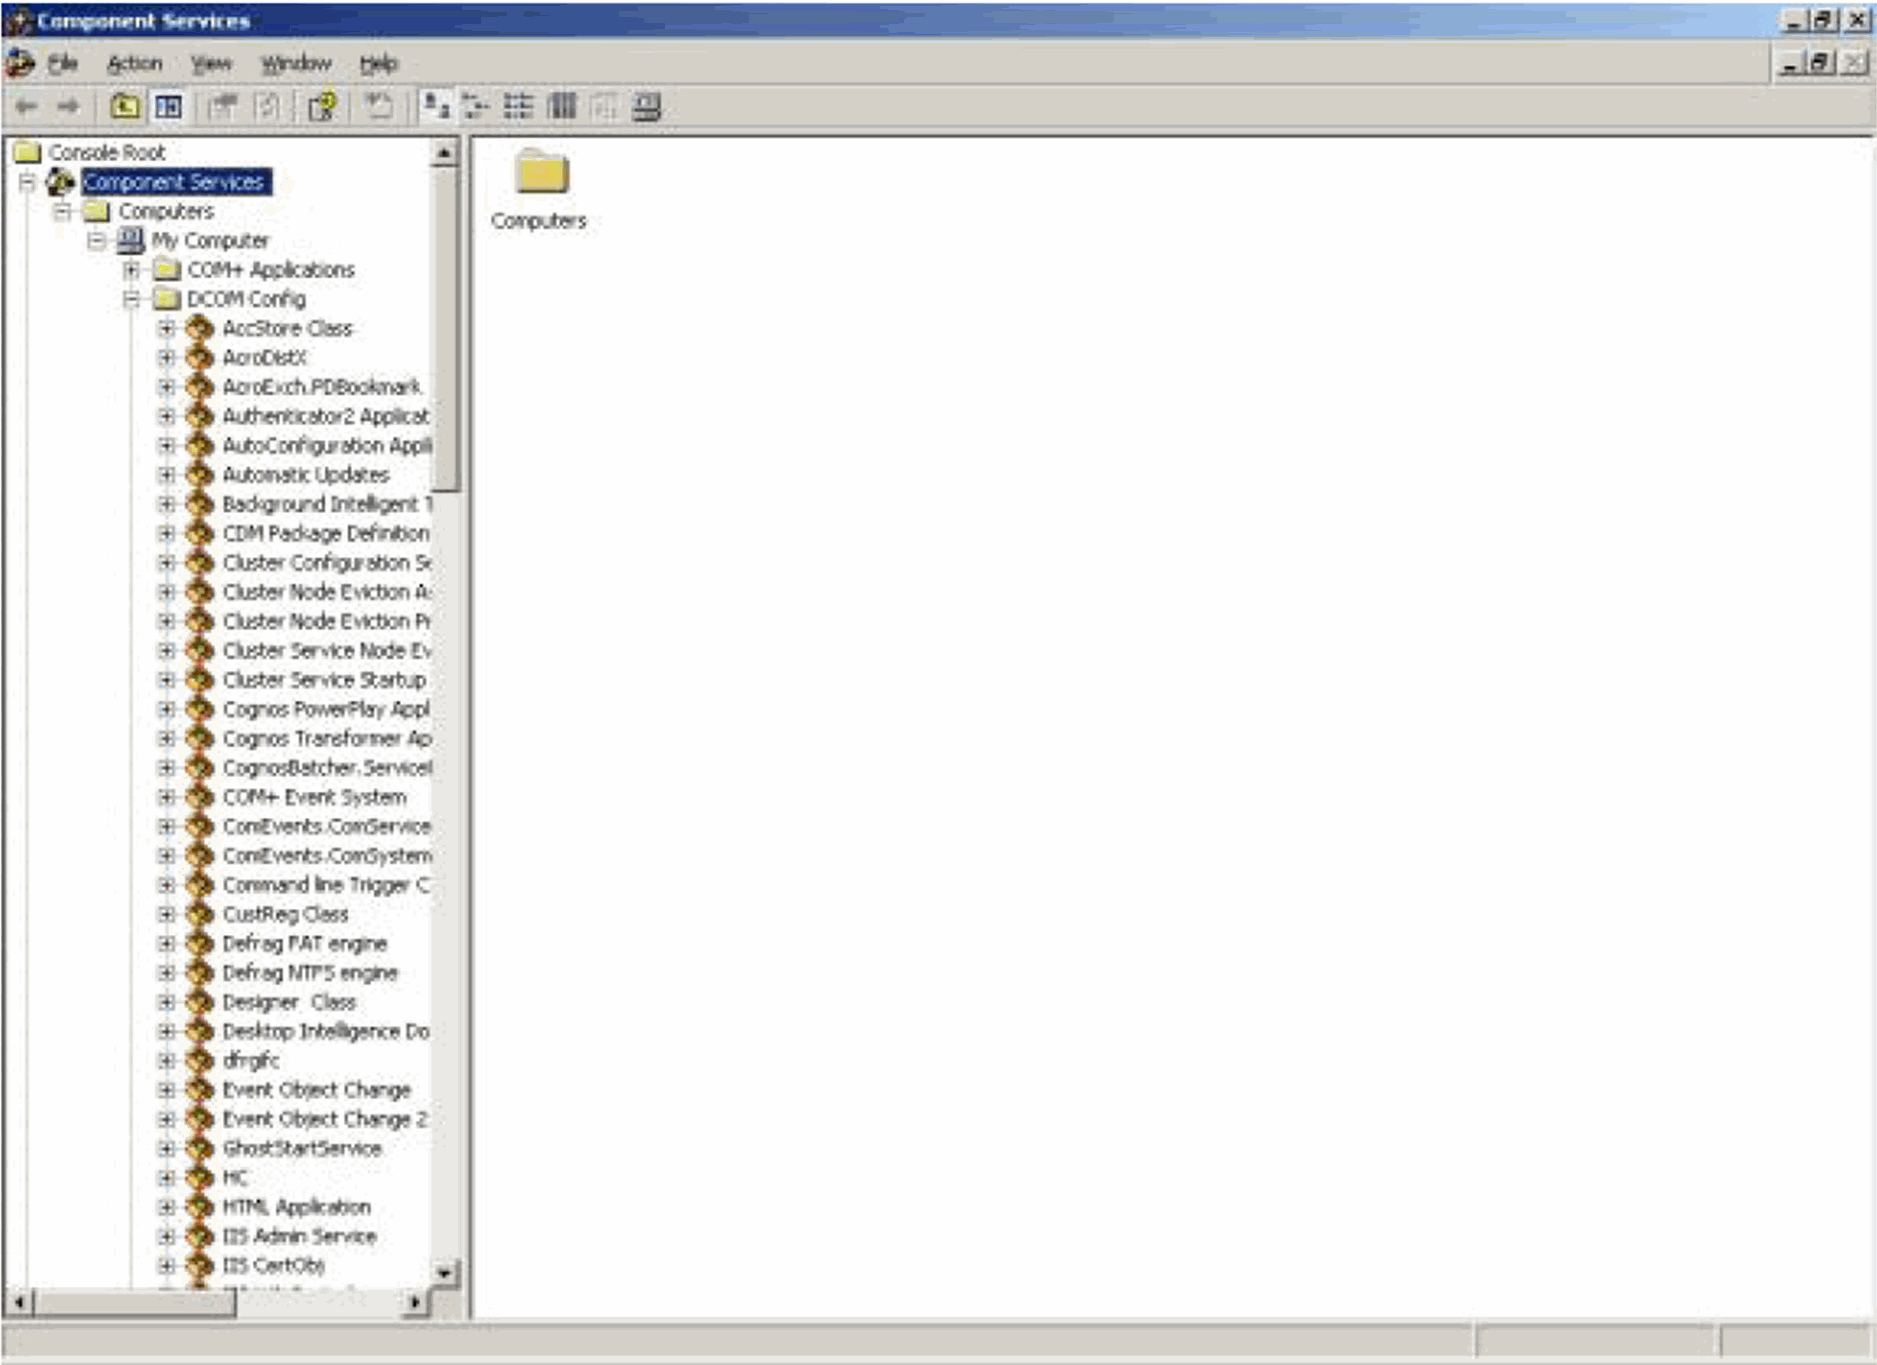
Right click on PwReports and select Properties. The following dialog box is displayed.
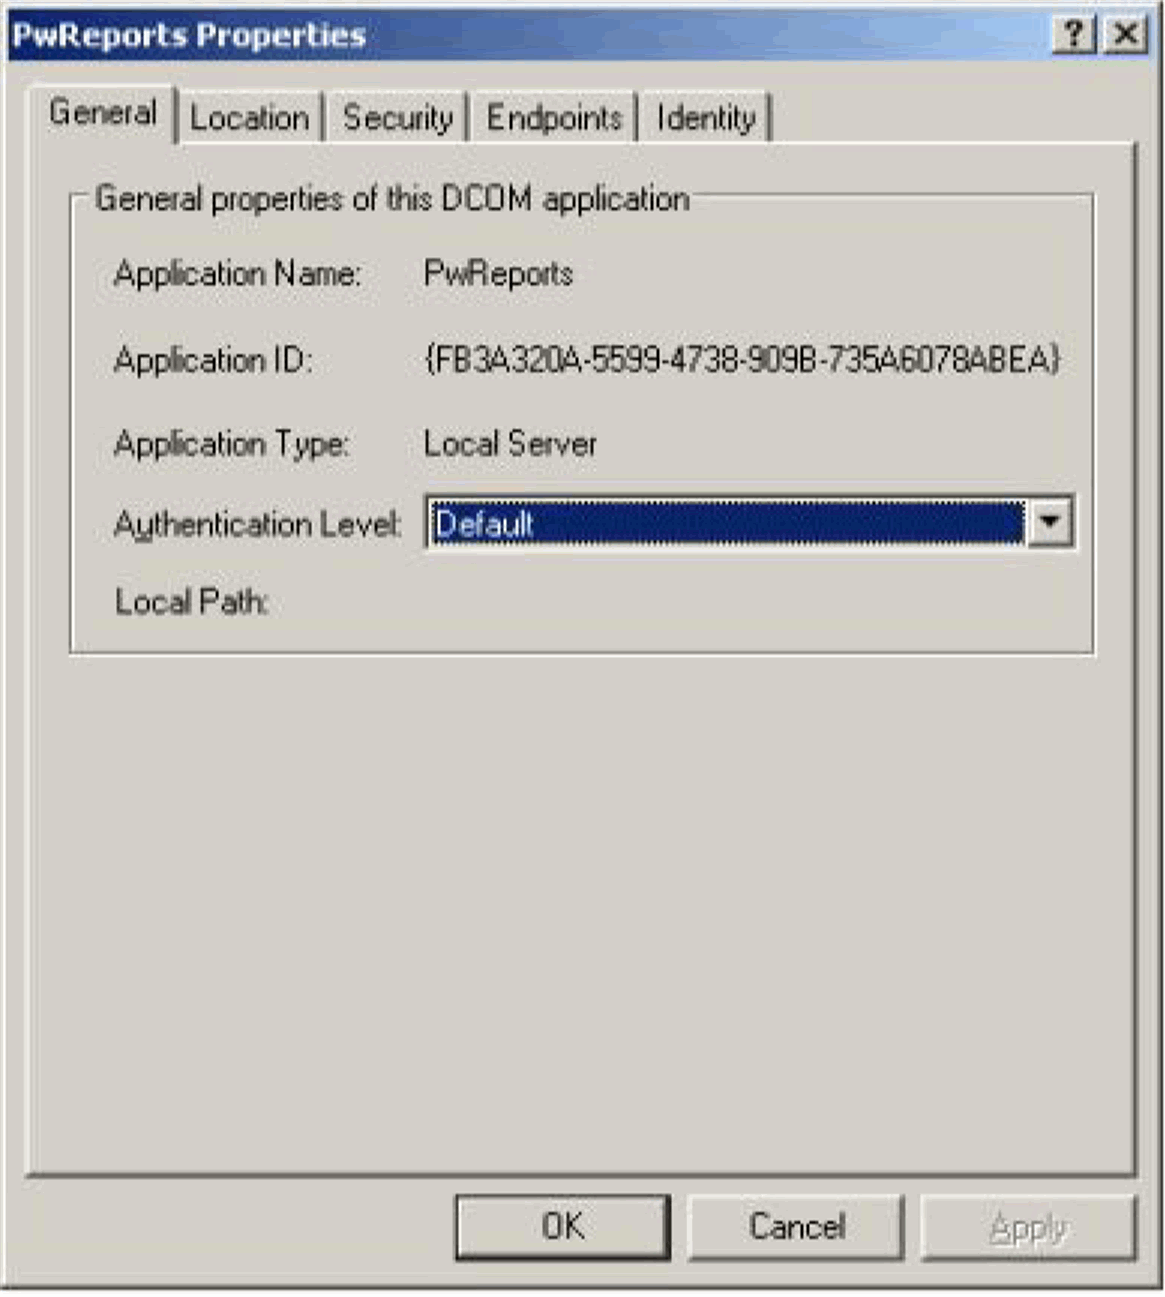
Click the Security tab.
When the system opens the Security tab:
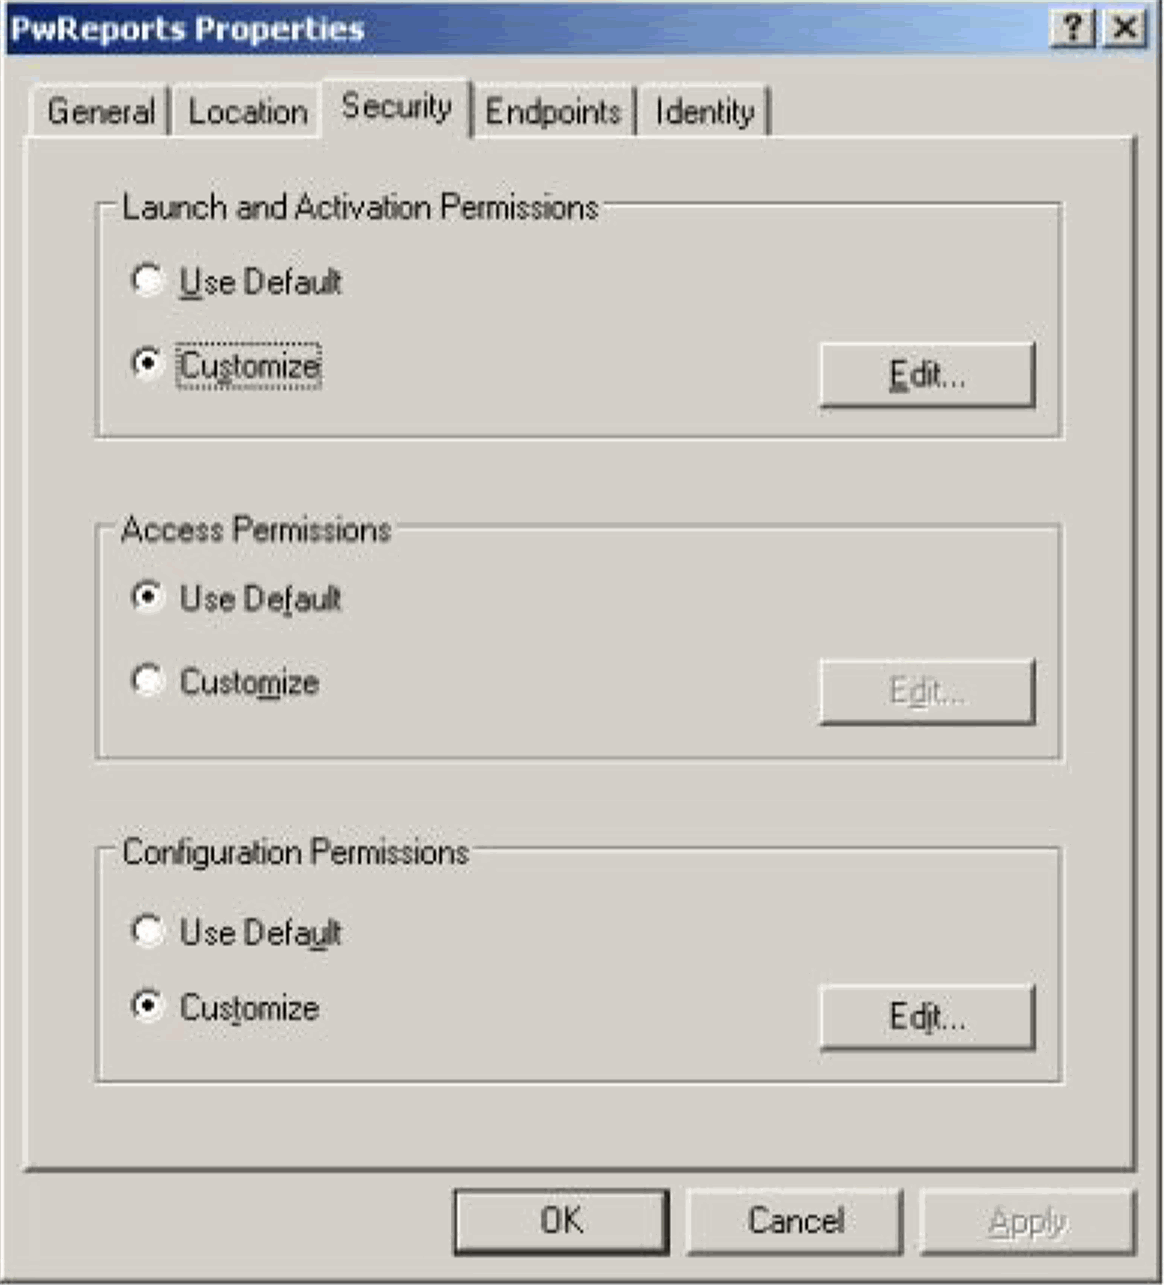
In the Launch and Activation Permissions section, click Customize.
Click Edit.
When the system opens the following dialog box, click Add.
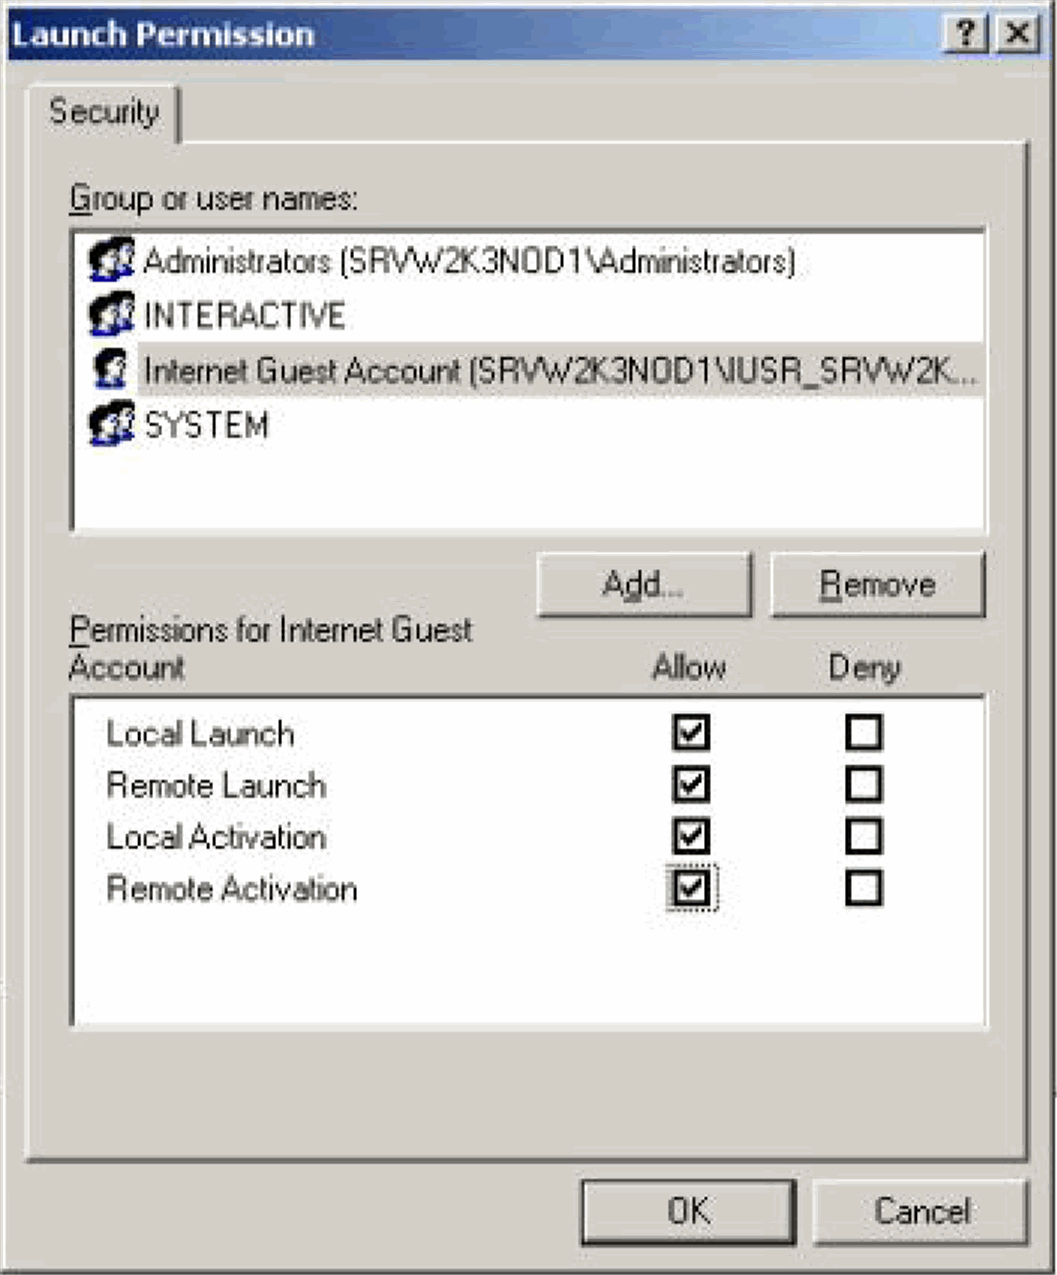
When the system opens the following dialog box:
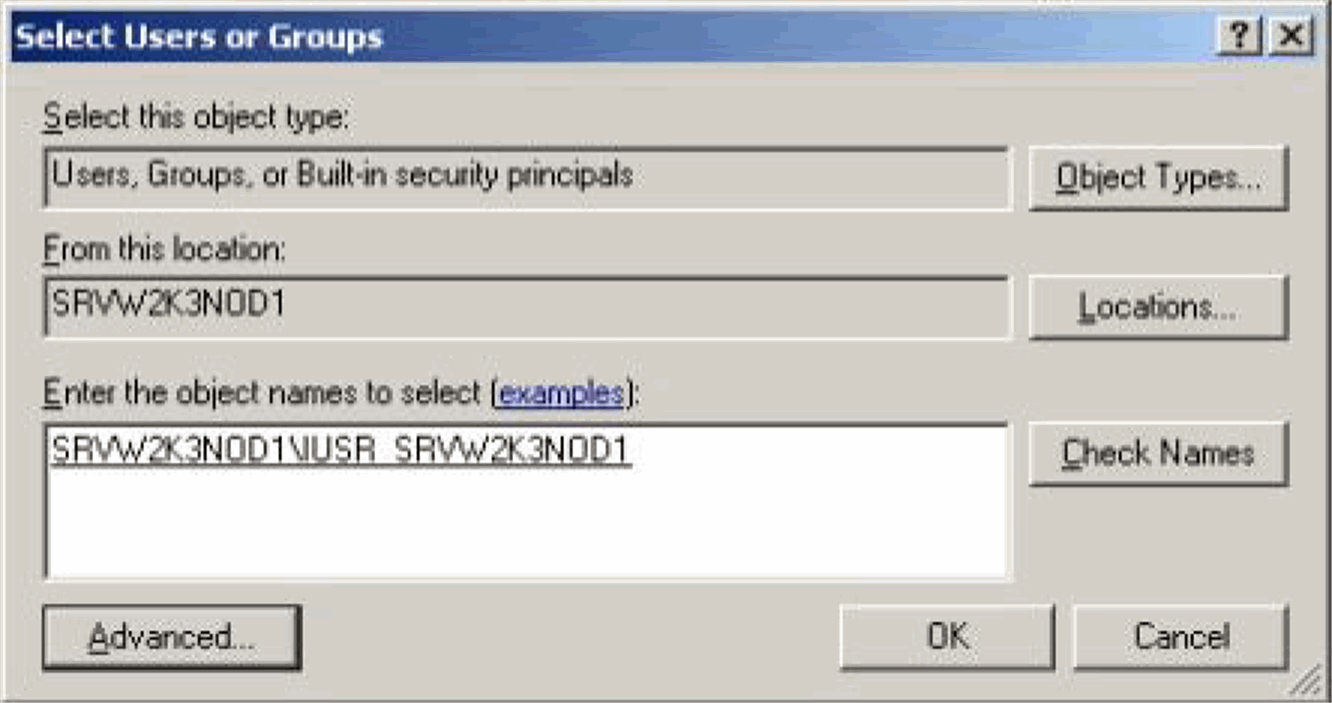
Locate the Enter the object names to select section
Add <machine_name>\IUSR_<machine_name>. On a Windows 2008 Server, add <machine_name>\IUSR.
Click OK.
When the system opens the following dialog box:
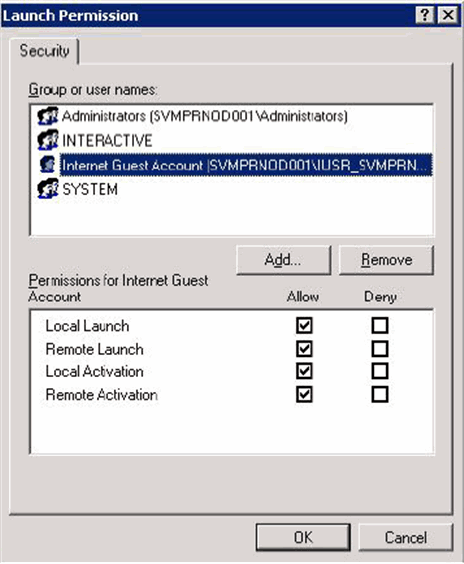
Select the newly created Internet Guest Account.
Check all the permissions.
Click OK
Exit the Component Services program.
Use the following procedure to configure the IIS file download limit for Windows 2003.
Go to the Internet Information Services (IIS) Manager.
Go to Start -> Run. Type iisreset -stop to stop the IIS service.
Go to C:\Windows\system32\inetsrv\metabase.xml file.
By default, this file has this entry: AspBufferingLimit = "4194304". This limits the download size to 4,194,304 bytes (4 MB).
Change this size to a large value (such as 200000000 for 200 MB) to allow your Windows 2003 server to send large downloads.
Start the IIS service. Go to Start -> Run. Type iisreset -start to start the IIS service.
Use the following procedure to configure the IIS file download limit for Windows 2008.
Go to the Internet Information Services (IIS) Manager.
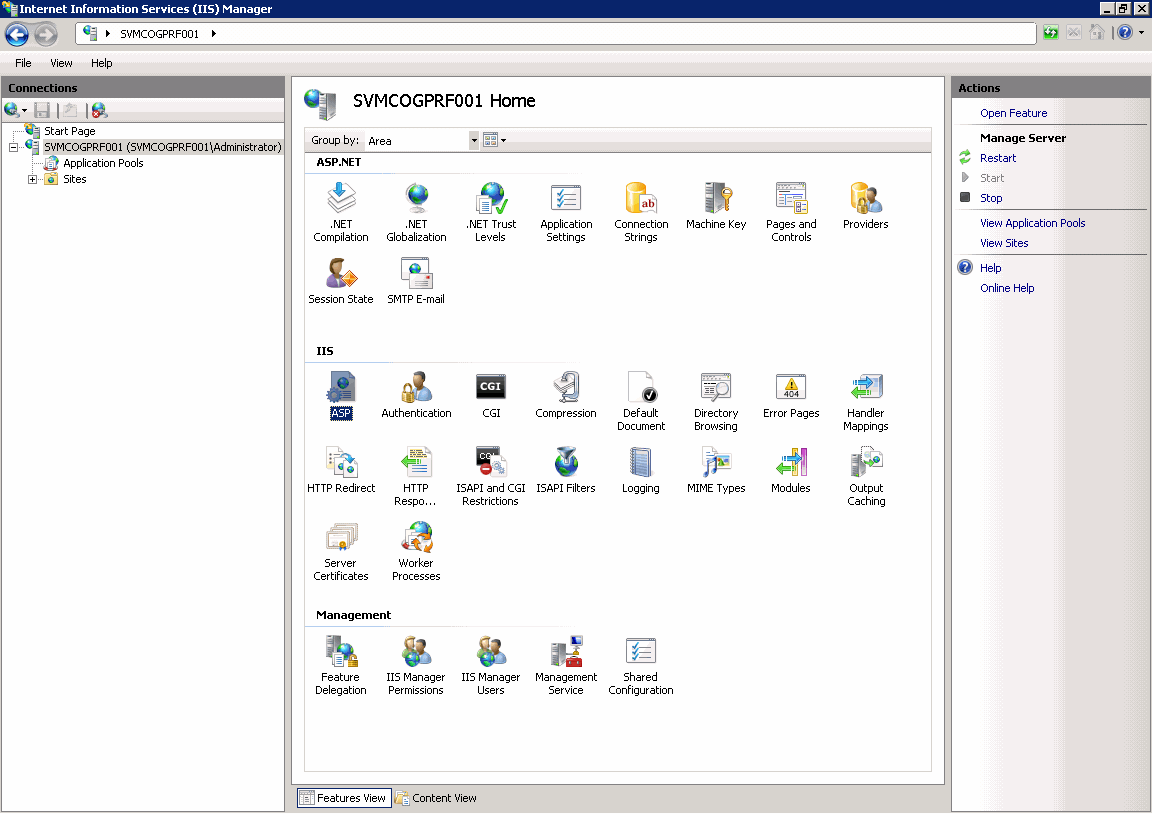
Double-click ASP in the right pane. The following page appears:
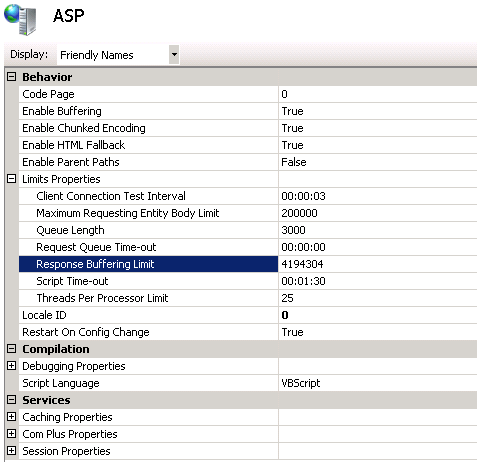
Expand Limit Properties and change the Response Buffering Limit from its default value of 4 MB to a large value such as 200000000 (200 MB).
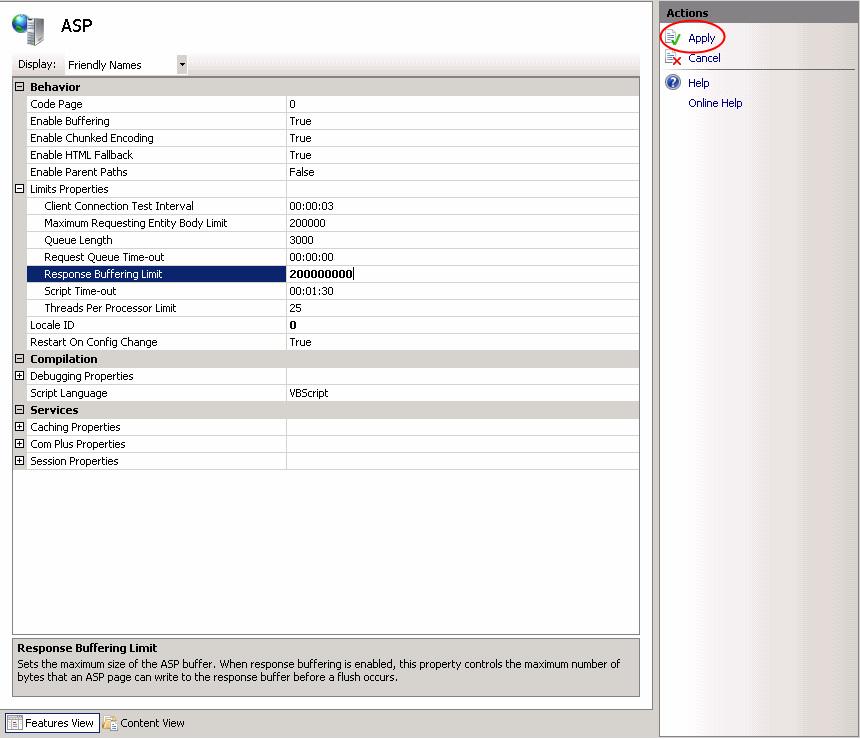
Click Apply to save the changed value.
Restart the IIS service. Go to Start -> Run. Type iisreset to restart the IIS service.
Configuring the ASPMaxRequestEntityAllowed Value (Optional Setting)
This setting is required only if end-users are using custom SQLs in advanced conditions, with more than 70,000 characters. If any AJAX error appears while saving the Custom SQLs of these many characters, update the ASPMaxRequestEntityAllowed value of the MetaBase.xml file. This ensures that the ASP can post that much data onto the server. There are two ways of updating this value: 1. By updating the MetaBase.xml: a) Stop the IIS. Use "iisreset /stop" at command prompt b) Go to \WINDOWS\system32\inetsrv c) Open the MetaBase.xml file in notepad d) Edit the Value of ASPMaxRequestEntityAllowed and set it to 500000 e) Save the file and restart the IIS. Use "iisreset /start" at command prompt. 2. By using the DOS Prompt: a) At a command prompt, type the following command, and then press ENTER: cd drive:\inetpub\adminscripts Note that in this command to change folders, the drive is only a placeholder for the hard disk where IIS is installed. b) On the command prompt, type the following command, and press ENTER: cscript adsutil.vbs set w3svc/ASPMaxRequestEntityAllowed 500000 The maximum value is 1,073,741,824 bytes. Set this value to the lowest possible value that allows for the functionality that you want. c) On the command prompt, type the iisreset command, and press ENTER.
Before configuring export and import functions, be aware of the following:
Before importing or exporting to or from a network drive, verify that you have mapped the network drive. This tool does not support direct access to network drives.
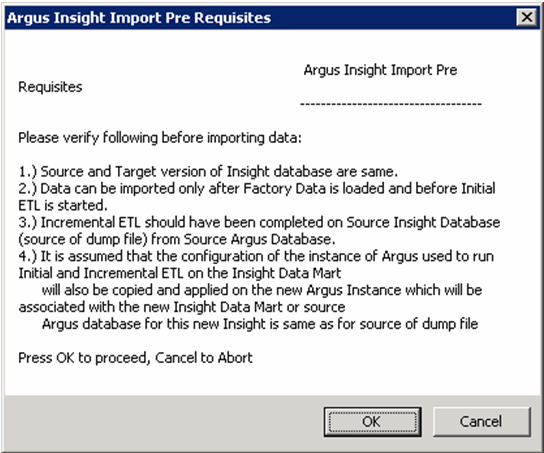
Before copying Argus Data, incremental ETL should be completed on Source Insight Database from Source Argus.
It is assumed that the configuration of the instance of Argus used to run Initial and Incremental ETL on the source Insight DataMart will also be copied and applied on the new Argus Instance which will be associated with the new Insight DataMart.
Data must be imported after loading Factory Data and before running Initial ETL on destination environment.
Use the following procedure to export data.
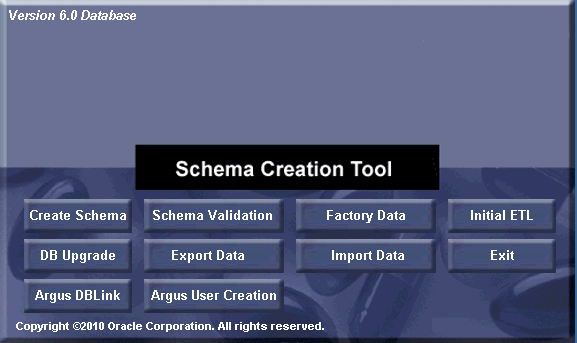
Go to Start>Programs>Oracle>Argus Insight>Schema Creation Tool.
Click Export Data.
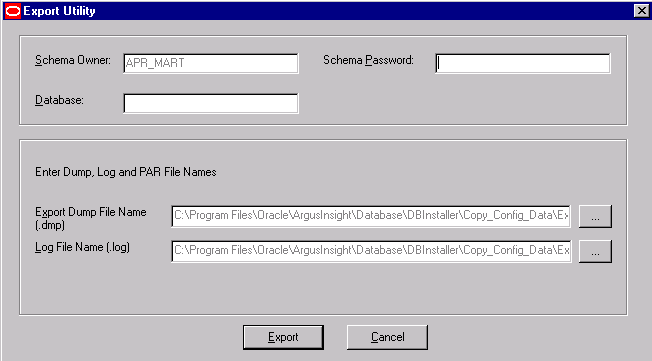
When the system opens the Export Utility dialog box, enter the name of the Schema Owner, the Schema Password, and the Database name.
If you want to retain the default values for the Export Dump, Log, and PAR files, go to Step 6 and then to Step 9.
If you want to configure the export file name and location, perform steps 7 and 8.
Click Export, to retain the default values of the Export Dump, Log and PAR files.
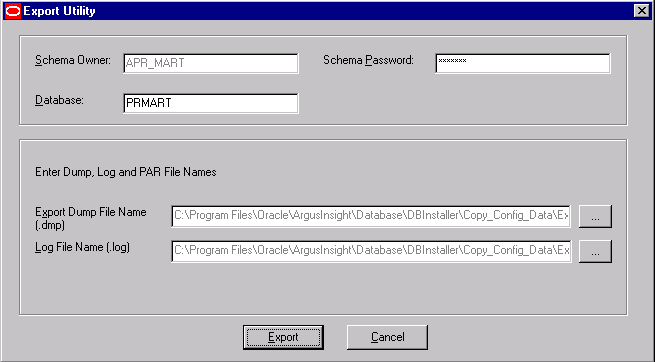
To configure the export file name and location, click the ... button, next to the Export Dump File Name.

When the system opens the Export Dump File dialog box:
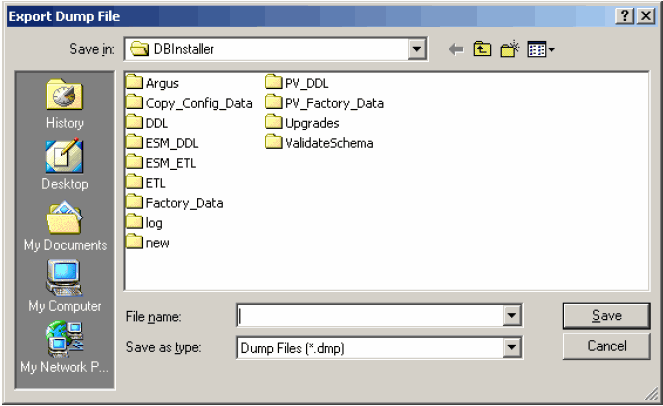
Navigate to the appropriate location and enter the export file name in the File name field.
Click Save.
|
Note: You can configure the Log File names in a similar manner. |
When the system redisplays the Export Utility dialog box, click Export to retain the default file name and continue.
|
Note: Do not change the parameter file name and location. |
The system displays a series of command screens. When prompted to do so, perform the appropriate actions.
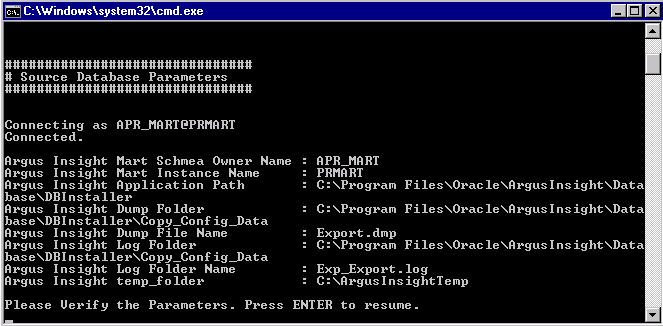
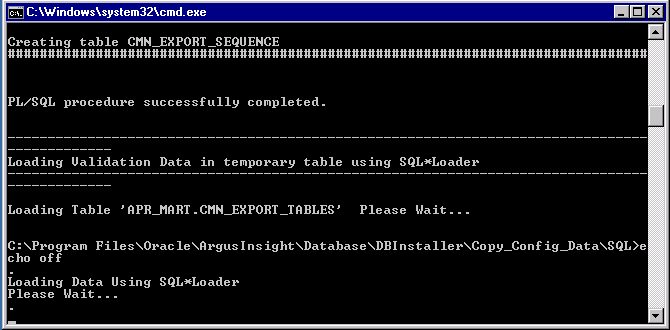
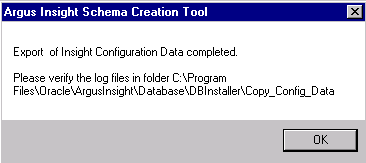
When the system opens the following dialog box, click OK to verify the log files are at the location in the dialog.
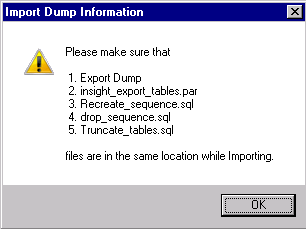
When the system displays the following message, click OK and verify the log files are at the location displayed in the dialog.
Use the following procedure to import data.
Go to Start>Programs>Oracle>Argus Insight>Schema Creation Tool.
When the system opens the Schema Creation Tool, click Import Data.

When the system opens the Import Utility dialog box, enter the name of the Schema Owner, the Schema Password, and the Database name.
To configure the Dump file name and location, click the ... button next to the Dump File Name to configure the Dump file name and location.
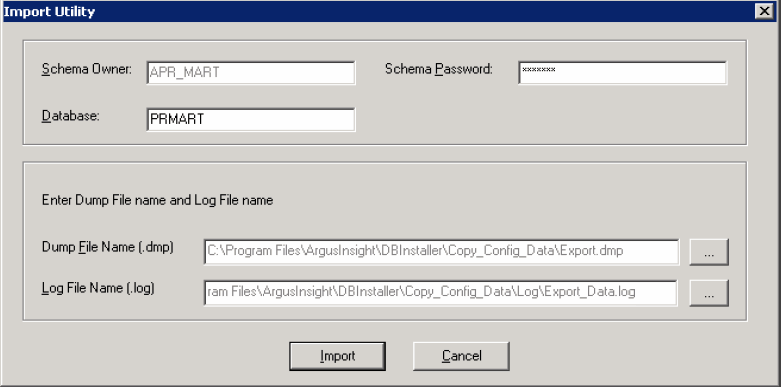
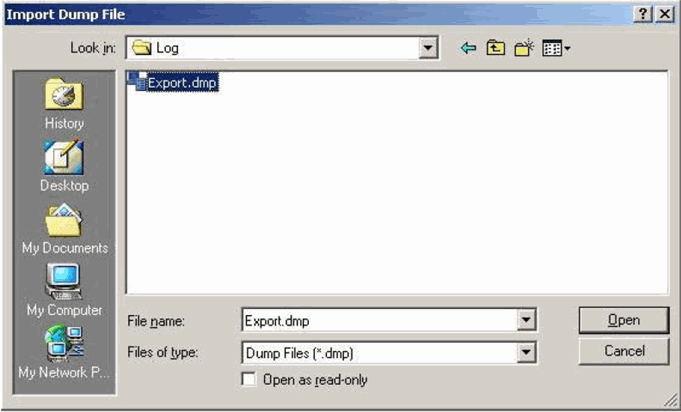
When the system opens the Import Dump File dialog box, navigate to the appropriate location and select the Dump File Name.

When the system opens the Import Dump File dialog box, click Open.
When the system redisplays the Import Utility dialog box, click Import.

When the system opens the following dialog box, click OK to proceed.
The system displays a series of command screens. Press Enter when prompted to do so.

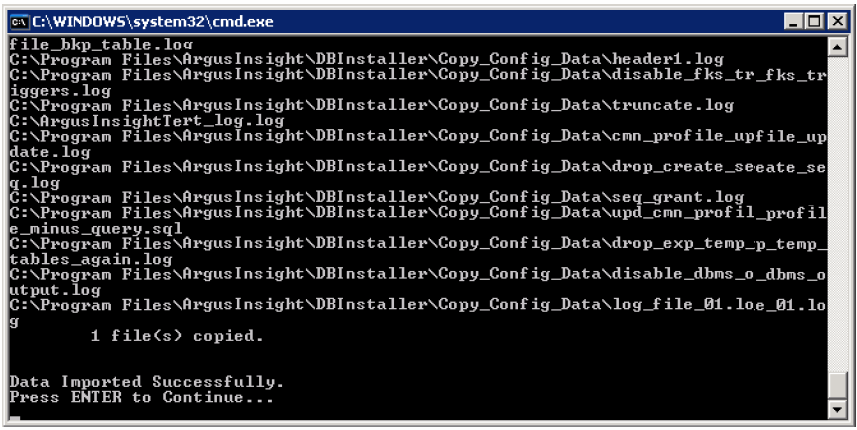
When the system presents the following dialog box, click OK and verify that the log files are at the location specified in the dialog box.
