


In this section, you add a button to the EmpList page that integrates with the camera of the device and navigates to the TakePicture page. On the TakePicture page, you add a button for taking another picture and a button to return to the EmpList page. You also add an image that shows the picture you just took.
-
Open EmpTaskFlow.xml. (HINT: Double-click EmpsTaskFlow.xml in the Application Navigator.)

-
Double-click EmpList to open it in the editor.
-
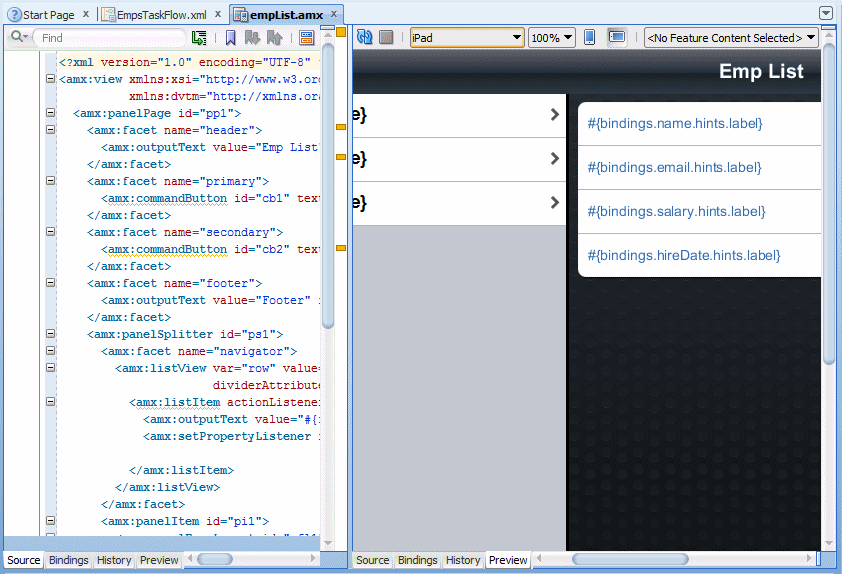
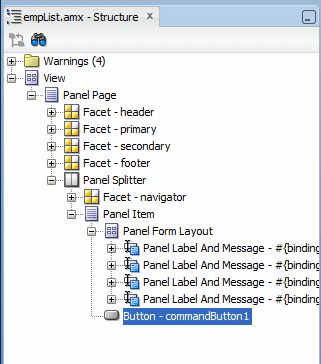
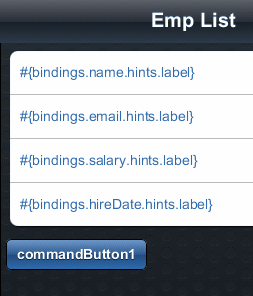
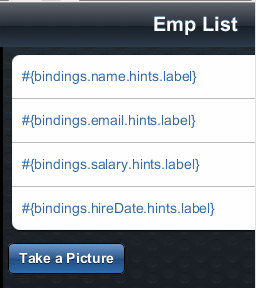
Drag a Button component from the Component Palette to the Panel Item in the Structure pane.
-
Set the Text of the button to Take a Picture and set the Action to takePicture.
-
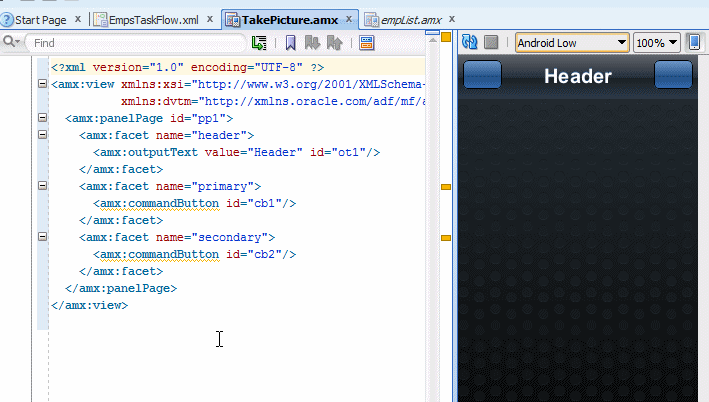
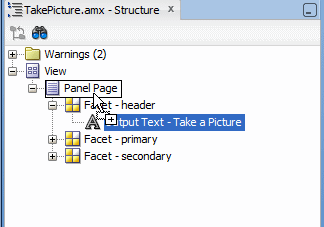
Now you start working on the TakePicture page. Open the TakePicture page in the editor. (HINT: Double-click TakePicture.amx in either the EmpsTaskFlow or the Application Navigator.)
-
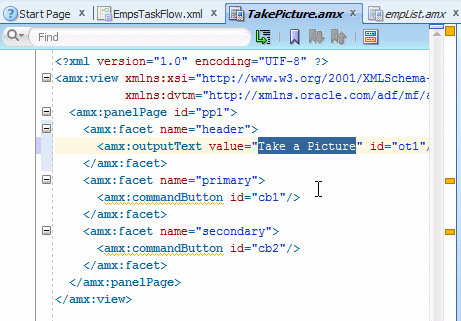
Look for the outputText component under the header facet and set the value to Take a Picture.
-
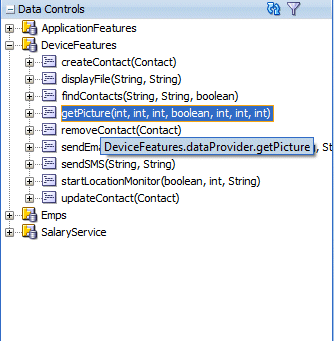
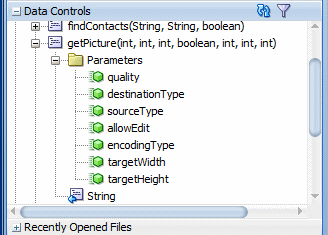
Expand the Data Controls palette to show Device Features.
-
Expand getPicture(int,int,int,boolean,int,int,int). Notice the parameters that the getPicture method requires. The getPicture method allows the caller to set parameters on the method which control various aspects of the device. For example the method call can set the quality, height, and width of the results.
-
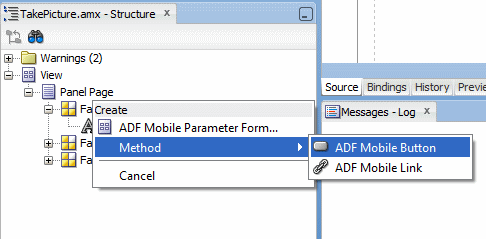
Drag getPicture(int,int,int,boolean,int,int,int) to the Panel Page in the Structure pane and drop it as an ADF Mobile Button.
-
In the Edit Action Binding dialog box, enter the following values for the parameters and click OK to create the button.
Name Value quality 50 destinationType 1 sourceType 1 allowEdit true encodingType 1 targetWidth 200 targetHeight 200 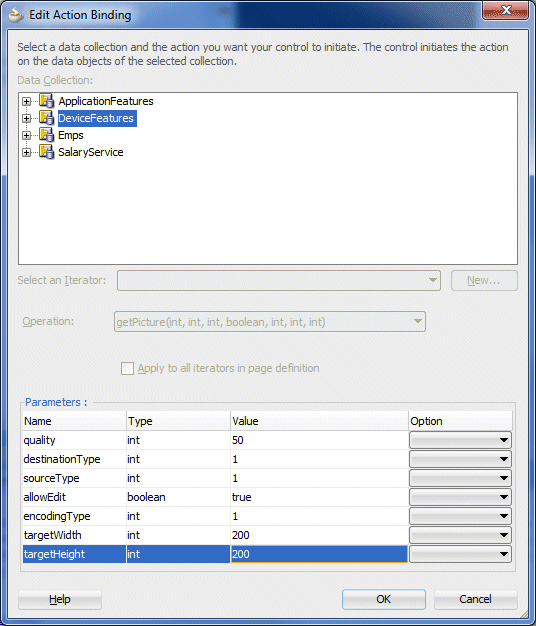
-
From the Data Controls palette, drag the String return from the getPicture method to the Panel Page in the Structure pane and drop it as an ADF Mobile Output Text.

-
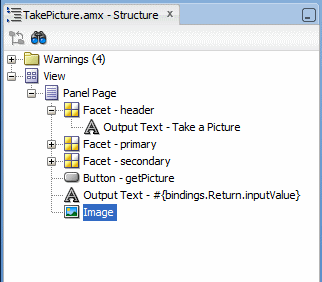
From the ADF Mobile AMX General Controls, drag an Image component from the component palette to the Panel Page in the Structure pane.
-
In the code editor, copy the binding code from the outputText component, using Ctrl + C.

-
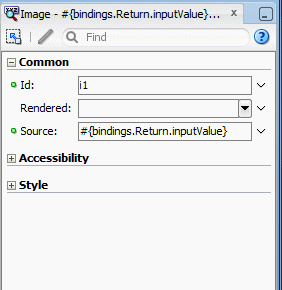
Select the image component and in the Property Inspector, paste the binding code into the Source property (use Ctrl + V).
-
Select the outputText field in either the Code Editor or the Structure pane and delete it.

-
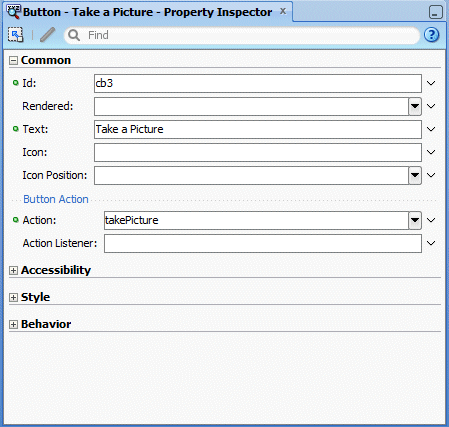
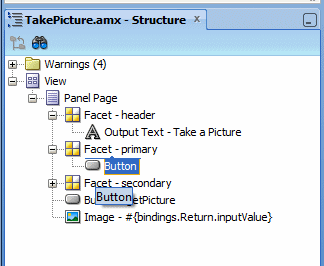
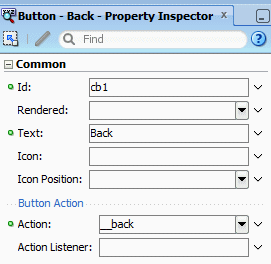
Select the Button component in the Facet - primary node of the Panel Page.
-
Use the Property Inspector to set the Text to Back and the Action to __back.
-
Just as you did before, deploy the application. (HINT: From the Application menu in JDeveloper, select Deploy > Android2 to Android emulator.)
Also make sure the emulator is already up and running.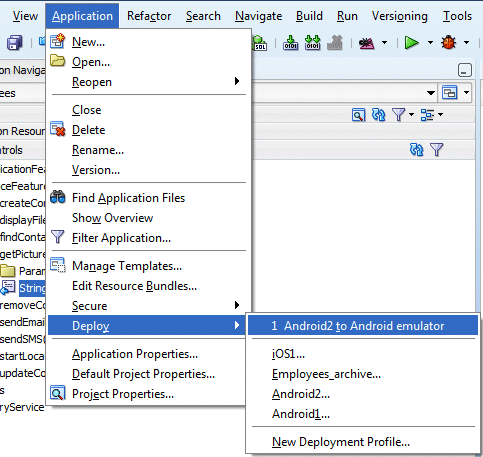
-
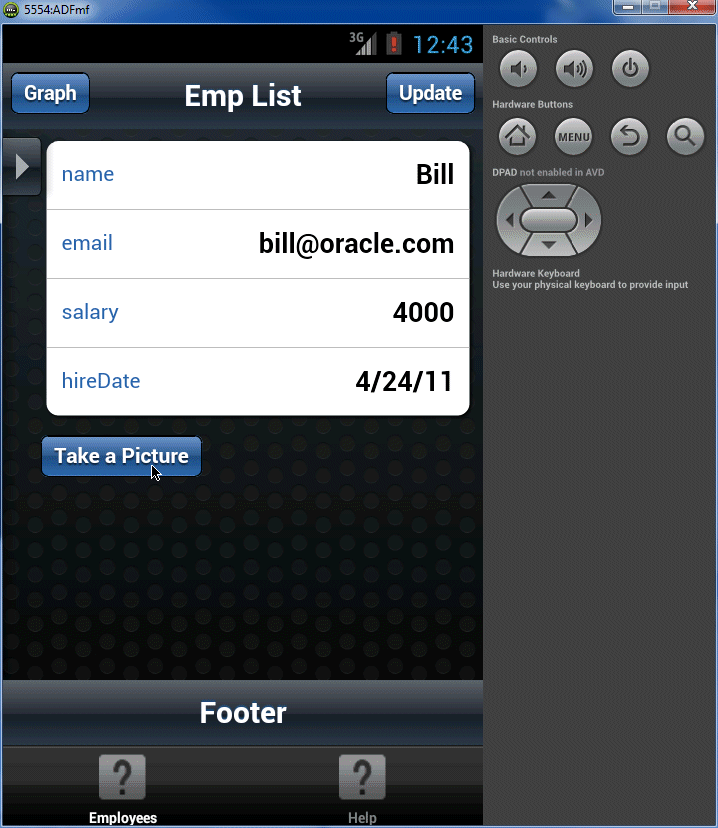
Click the Applications button on the main page, and then click the Employees application.

-
When the application opens, click Take a Picture. This will open the Camera feature on the emulator.
-
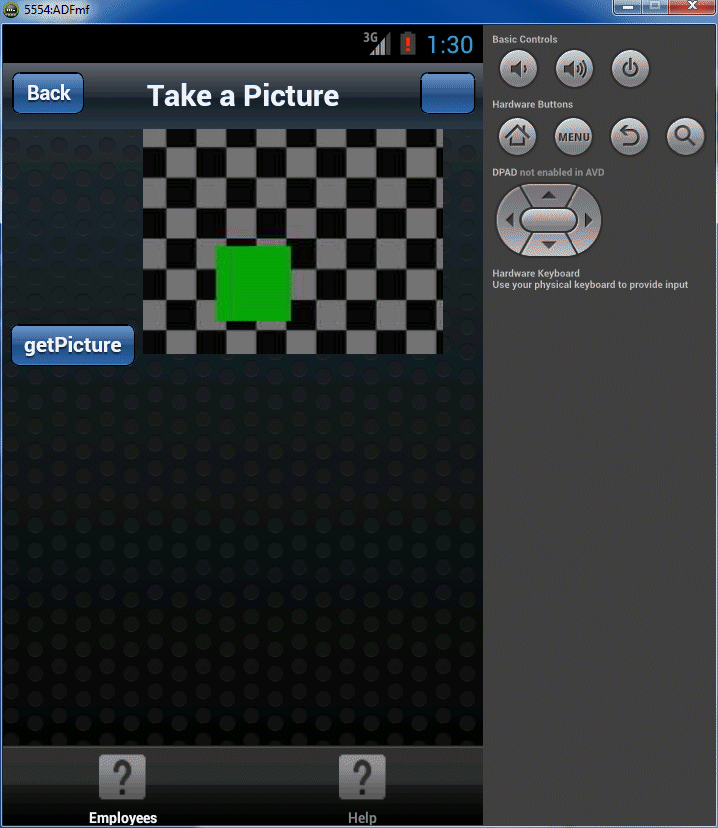
The camera emulator has a green box that moves around on a checkered background. Click the shutter button (the blue circle in the middle of the footer) to take a picture.
If you get a message about the Camera has stopped working, check the AVD setup to make sure the Back Camera is Emulated.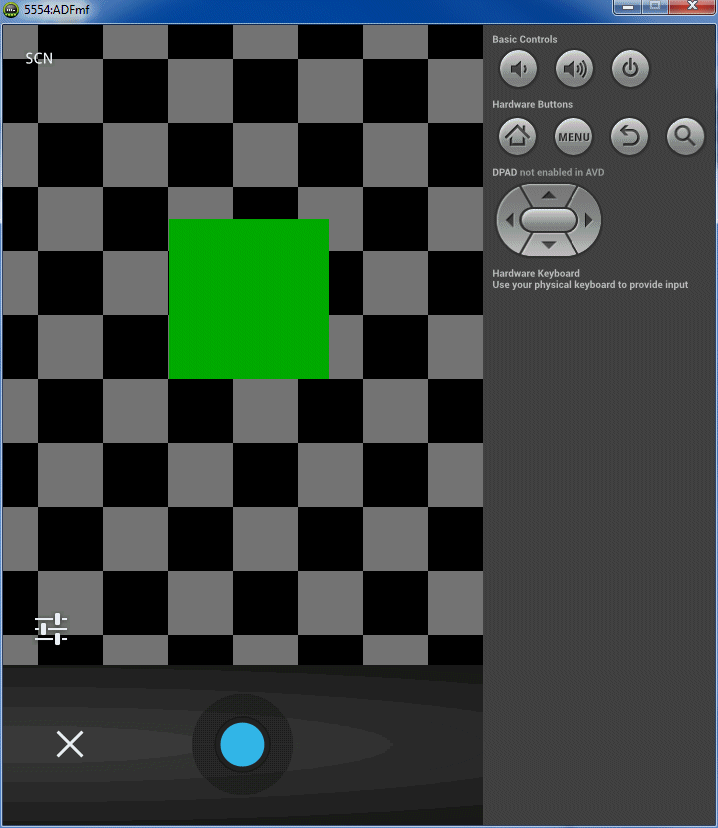
-
Click the checkmark, on the right side of the footer to accept the image.
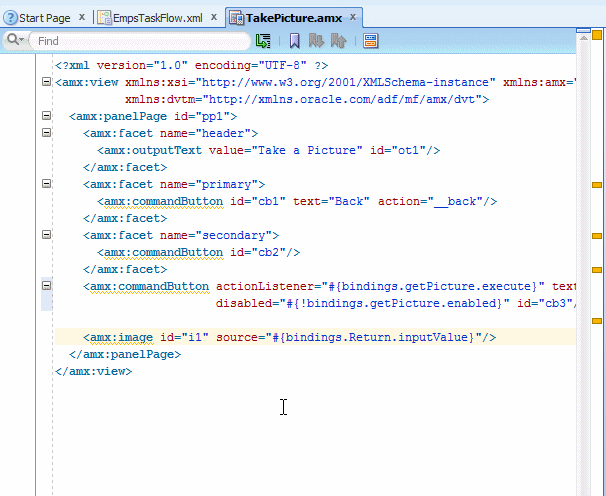
The page and code should look something like this:
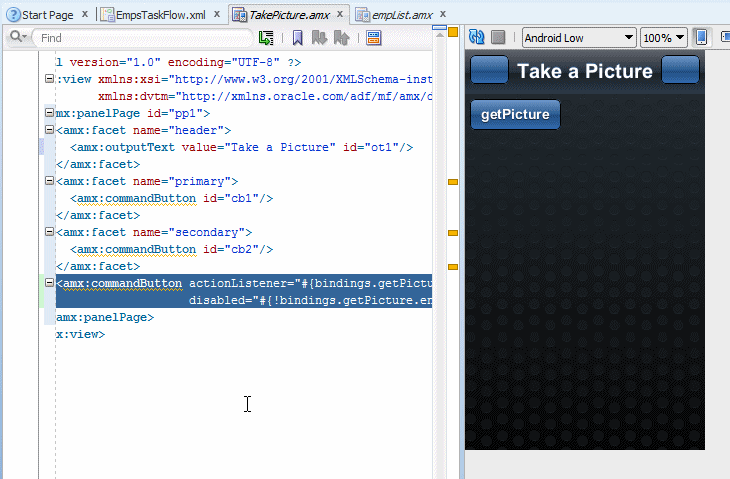
In the next few steps, you to add an output text component bound to the return of the getPicture method. As you would suspect, the return from the camera is a picture not text. We are adding the output text component for the purpose of creating the binding to the return of the method. After you add the output text component, you will add an image component and copy the binding to be the source of the image component. After you copy the binding, you will delete the text field.
The device camera closes and returns to your application. Your application then displays the picture in the image component that you added to the TakePicture page.
You have successfully used ADF Mobile to interact with a standard device feature. In the next section you add a Java program that interacts with the email feature of the device.
In this section, you expand the application by adding Java code to send email programmatically. Rather than dragging a device data control to a page, you access the device feature from Java code.
-
In JDeveloper, open the TakePicture page in the editor.
-
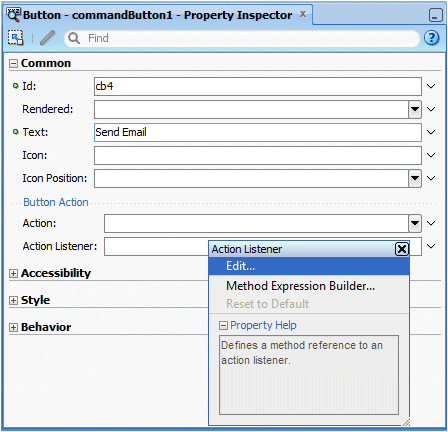
Drag a Button from the Component palette to the PanelPage. You use this button to call the method to send an email.
-
Set the Text property to Send Email.

-
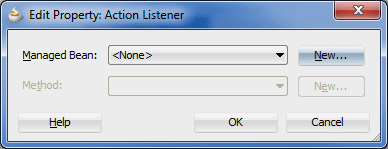
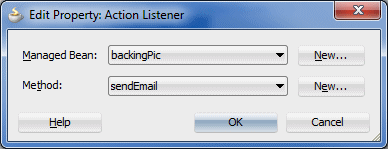
Rather than using the Device Features data control from the Data Controls palette, we will create a JavaBean to call the device feature. To create the JavaBean and method, click the down arrow to the right of the Action Listener property and select Edit.
-
In the Edit Property: Action Listener dialog box, click the New button next to the Managed Bean list.
-
In the Create Managed Bean dialog box, set the following property values and then click OK.
Name Value Bean Name: backingPic Class Name BackingPic Scope view 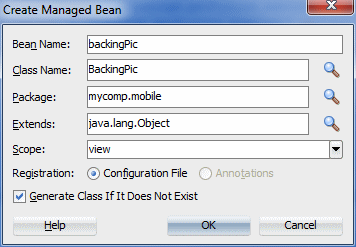
-
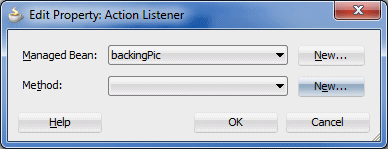
Click the New button next to the Method list to create a new method.
-
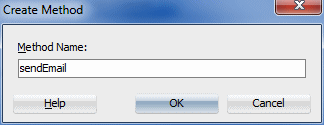
Set the Method Name to sendEmail, and then click OK.
-
Click OK to create the Java class and the method.
-
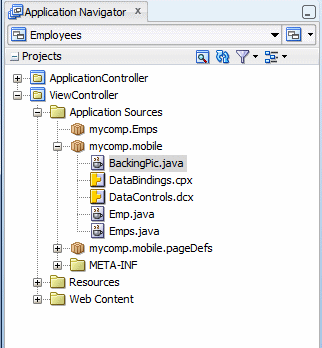
Double-click BackingPic.java in the Application Navigator to open it in the editor. (HINT: Expand Application Sources > mycomp.mobile.)
-
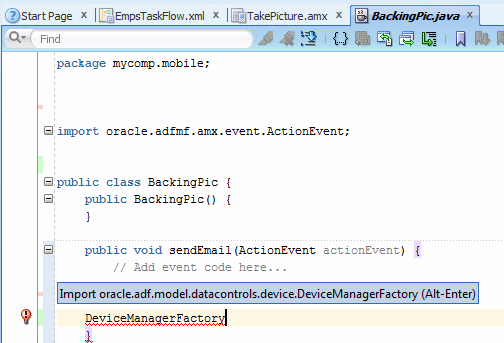
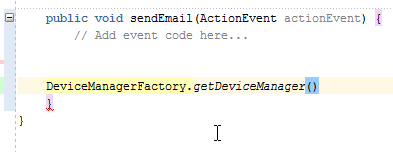
Find the sendMail(ActionEvent actionEvent) method and type the code DeviceManagerFactory inside the method. JDeveloper prompts you with a suggested import for the DeviceManagerFactory. Press Alt+Enter to add the import statement for oracle.adf.model.datacontrols.device.DeviceManagerFactory.
-
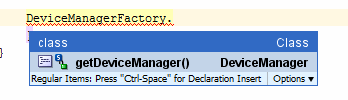
Type a period (.) at the end of DeviceManagerFactory and JDeveloper will propose a list of available methods from the class. Click getDeviceManager() and press return to add method call to your code.
-
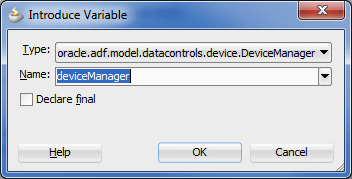
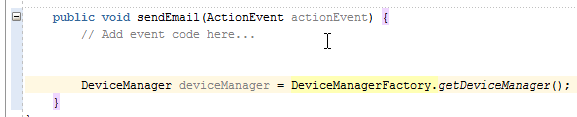
Click the getDeviceManager() method and press Ctrl+Alt+V to open the Introduce Variable dialog box. This dialog box proposes a variable and a type to add to this method. Click OK to accept the defaults.
-
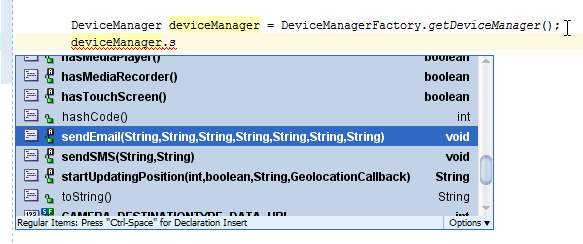
On a new line just below the deviceManager declaration, enter deviceManager.s. JDeveloper will propose a list of available methods. Choose sendMail(String,String,String,String,String,String,String) to add the method call to your code.
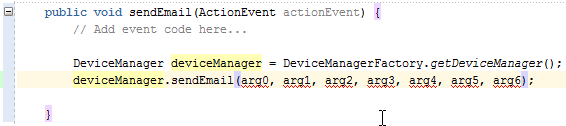
-
Notice the names of the parameters that appear in the Data Controls palette under the sendMail method. Using the list of parameters as a guide, set the values in the method call to the following:
Argument Value arg 0 (To) "Jeff @oracle.com" arg 1 (cc) "" arg 2 (subject) "An Email" arg 3 ((body) "Hello from me." arg 4 (bcc) "" arg 5 (attachments) "" arg 6 (mimeTypes) "" 
-
Save your work.
-
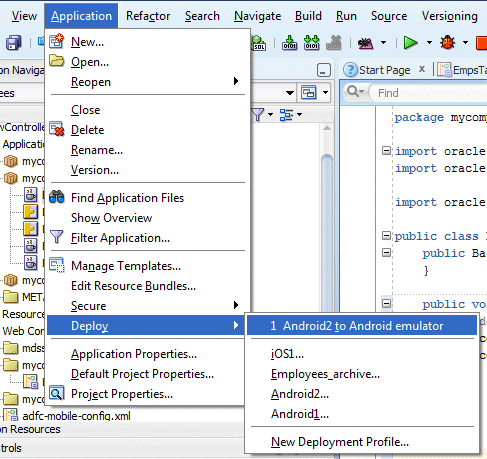
Just as you did before, deploy the application to the emulator. (HINT: Select Application > Deploy.)
-
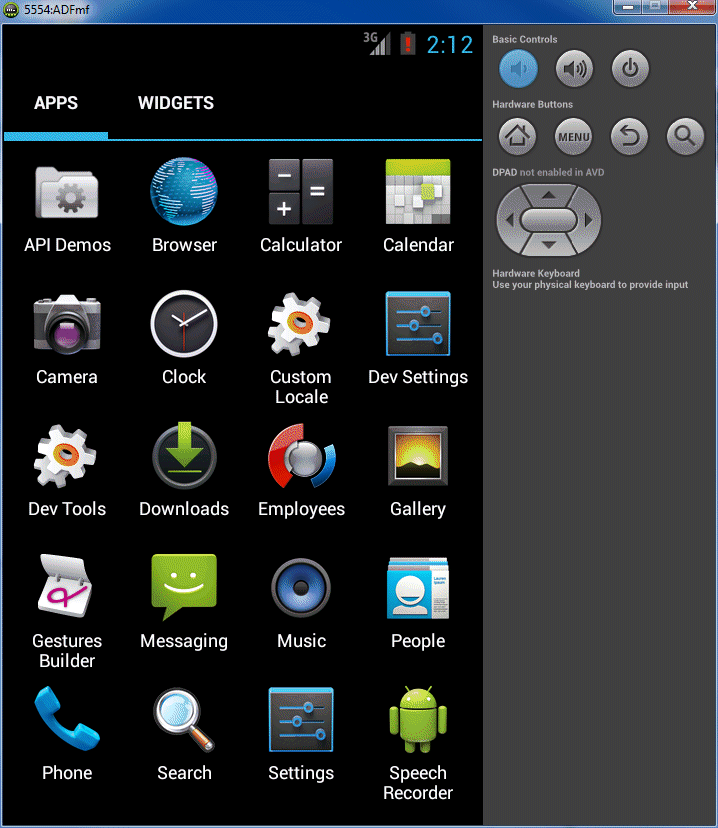
When the deployment is complete, click the Applications button on the emulator, and then click the Employees application.
-
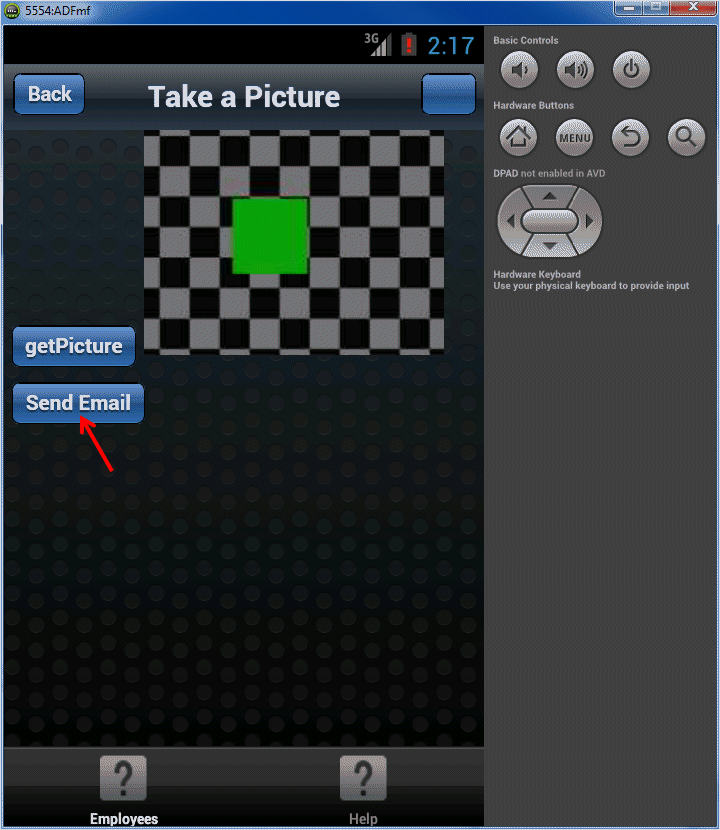
Click the Take a Picture button.
-
In the Camera feature, click the shutter button, and then click the checkmark icon to accept the picture.
-
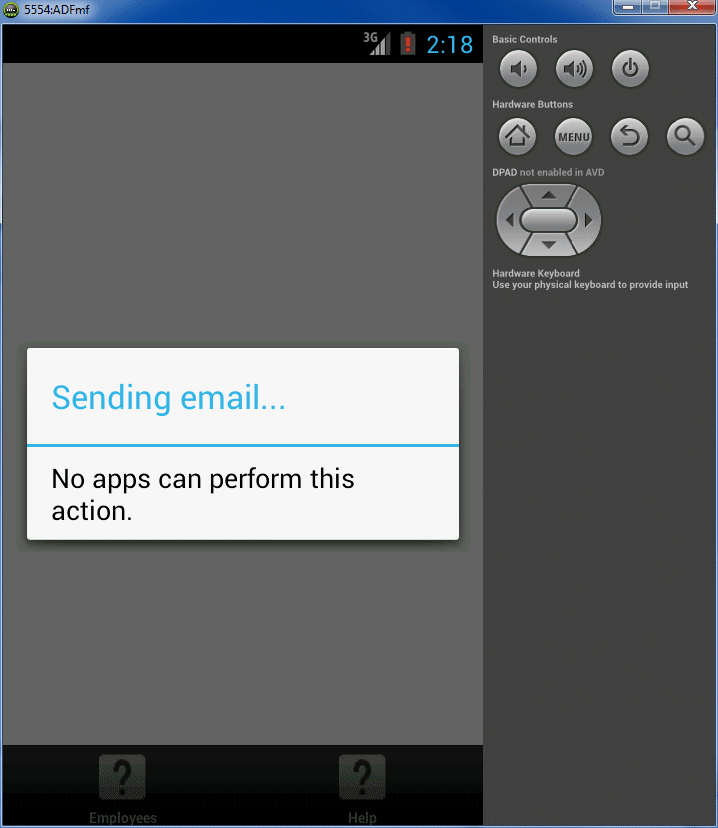
On the next page, which is the TakePicture page, click Send Email.
-
The emulator does not have an email application configured by default, so it returns an error message when it tries to send the email. If you deploy the application to a device, the application uses the installed client. If there are multiple clients installed, the application prompts you to select an email client.
In this tutorial, you created an ADF Mobile application and deployed to a mobile device or emulator. The application includes a basic form, a call to a web service and interaction with device features like the camera and an email client.

 Expand all |
Hide all
Expand all |
Hide all