 Read more...
We assume, for this tutorial, that JDeveloper 11g (11.1.2.) is installed and that you have access to an Oracle database with the hr schema created.
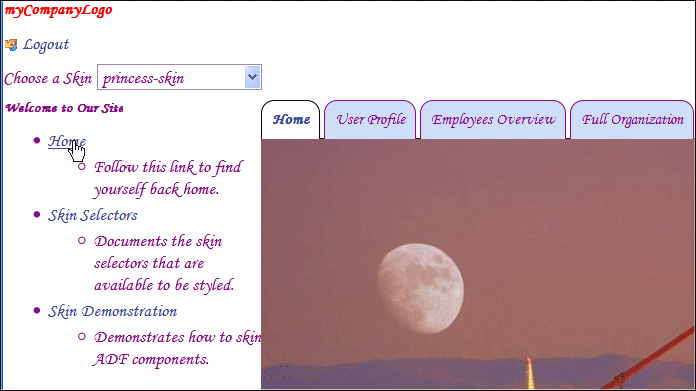
Your final application should look like the following:
-
Download the ADFSkin zip file. Right click this icon
 and
choose Save Target As... from context to download
the adfskin.zip file to a local directory of your
choice.
 -
Unzip the adfskin.zip file to a local directory of your choice (i.e. labs)
-
Start JDeveloper by selecting Start > All Programs > Oracle Fusion Middleware 11.1.2 > JDeveloper Studio 11.1.2
-
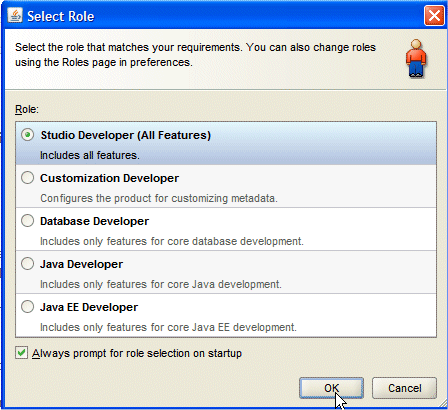
If prompted for a Role, choose Studio Developer (All Features) and click OK.
-
Close the Tip of the Day window.
-
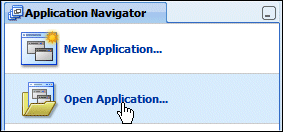
Click the Open Application link in the Application Navigator.
From the predefined application you downloaded, you create a new ADF Skin file (.css) to modify the look and feel of the sample application.
-
In the Open Application dialog, select the file C:\labs\ADFSkin\ADFSkinSample\ADFSkinSample.jws and click Open.
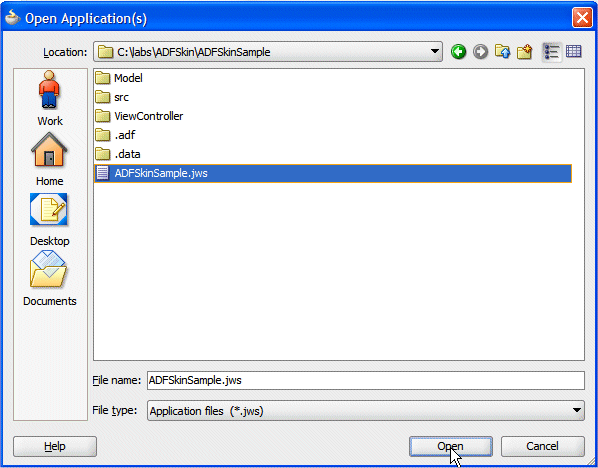
If you are prompted to migrate the project, click Yes to confirm.
-
Once the application is loaded in JDeveloper, check the database connection. Right-click the Model node and select Project Properties from context.
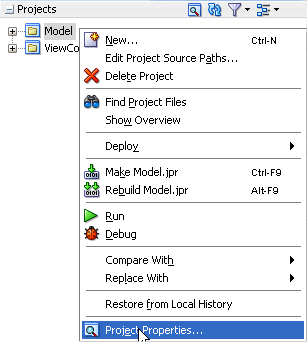
-
In the Project Properties dialog, select the Business Components and if required click Load Extension to load the appropriated library files.

-
Next to the Connection field, click the Edit icon
 .
. 
-
In the Edit Database Connection dialog, type the following values. Note that the values provided here as example may need to be modified to work with your environment.
Property Value Connection Name hrconn Username/Password hr / <your hr password> Save Password Checkbox checked Driver Thin Host Name The machine where the schema is installed (e.g. localhost) SID The database where the HR schema is installed (XE, orcl...) 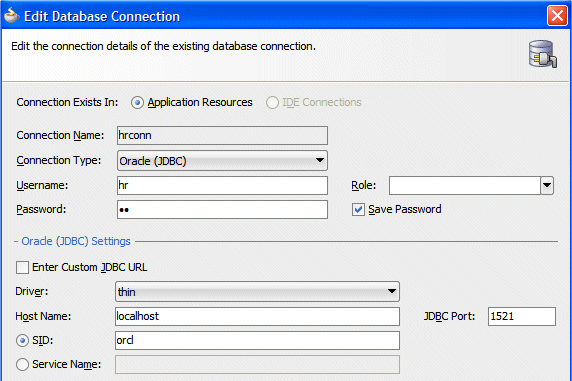
-
Click Test Connection to confirm that you can connect.
 C
C -
Expand the Model project node to review the Business Components created for this application. The Application Navigator should look like the following:
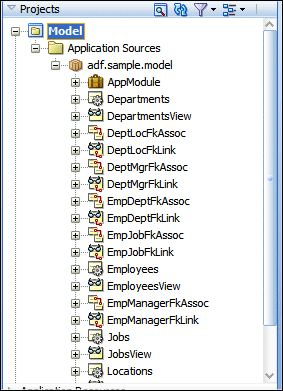
-
Now expand the ViewController node and feel free to navigate through the nodes to review the existing components.
The Application Navigator should look like the following: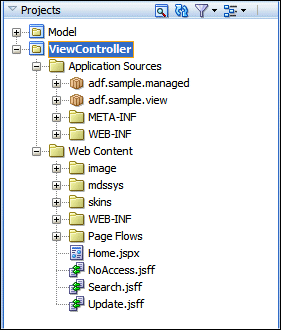
 Read more...
The very first time you open JDeveloper, the Start Page displays. You can re-invoke the Start Page later by choosing Help | Start Page.
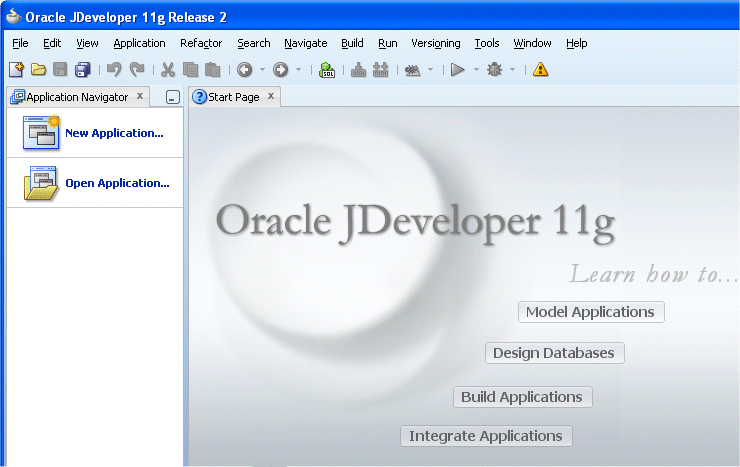
Notice the various options available to help you learn about JDeveloper. After exploring these options, click the X on the Start Page tab to close it. (the X appears when you mouse over the tab).
 Read more...A database connection has been created in the startup application, but you need to check that the values are appropriate for your environment.
 Read more...
If the connection fails, check that the parameters entered are correct and that the Oracle database and listener services are running.
The connection should also appear in the Initialize Business Components Project page.
 Read more...
Entity objects, view objects, foreign key links, foreign key associations and application module. The application module serves as the Data Control provider, allowing data bindings between your pages and the database. An application module is an ADF Business Components component that encapsulates the business service methods and UI-aware data model for a logical unit of work related to an end-user task.
Collapse the Model node.
-
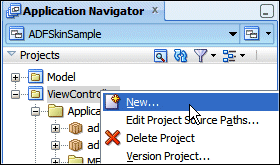
In the Application Navigator, Right-click the ViewController project and select New from the context menu.
In the New Gallery, expand the Web Tier node, select JSF/Facelets and in the right hand pane, select ADF Skin as the item.
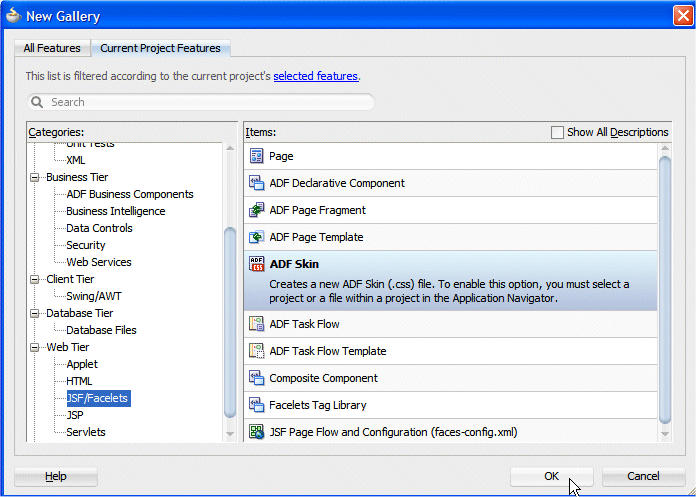
Click OK.
-
In the Create ADF Skin File dialog, change the file name to MyNewSkin.css. Append \MyNewSkin to the existing skins directory path. Check the Use as the default skin family for this project checkbox and in the Extends field choose to extend the fusionFx-simple-v2.desktop skin from the list of values.

Click OK.
-
MyNewSkin.css opens by default in the design editor with a selector tree of components that you can navigate to. When you navigate into the component, the preview will be updated with a view of that component.
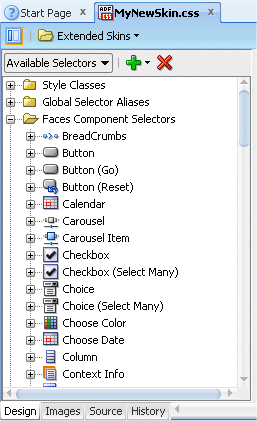
-
Scroll down in the Navigator to locate the Home.jspx entry. Right-click and select Run from context to launch the page in the Firefox browser. This verifies that your application is running and has the look and feel of the skin you have extended, which is fusionFx-simple-v2.desktop. This is because you have not yet made any changes to your skin file to override the fusionFx-simple-v2 look and feel.
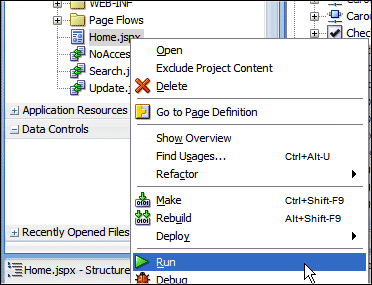 Note that after a fresh install of JDeveloper, the first time you deploy your application, you need to create a default domain for WebLogic server.
 Read more...
In the Create Default Domain dialog, type an 8 digits password of your choice and confirm it.
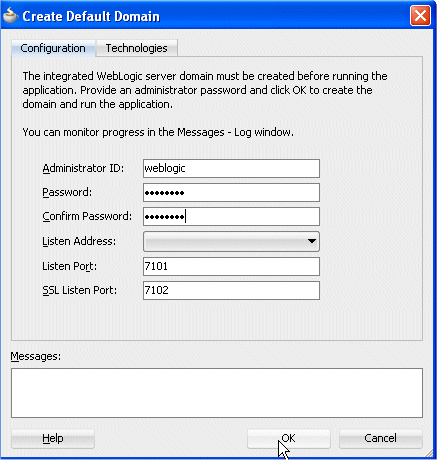
Click OK. -
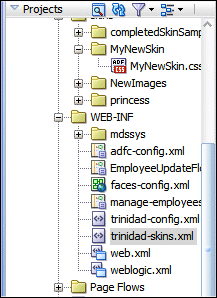
While your page is being loaded, expand the WEB-INF node and double-click trinidad-skins.xml to open it in the editor.
-
The source shows that your skin file, MyNewSkin has been added to other existing skins. These skins are registered skins and available for use by your project.
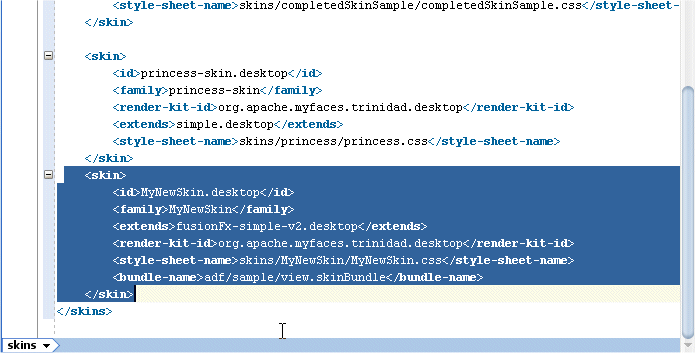
-
Double-click the trinidad-config.xml file. It shows that the current skin for your application is MyNewSkin, the skin you just created.
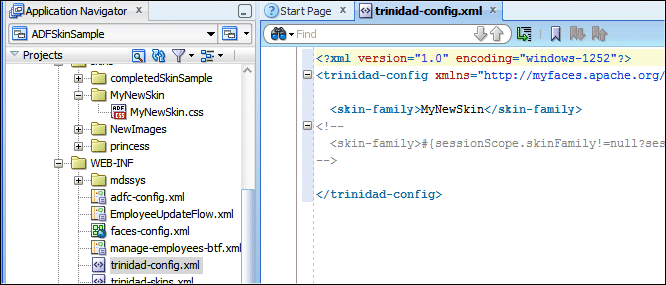
Click the cross on the right hand corner of the current tab to close the editor.
-
Switch to the Firefox window, now the Home page should be loaded in the browser.
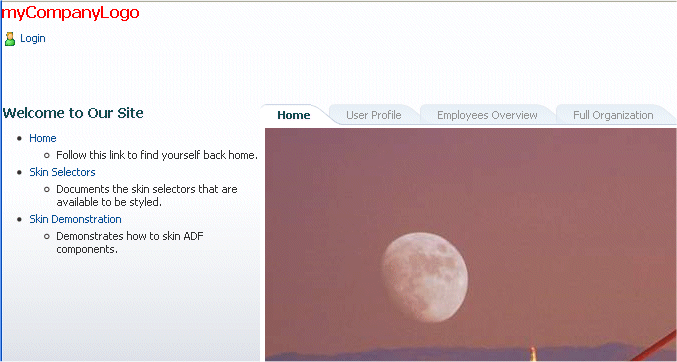
-
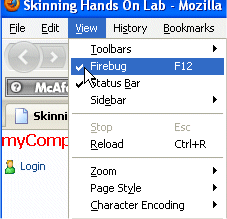
From the main menu toolbar, select View > Firebug.
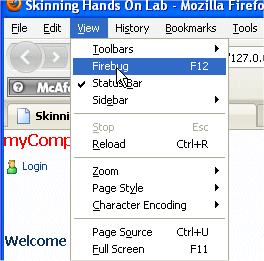
-
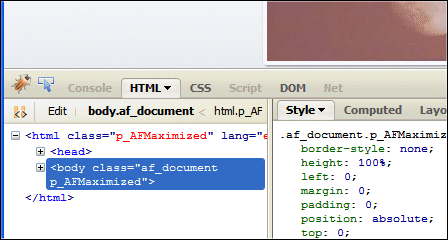
Move the Debug pane at the bottom of your page to make it visible. It should display the HTML tab by default.
-
In the right hand pane, the Style tab shows that you're using MyNewSkin . Hover over the MyNewSkin link, it displays the location of the skin file used. Confirm that it is the one you've added to your application.

-
From the main menu toolbar, re-select View > Firebug to hide the Debug pane.
-
Return to JDeveloper without closing the browser window.
 Read more...
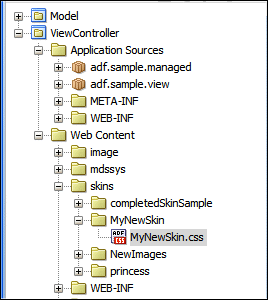
The new skin file appears in the Application Navigator under the Web Content | skins | MyNewSkin nodes.
 Read more...
The file doesn't exist by default as it is not needed when using the Oracle look and feel.
 Read more...
This can be done as a static configuration or dynamically using Expression Language. To conditionally set the value, enter an EL expression that can be evaluated to determine the skin to display. For example, if you want to use the German skin when the user's browser is set to the German locale, and to use the English skin otherwise, you would have the following entry in the trinidad-config.xml file:
<skin-family>#{facesContext.viewRoot.locale.language=='de' ? 'german' : 'english'}</skin-family>
An easy way to find the CSS class is by using a free add-on for Mozilla
Firefox called Firebug.  Read more...
Firebug is a convenient tool for web development allowing debugging,
editing, and monitoring CSS, HTML, JavaScript and Net requests in any
web page.
To install Firebug, in Firefox, select Tools | Add-ons from the Firefox menu and type firebug in the search field. (Download, install and reload firefox).
 Read more...
It uses the default fusion style since you haven't yet made any changes to MyNewSkin to extend it with new properties.
-
In the Design editor of MyNewSkin, select the Faces Component Selectors > Document > af|document entry.
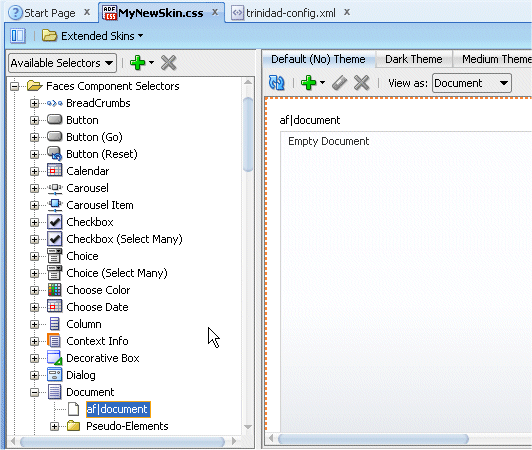
In the Property Inspector (use View | Property Inspector from the main menu if the pane is not visible), change the background color for a yellowish one. Click the down arrow at the right of the Background Color field and select Edit.
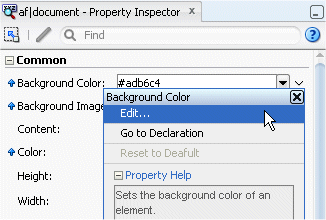
-
In the Background Color dialog, type #fcfacb in the RGB Hex filed.
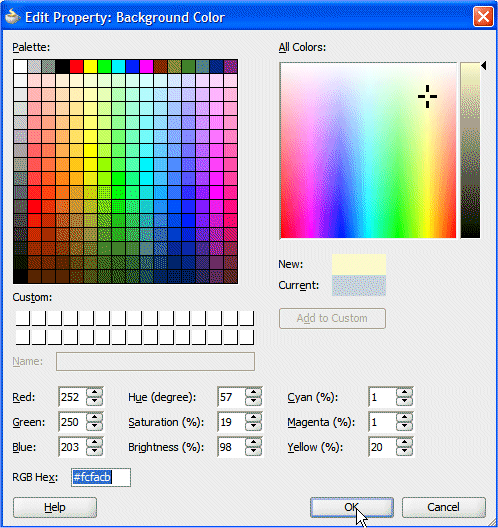
Click OK.
Using the drop down list, set the Background Image property to none.
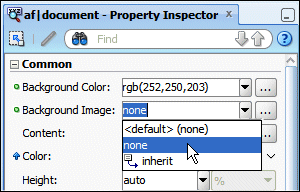
Click the Save All button
 in
the toolbar to save your work.
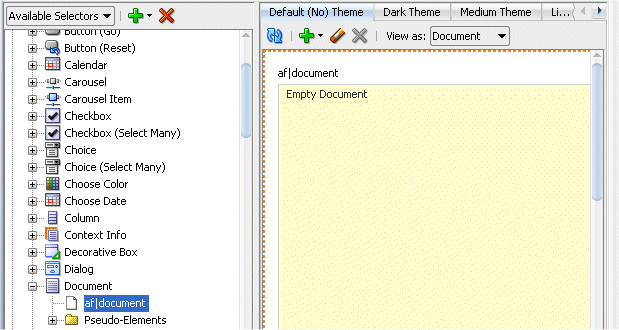
Switch to the Firefox window and reload the page.

-
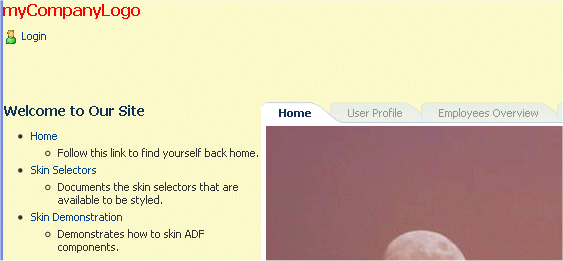
Notice the change of the background now reflected in your browser.
-
You are now going to change the font of the application text.
Without closing the browser window, switch back to JDeveloper and in the Skin editor, expand the Global Selector Aliases | Font nodes, and select the .AFDefaultFontFamily entry.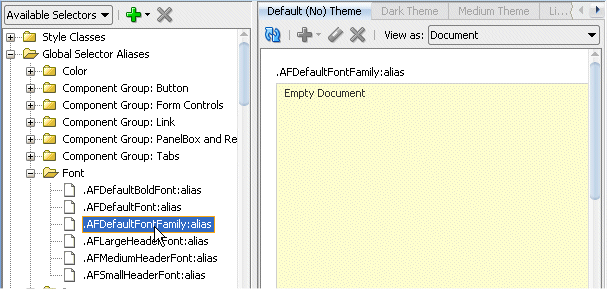
-
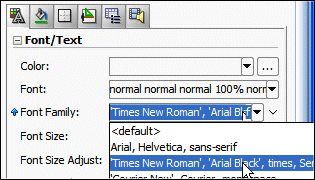
In the Property Inspector in the Font/Text section, from the drop down list on the Font Family attribute, select Times New Roman.
-
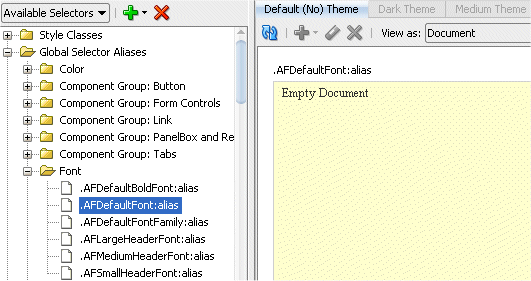
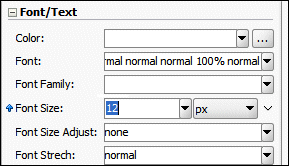
In the Navigator, select the .AFDefaultFont:alias.
-
In the Font/Text section, set the Font Size to 12 px.
-
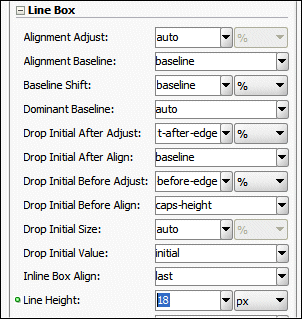
In the Line Box section, set the Line Height to 18 px.
-
Click the Save All button
 in
the toolbar to save your work.
 -
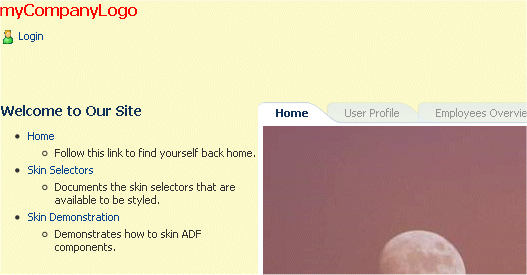
Switch to the browser window and reload the page.
-
Notice the font changes in the page.
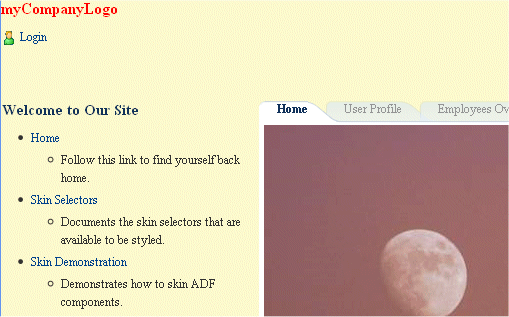
Don't close the browser window. You are now going to make changes to the look and feel of the Panel Header.
-
Switching back to JDeveloper, collapse the Global Selector Aliases node and in the Faces Component Selectors, expand the Panel Header | Pseudo-Elements nodes and update three of the components. Select the title0 node.
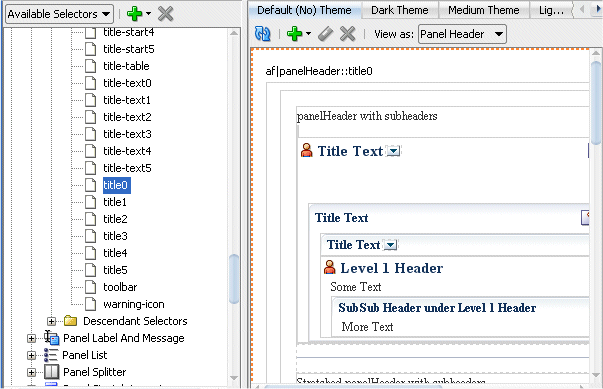
-
In the Property Inspector, for the title0 component set the Background Color to #fff27e. (Enter the value and press Return)
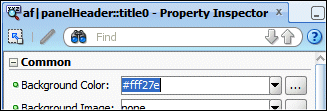
-
Set the title-text0 > Font/Text > Color component to Red.

-
Set the content0 component to the following properties:
Section Property Value Common Background Color White (from LOV) Common Border 1px solid Common Border Color #fff27e 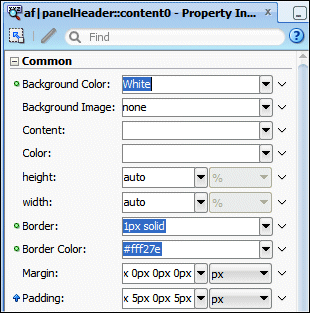
-
The new rendering in the design editor should display like this:
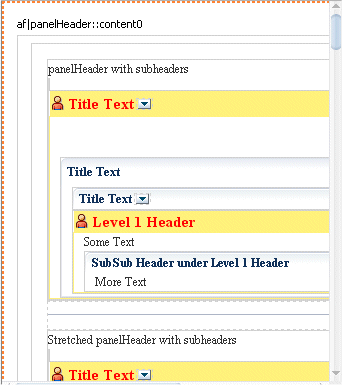
-
Click the Save All button
 in
the toolbar to save your work.
 -
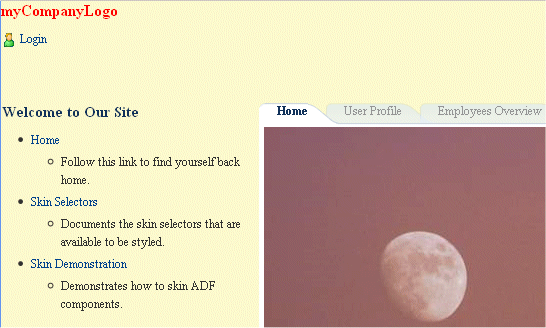
Reload the page in Firefox.
-
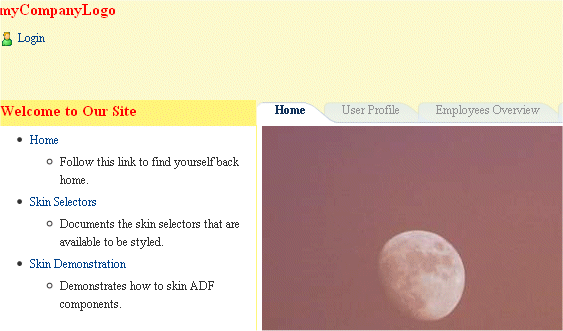
Notice the changes in the UI. Also observe that only the Home tab is selectable at the moment. You need to login to make other tabs accessible.
 Read more...
Standard selectors are those that directly represent an element that can have styles applied to it. For example, af|body represents the af:body component. You can set CSS styles, properties, and icons for this type of element.
 Read more...
You can, for example, use it to set styles for more than one component or more than one portion of a component. You can also create your own alias classes that you can then include on other selectors. For example, you can define an alias pseudo-class (.AFLabel:alias) where you define label colors for a number of form components. Subsequent changes to the alias pseudo-class impact all components referenced by the alias pseudo-class.
af|inputText::label,
af|inputChoice::label,
af|selectOneChoice::label {-tr-rule-ref: ".AFLabel:alias"}
.AFLabel:alias { color: blue }
The .AFLabel:alias pseudo-class has color set to blue, but you
can change all the component's label color to red by simply changing
.AFLabel:alias:
.AFLabel:alias {color: red}
 Read more...
Pseudo-elements are denoted by a double colon followed by the portion of the component the selector represents. For example, af|chooseDate::days-row provides the styles and properties for the appearance of the dates within the calendar grid.
-
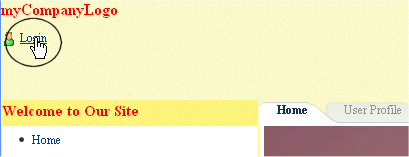
To see the current look and feel of the table headers, you need to login to the application. Click the Login link.
-
In the Login dialog, enter sking/Welcome1234. and click OK.

-
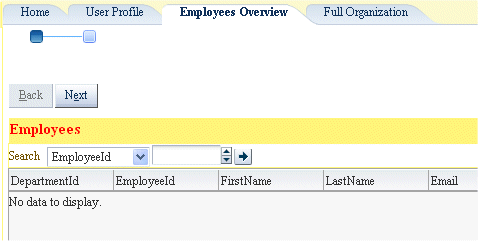
The tabs are now selectable. Click the Employees Overview tab.

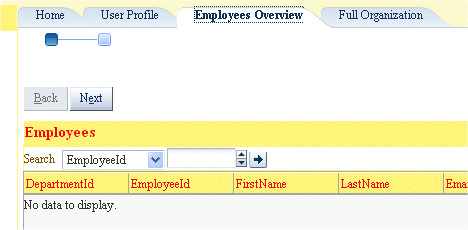
Notice the rendering of the Employees table headers.
-
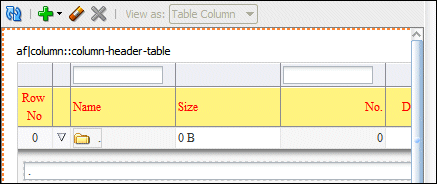
In the next few steps, you are going to change the headers of the table to yellow with red font.
Switch back to JDeveloper. In the Faces Component Selectors, collapse the PanelHeader node and expand the Column | Pseudo-Elements node and select the column-header-table entry.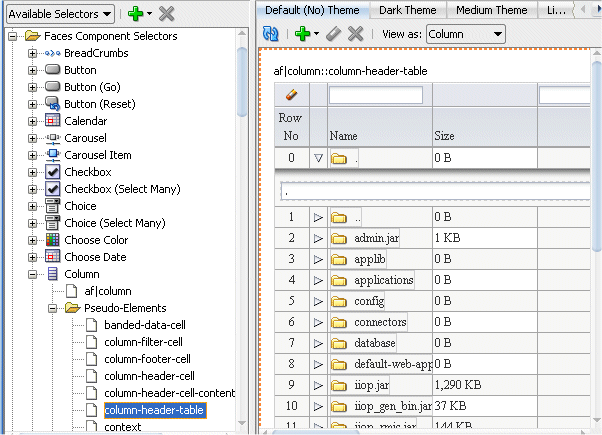
-
In the Property Inspector, in the Common section set the following properties:
Property Value Background Color #fff27e Background Image none 
In the Font/Text section set the Color attribute to Red from the drop down list.
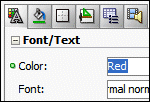
The rendering pane should look like the following:
-
Click the Save All button
 in
the toolbar to save your work.
 -
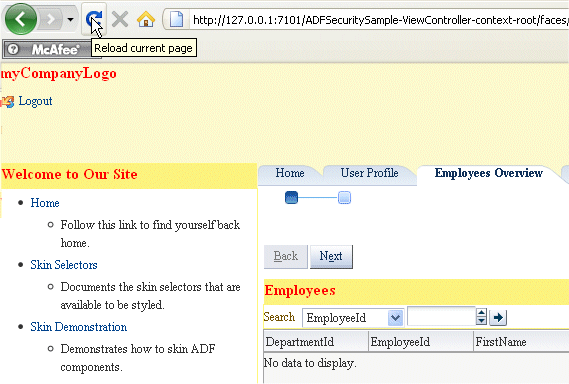
Reload the page in Firefox.
-
Click the Employees Overview tab and notice the changes in the table headers.
-
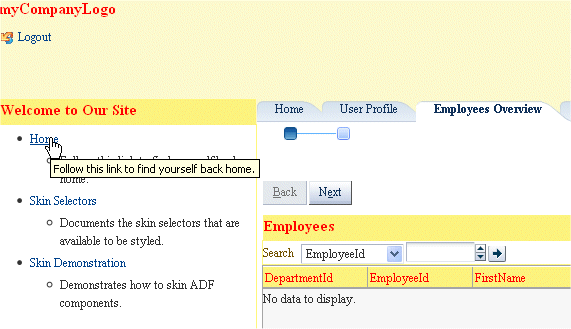
You are now going to change the look and feel of the links in the panel list. Observe the panel list under the Welcome to Our Site message. Hover your mouse over the hyperlink text, and note that then the text becomes underligned.
-
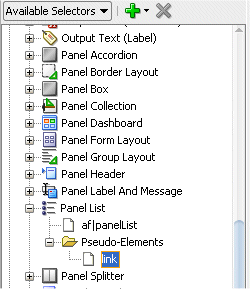
Switch back to JDeveloper, collapse the Column node and expand the Panel List > Pseudo-Elements one. Select the link entry.
-
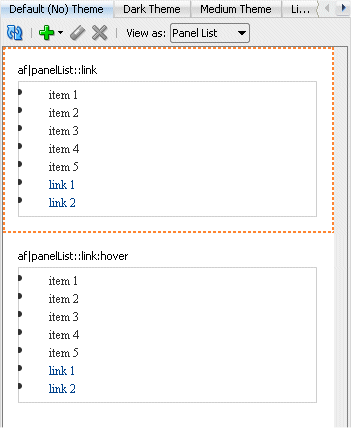
Notice the two sections in the rendering pane, the top one for link properties and the bottom one for the link hover properties.
-
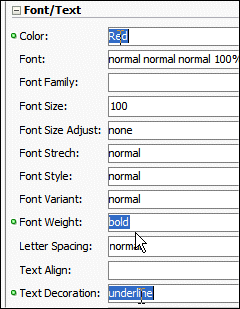
For the link properties, in the Property Inspector, in the Font/Text section, set the following properties:
Property Value Color Red (from LOV) Font Weight bold (from LOV) Text Decoration underline (from LOV) 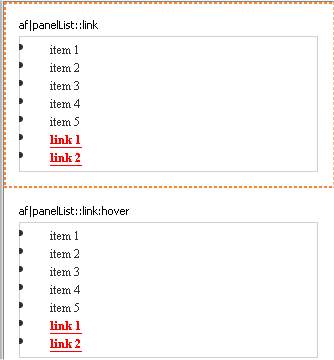
-
Click the link:hover section in the rendering pane and in the Property Inspector, in the Font/Text section, set the following properties:
Property Value Font Weight bold (from LOV) Text Decoration none (from LOV) 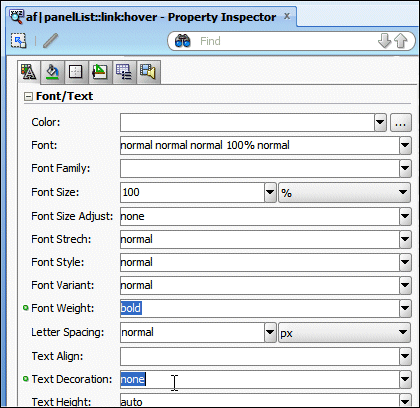
-
Click the Save All button
 in
the toolbar to save your work.
 -
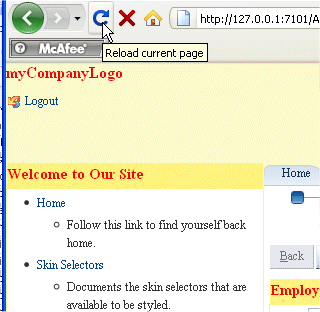
Reload the page in Firefox.
-
Observe the UI changes in the panel list. The links are now red and the underline state works the other way around when hovering over.
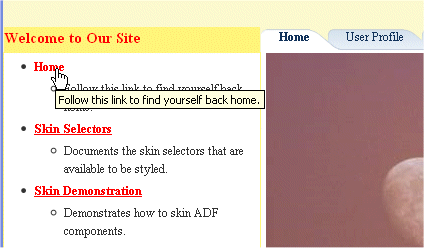
You are now going to change the look and feel of the tabs, using different images for the tab shape, and defining different fonts and colors. For this, you use image files provided with the application.
-
Don't close the browser window. Switch back to JDeveloper and collapse the Panel List node.
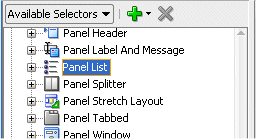
-
Navigate to the Global Selector Aliases Folder and expand the node Component Group Tabs. (NEW SCREEN)
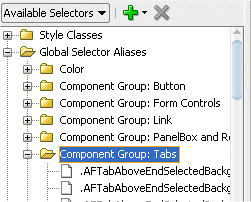
-
Select the AFTabAboveEndSelectedBackground:alias:ltr entry.
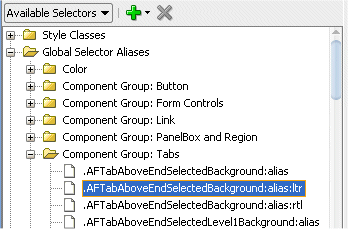
-
In the Property Inspector in the Common section, click the right-most down arrow next to the Background Image property and select Edit from context.
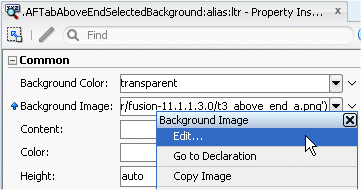
In the Edit Property dialog, navigate to skins | NewImages | af_panelTabbed where existing images are already provided and select the t3_above_end_a.png.
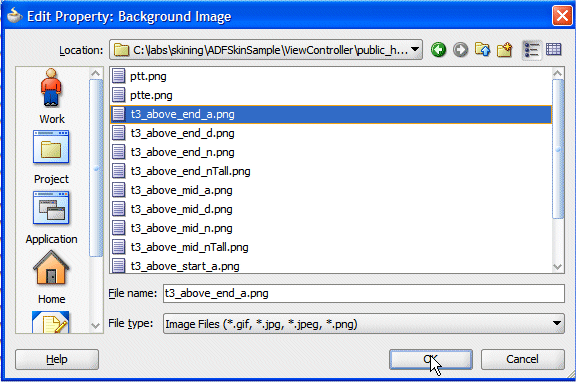
Click OK. The value should now be:
Alias component Background Image .AFTabAboveEndSelectedBackground:alias t3_above_end_a.png -
Repeat the above step for the following End tab parameters:
Alias component Background Image .AFTabAboveEndUnselectedBackground:alias:ltr t3_above_end_n.png .AFTabAboveEndUnselectedDisabledBackground:alias:ltr t3_above_end_d.png -
To populate the Middle and Start values from a prepared file, in the Application Navigator, locate the readme.txt file and double-click to open it in the source editor.

-
Select and copy all the text with the exception of the first 2 lines.
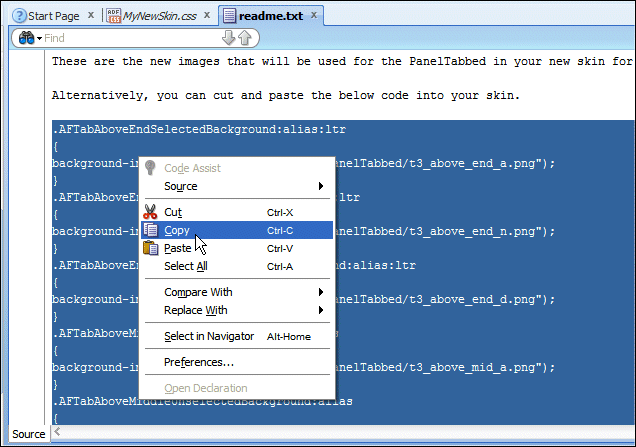
Close the readme.txt.
-
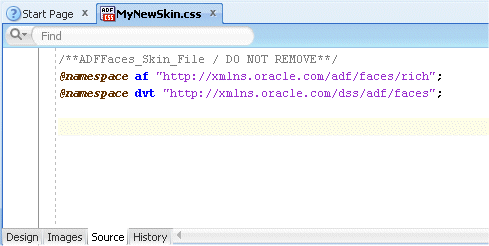
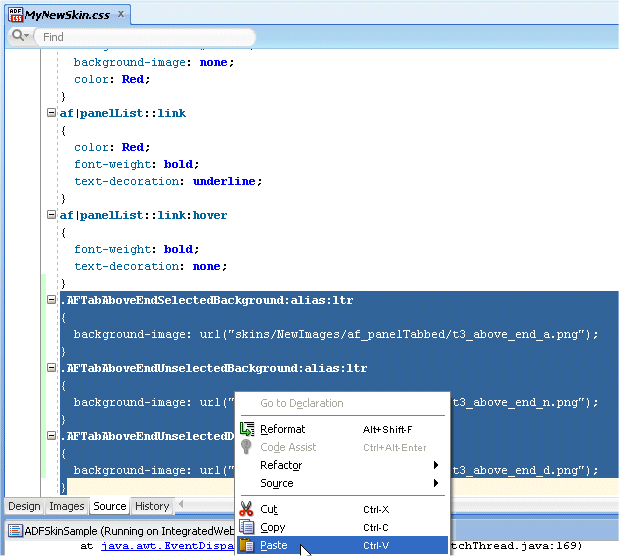
With the MyNewSkin.css file displayed, click the Source tab at the bottom of the editor pane. Scroll down at the bottom of the file to find the first image uses defined, then select all of these related component definitions. Right-click and Paste from context.
-
The clipboard text in the file to replace the selected statements.
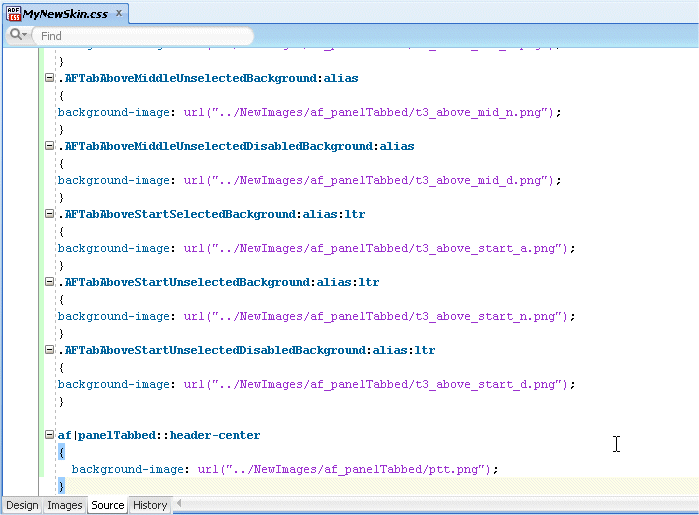
-
Click the Design tab at the bottom of the editor and select the Panel Tabbed | af|panelTabbed to see the rendering for the new tab definitions.

-
Click the Save All button
 in
the toolbar to save your work.
 -
Switch to Firefox browser window.
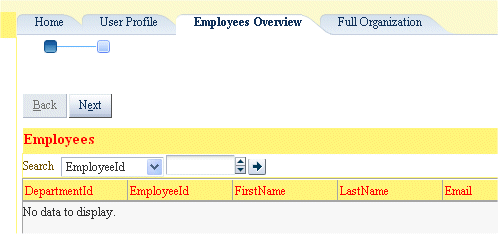
-
To be able to see the new look and feel defined for the tabs, you need to press the Ctrl key and click the reload button at the same time (In case the [Ctrl] + [Reload] action does not refresh the page, re-run the home page from JDeveloper). Observe the new rendering of your page. Click the Employees Overview tab to see the look and feel of active versus unselected tabs.
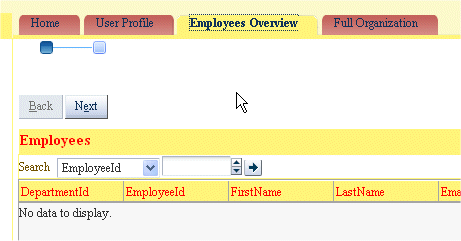
-
Switch back to JDeveloper. Now you need to update the text color of the link in the tabs to better match our styling. Navigate to the af|panelTabbed node and click the Source tab.
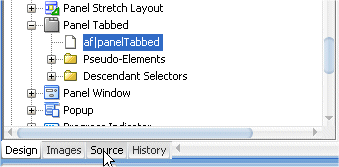
-
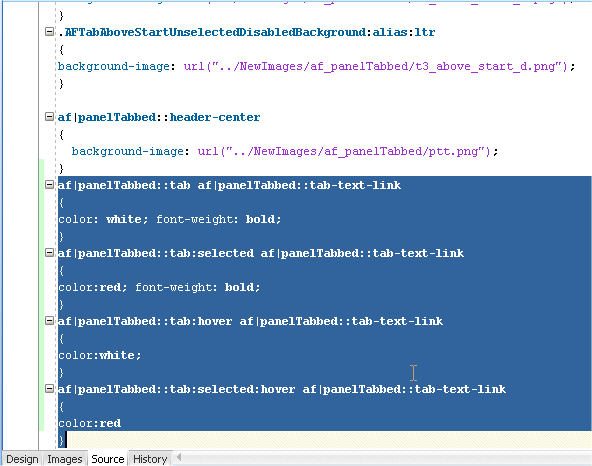
Enter the following statements at the bottom of the code to define the new tab aspect.
af|panelTabbed::header-center
{ background-image: url("../NewImages/af_panelTabbed/ptt.png"); }
af|panelTabbed::tab af|panelTabbed::tab-text-link
{ color: white; font-weight: bold; }
af|panelTabbed::tab:selected af|panelTabbed::tab-text-link { color:red; font-weight: bold; }
af|panelTabbed::tab:hover af|panelTabbed::tab-text-link { color:white; }
af|panelTabbed::tab:selected:hover af|panelTabbed::tab-text-link { color:red }
-
Click the Save All button
 in
the toolbar to save your work.
 -
Switch back to Firefox.

and reload the page.
-
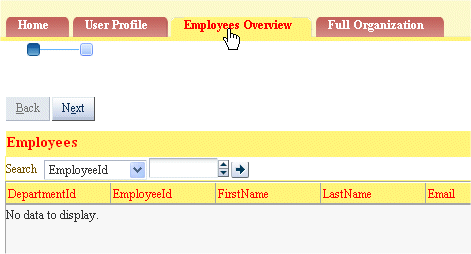
Observe the new rendering of your page. Click the Employees Overview tab to see the look and feel of active versus unselected tabs.
 Read more...
Some are for tabs located at the top (Above tabs) and others are for the tabs located at the footer (Below tabs). Each tab has a start, middle and end part. You just want to change header tabs in the application.
 Read more...
In the next action you will use a prepared file to set the Middle and the Start component values. If you don't use the file, you need to populate the following values:
| Alias component | Background Image |
|---|---|
| .AFTabAboveMiddleSelectedBackground:alias | t3_above_mid_a.png |
| .AFTabAboveMiddleUnselectedBackground:alias | t3_above_mid_n.png |
| .AFTabAboveMiddleUnselectedDisabledBackground:alias | t3_above_mid_d.png |
| .AFTabAboveStartSelectedBackground:alias:ltr | t3_above_start_a.png |
| .AFTabAboveStartUnselectedBackground:alias:ltr | t3_above_start_n.png |
| .AFTabAboveStartUnselectedDisabledBackground:alias:ltr | t3_above_start_d.png |
To be able to implement a Dynamic Skin UI change, perform the following steps:
-
For this new section, you need to re-deploy the application, so close the browser window this time and switch back to JDeveloper.
-
In the Log window, click the arrow within the Stop red icon and select ADFSkinSample to stop the running application. Notice that you don't need to stop WebLogicServer.

-
Now enable the skin drop down list so you can switch the skin dynamically. Do this by updating the trinidad-config file with the reference to the dynamic code. Select the trinidad-config file editor.
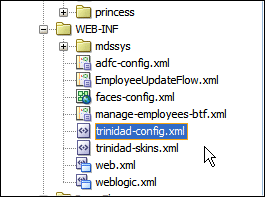
The Source looks like the following:

-
Copy the comment line of code with the skin-family tag, and paste it in place of the active skin-family MyNewSkin tag.
<skin-family>#{sessionScope.skinFamily!=null?sessionScope.skinFamily : 'fusion'}</skin-family>

-
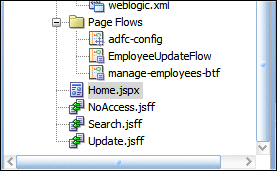
In the Application Navigator, double-click the Home.jspx entry to open the page in the Design editor.
-
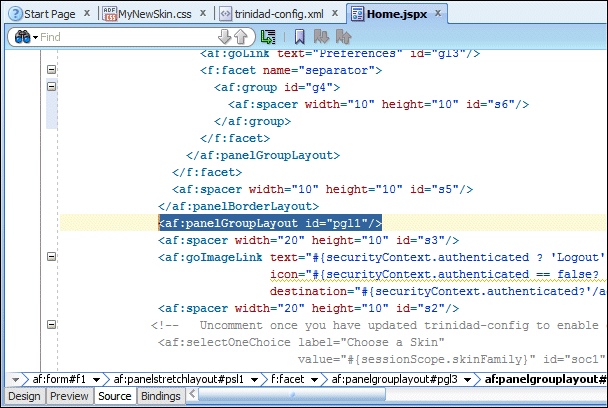
In the Design editor, click within the panel group layout component underneath myCompanyLogo. This selection highlights the corresponding component in the Structure pane.

-
Click the Source tab at the bottom of the editor pane. The panelGroupLayout should be highlighted.
-
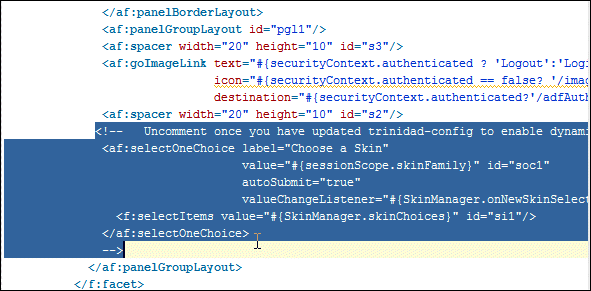
Notice the commented section.
-
Cut the end of comment tag (-->) and paste it at the end of the start comment tag line:
<!-- Uncomment once you have updated trinidad-config to enable dynamic loading of skins-->

-
Click the Save All button
 in
the toolbar to save your work.
 -
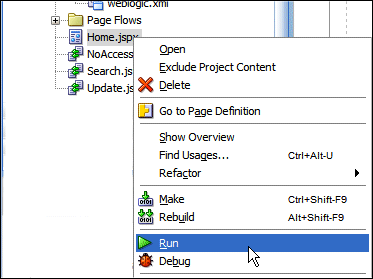
Right click the Home.jspx page and select Run to restart the page.
-
The page loads up in the browser window.
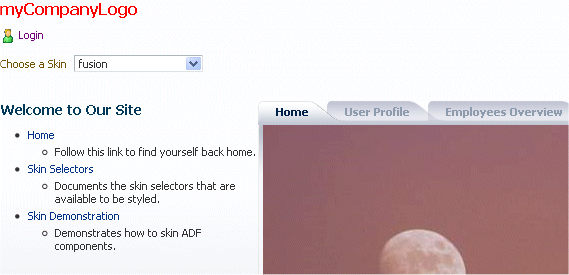
-
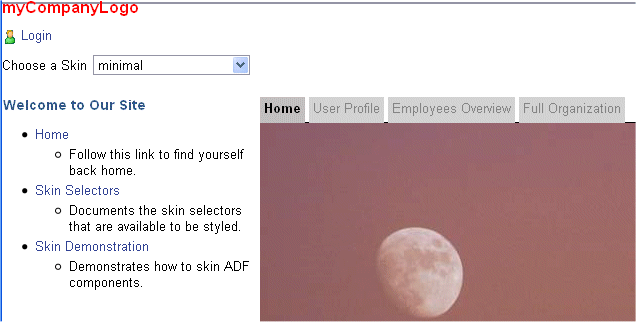
Use the Choose a Skin field and select MyNewSkin from the list of values.
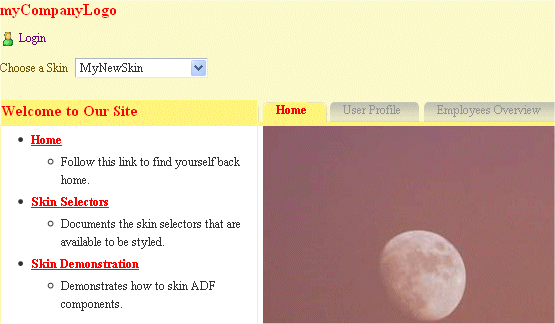
-
The new UI is dynamically changed. Use the Choose Skin field and select another Skin flavor from the list (i.e. princess-skin).
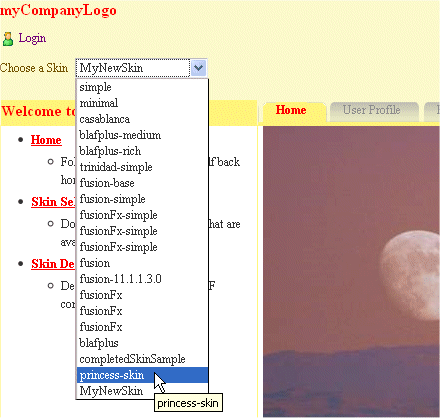
-
The UI is dynamically changed.
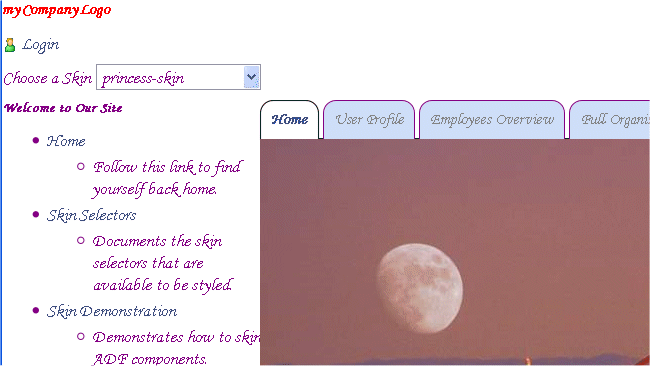
-
Experiment with other look and feel choices from the list.
-
You've now completed the skin tutorial.
- Create a new ADF Skin and check Skin values being used
- Change the page background and font family
- Update the look and feel for table headers and links
- Change the pane body and shape of tabs
- Implement dynamic skin change
- Skin Editor User's Guide for Oracle ADF
- "Customizing the Appearance Using Styles and Skins" in Web User Interface Developer's Guide for Oracle ADF
- "Creating and Managing Skins" in Developer's Guide for Oracle WebCenter
- Selectors for Skinning ADF Faces Components


