 Part 1: Starting WebLogic Server, Setting up TPC, and Versioning your Application

For anything other than a very trivial application, you will find it important to test various components of the application to ensure that they are functioning correctly. As you continue developing and changing the components, having automated tests that you can rerun after each change enables you to test that the components continue to function correctly. A generic architecture called xUnit exists for writing such automated unit tests. A specific instance of the xUnit architecture called JUnit is an open source package for developing automated unit tests in Java. This section explains how to use Oracle JDeveloper 11g to write and execute JUnit tests for testing Oracle Application Development Framework (Oracle ADF) applications.
JUnit is a program that can be used to perform unit testing of software
by writing test cases in Java.
A common use for JUnit is to create a set of unit tests that can be run automatically when changes are made to software;
in this way, developers can ensure that changes to the software they are creating do not break things that were previously
functioning. There is even a method of development known as
test-driven development (TDD)
that advocates writing unit tests even before writing the software under test itself. JUnit also provides a test runner that is
capable of running the unit tests and reporting on the success or failure of the tests.
Apache Ant is a Java-based build tool that has become a de facto standard for building Java projects. Most modern Java IDEs, including Oracle JDeveloper, support the development of Ant build files and running them from within the IDE; Ant can also be run independently of any IDE, making it useful for the use cases described above. Using Ant inside the Oracle JDeveloper IDE is simple and straightforward, because you have access to all of your project settings.
Apache Ant is a software tool for automating software build processes. It is similar to Make but is implemented using the Java language, requires the Java platform, and is best suited to building Java projects.
The most immediately noticeable difference between Ant and Make is that Ant uses XML to describe the build process and its dependencies, whereas Make uses Makefile format. By default the XML file is named build.xml.
You may have heard of another popular build tool called Maven, which is different in that it enforces a common project structure as well as providing ways to compile and build applications.
-
From the Oracle JDeveloper Help menu, choose Check for Updates.
Click Next on the Welcome page.
-
Select the Official Oracle Extensions and Updates update center, and click Next.
-
Type junit in the search box to search for the updates. Select the BC4J JUnit Integration, and click Next.
-
Agree to the license agreement and click Next. Provide your Oracle Technology Network (OTN) username and password if prompted. Oracle JDeveloper will download and install the extensions.
-
When prompted, click Finish to close the wizard.
Click Yes to allow Oracle JDeveloper to restart in order to finish installing the extensions. Answer No when asked if you want to migrate settings from a previous version.
Keeping unit tests separate from application code makes it easier for you to create deployment artifacts, such as EAR files, that do not include unnecessary files like unit tests. Therefore, it is recommended that you create a separate project to hold the unit tests.
-
After JDeveloper restarts, close the tip of the day dialog, if necessary.
-
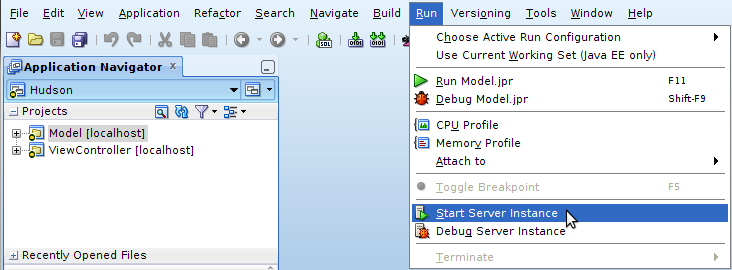
If you are continuing from Part 1, you can jump to step 5. Otherwise, from JDeveloper, run the Integrated WebLogic Server to start the TPC Server.
-
Click the Team Navigator tab and select Connect to Team Server to reconnect.
-
Deselect the SSL Connection option, and connect to the team server as mdavis/Welcome1.
-
The connected team member is now displayed in the team members list.
-
Re-open the Application Navigator. Right-click the Model node and select New.
-
Because you need to create a project that contains the libraries and deployment profile for ADF Business Components, the best, easiest, and quickest way to do that is to create a project based on the Model type template. In the New Gallery, select the General | Projects node and select ADF Model Project.
Click OK.
-
Type JUnitTests as the project name and click Next.
-
In the Configure Java Settings page, type junitTests as the default package name.
Click Finish.
-
In the Application Navigator, the new project appears.
-
In the Application Navigator, right-click the JUnitTests node and select New.
-
In the New Gallery, select the All Features tab. In the General category, select Unit Tests and choose the ADF Business Components Test Suite.
Click OK.
-
In the JUnit ADF Business Components Test Suite Wizard, notice that the test cases are being created from the Model.jpr project.
Click Next.
-
In the Summary step, you see the components that will be created.
Click Finish.
-
In the Projects panel of the Application Navigator, expand the JUnitTests nodes and look at the new classes that were created for testing purposes. JDeveloper creates the following files in the JUnitTests project:
File Purpose AllAppModuleTests.java
Test suite class
AppModuleAMFixture.java
Test fixture class that is used by all of the tests to obtain an instance of the application module so that each test does not have to create its own instance of the application module (for performance reasons) DepartmentsView1VOTest.java
DepartmentsView1VOTest.xmlUnit test class for the DepartmentsView view object EmployeesView3VOTest.java
EmployeesView3VOTest.xmlUnit test class for the EmployeesView view object 
-
Click the Save All
 icon on the JDeveloper menu bar, or select File > Save All from the main menu.
 -
In the Application Navigator, double-click the AllAppModuleTests.java file to open it in the editor. Explore the code and notice the various annotations like @BeforeClass and @AfterClass. This is where you can add your own code for tracing at the various steps of execution.
 The first thing you will notice is the use of Java 5 annotations in the code.
 Read more...
These annotations are used to indicate to JUnit which methods are unit tests (with the @Test annotation) and which methods are run @Before or @After each unit test in the class. Unlike in previous versions of JUnit, the methods do not have to follow a specific naming convention for @Test, @Before, or @After methods. One thing to note is that JUnit does not guarantee the order of calling the @Before methods, the @Test methods, or the @After methods; the only guarantee is that all @Before methods are called before each @Test method, and all @After methods are called after each @Test method.
The test class that Oracle JDeveloper generates has one test method called testAccess that attempts to get a view object instance from an application module (the application module was created by a test fixture). The test class uses a JUnit assertion to ensure that the obtained view object is not null. This is a common pattern for a unit test within JUnit: perform a test and then use one of the assert methods to verify the result. If the assertion is not true, then JUnit flags the particular unit test as failed.
You can write your own unit test for this view object to test that the Department Name attribute is being validated as required. You use the @Test annotation to tell JUnit that you expect to see a certain exception. The JUnit Tester Log will show the status of the execution. -
Open the DepartmentsView1VOTest.java file to review the code. Notice that the code contains similar annotations (@Test, @Before, @After).

To use JUnit for testing your application, you add code to the JUnit test classes that were generated, and then you run the test class for the application module. First you want to make sure that the new validation rule for the department name is checked correctly and that the test fails if the attribute violates the rule by containing fewer than 4 characters.
-
In the DepartmentsView1VOTest.java file, add your own code to verify that the validation rule is tested successfully. Replace the @Test section with the following code:
@Test public void testDepartment() {
ViewObject view = fixture1.getApplicationModule().findViewObject("DepartmentsView1"); oracle.jbo.Row r = view.createRow();
// set req attr
r.setAttribute("DepartmentId",601);
//set dep name to a 3 char string
r.setAttribute("DepartmentName","ABC");
r.validate();
} -
Right-click within the editor pane and select Reformat.
-
At this point, you can run individual tests on specific components, or you can run the test suite class to test all the components in the application module. JUnit uses the concept of a test suite to group tests together. To run the generated test suite, you use the JUnit test runner in JDeveloper. Right-click AllAppModuleTests.java and select Run to run all the tests.
-
Wait for Apache to run and for the test to be 100% complete. In the JUnit Test Runner tab of the Log window, notice the status of each step. The testDepartment error confirms that the test works. From this example, you can see that two unit tests were run (one for each VO class). The EmployeesView is successful because you did not make any changes that violated a validation rule. However, the DepartmentsView failed because you added code in the @Test annotation that violated the validation rule requiring a minimum of 4 characters for the department name. Notice that you can click an error in the log and see details about the error in the right pane.
Now you have done the first step of testing: You have tested the new validation rule and observed it failing. The next step is to change the test case so that you set the department name to a value that does not violate the validation rule. Then, you rerun the test suite to observe that all tests succeed.
-
Back in the DepartmentsView1VOTest.java file, change the ABC value to ABCD so that the value conforms to the validation rule.
-
Click the Save All
icon on the JDeveloper menu bar, or select File > Save All from the main menu. -
Right-click AllAppModuleTests.java, and select Run to run all the tests.
-
Notice the new status on each step. The whole test is successful.

In this tutorial, you want to run your tests as part of an automated approach. Therefore, you use Ant to create a script that builds and runs your tests. Later in your application design, you can use the script to deploy your complete application. In the following steps, you refine the business services by adding validation rules, formatting, and default values.
Read more...
A common approach is to use a continuous integration (CI) server that builds your code and runs unit tests each time the code is committed to the version control system.
A common way of integrating JUnit tests with such CI servers is to add Ant targets to the build process for executing the tests. The CI server can then be set up to run the unit tests as part of the build process (and usually will "fail the build" if any JUnit test fails).
-
In the Projects panel of the Application Navigator, right-click the JUnitTests project, and select New.
-
In the New Gallery, select the All Features tab. Select the General | Ant category, and then select the Buildfile from Project item.
Click OK.
-
In the Create Buildfile from Project dialog box, leave the existing file name. Because you are using an ADF application, select the Include Packaging Tasks (uses ojdeploy) check box.
Click OK.
More about the Include Packaging Tasks (uses ojdeploy) option.
Read more...
Select this option to deploy the project by using JDeveloper's deployment framework. When this option is selected, the build file will invoke the command line tool ojdeploy.
ojdeploy uses JDeveloper's deployment framework to package a project or workspace into a JAR, WAR, or EAR file.
Selecting this option also adds variables to the build.properties file to customize ojdeploy. -
In the Application Navigator, notice that two new files have been added to the Resources folder: build.xml, which specifies all the libraries that are needed to build and deploy your application by using ojdeploy, and build.properties, which specifies the location of your JDeveloper installation.
-
Double-click the build.xml file to open it in the editor.
Notice all the logical names like ${oracle.commons}. Because Ant does not run within the JDeveloper environment and cannot use all the environment information that JDeveloper uses, Ant needs to build all the variables required to run, including path locations.
-
Double-click the build.properties file, and examine how logical addresses are resolved.
For example, ${oracle.commons} resolves to a path for library locations that is relative to your JDeveloper home location. Also, the output directory points to the classes folder.
-
Re-open the build.xml file. Scroll down to find the target element named all. The all target includes the depends parameter, which allows you to specify the steps that need to be executed for the all target. The output dir indicates where the results will be logged. The deploy target specifies where the project is deployed.
-
At this point, you won't use the deploy target, so you can remove the deploy step from the depends parameter of the all target.

-
Modify the clean target so that it cleans both the current (JUnitTests) directory as well as the Model project. Add the following line to the clean target immediately below the existing fileset element:
<fileset dir="${modelproject.output.dir}" includes="**/*"/>
-
Open the build.properties file and define the path to the modelproject.output.dir by adding the following entries to the end of the file:
modelproject.name=Model
modelproject.output.dir=../${modelproject.name}/${output.dir}
-
Click the Save All
icon on the JDeveloper menu bar, or select File > Save All from the main menu. -
Right-click the build.xml node in the Application Navigator, and select Run Ant Target > all. This step tests whether Ant can find all of its environment variables and run the target test.
-
Click the Apache Ant tab at the bottom of the Log window to see the Apache Ant log. Note that the results are not run in the embedded JUnit test runner because Ant is running the tests (an Apache Ant log pane is added).
All logical references are checked and the build is successful. Therefore, you can start configuring your test.
Now that Ant is able to compile and copy, you can define your own testing target.
-
Reopen the build.xml file. The next step is to create an Ant target for running the JUnit test suite. Add the following new <target> tag syntax to the end of the file just before the </project> end tag.
<target name="allTests" description="runs JUNit tests" depends="init,clean,compile,copy">
<junit printsummary="on" fork="true" haltonfailure="no">
<classpath refid="classpath"/>
<formatter type="xml"/>
<test todir="${testresults.dir}" name="model.services.AllAppModuleTests"/>
</junit>
</target>
Note that this <target> uses the property ${testresults.dir}. This property specifies the relative path where the test reports generated by JUnit plug-in for Ant will be stored.
-
Add the following line to the build.properties file of your JUnitTests project to specify the directory name: testresults.dir=testResults.
-
Open the build.xml file. Locate the <mkdir dir="${output.dir}"/> statement in the init target, and then add the following statements immediately below the mkdir statement:
<!-- create JUNIT dir-->
<mkdir dir="${testresults.dir}"/>
-
Before you execute the task, you need to import the build file for the Model project so that you can add a dependency on compiling the Model classes before testing them. In the build.xml file of your JUnitTests project, locate the <path id="classpath"> statement, and add the following within the <path id="classpath"> tag to connect to the database:
<!-- add to default build.xml to locate .adf\META-INF\connections.xml for DB connection-->
<pathelement location="../.adf"/>
<pathelement location="../JUnitTests/classes"/>
At this point the all target will run successfully. However, when the continuous integration server checks out the files and attempts to run the test cases associated with them, the class files will not be present because they are not part of the checkout from Subversion. Thus, you must specifically copy all of the files to the output (classes) directory. You can use the copy target that is created, with one addition. In the copy target, add the following include pattern:
<include name="**/*.jpx"/>
-
Also within the copy target, add the following copy task for the Model project, so that those files are copied, too:
<copy todir="${modelproject.output.dir}">
<fileset dir="${modelproject.src.dir}">
<patternset refid="copy.patterns"/>
</fileset>
</copy>
Finally, define the modelproject.src.dir by adding the following line to the build.properties file:
modelproject.src.dir=../${modelproject.name}/src
-
Click the Save All
icon on the JDeveloper menu bar, or select File > Save All from the main menu. -
Now you are ready to run the allTests target. In the Application Navigator, right-click the build.xml node and select Run Ant Target > allTests.
-
In the Apache Ant tab, verify that the results mirror those in the JUnit test runner. You can change the test to see a different result.
No error is reported. The test is successful.
-
In the build.xml file, add allTests as a dependent step of the all target test, so that the file looks like the following:
<target name="all" description="Build the project" depends="init, clean, compile, allTests"/>
-
Click the Save All
icon on the JDeveloper menu bar, or select File > Save All from the main menu. -
Right-click the build.xml entry and select the Run Ant Target > all option.
-
Verify that the test executed successfully.
-
Now that JUnit and Ant are configured, you can version all the new files to the repository. To version the new project and the included files, in the Projects panel of the Application Navigator, right-click JUnitTests, and select Versioning > Pending Changes.
-
The Pending Changes tab displays all the files that need to be committed to the Subversion repository.
-
In the Candidates tab, select all the files and click the Add
 icon to move the files from candidates to outgoing.
Click the Outgoing tab to display the files to commit to the repository.
-
Multi-select all the rows. Right-click and select Commit Working Copy.
-
In the Commit Working Copy dialog box, type Junit/Ant Project as a comment, and click OK to validate.
-
All the files are now committed to the repository.
Now you want to automate the running of this script. You use a continuous integration server (Hudson) to build and run your complete script by pulling the code from your Subversion Source Control Management (SCM) repository. Because the JUnitTests project is versioned, Hudson will pull the code from the repository.