To Install the Software on the Screen
Note -
In this procedure, you need the Administration Station's certificate ID (MKID) from "To Install a Self-Generated Certificate" or an issued certificate diskette.
-
On the Screen, open a terminal window and become root.
-
Insert the SunScreen CD-ROM into the Screen's CD-ROM drive.
A File Manager window appears listing the CD contents.
-
After the install wizard's Welcome window appears, click Next to continue.
-
Proceed through the installation windows accepting the default choices.
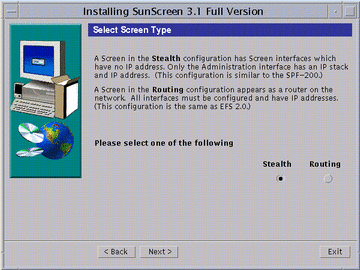
When the Select Screen Type window appears, you are given the choice of Stealth or Routing with Routing as the default. Change the choice to Stealth (as shown in the following figure).
Figure 5-1 Select Screen Type Window
-
Select Stealth and click Next.
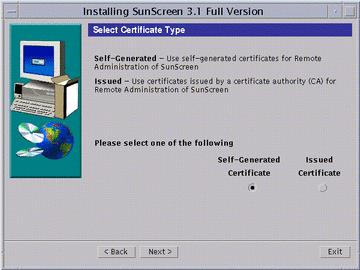
Continue to click Next to continue the installation accepting the defaults until the Select Certificate Type window appears (as shown in the following figure), you have to make a choice whether you are going to use self-generated certificates or issued certificates. Self-generated certificate is the default.
Figure 5-2 Select Certificate Type Window
-
If you are using self-generated certificates, follow instructions a-i through iii then go to Step 8. If you are using issued certificates, follow instructions b-i through iv then go to Step 8.
-
Self-Generated Certificate only:
Accept the default (Self-Generated Certificate) and click Next.
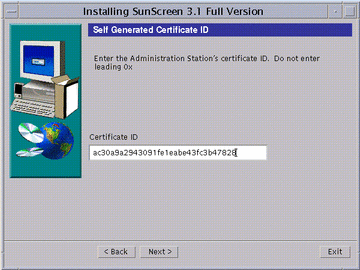
The Self-Generated Certificate ID window appear (as shown in the following figure).
Figure 5-3 Self Generated Certificate ID Window
Self-Generated Certificate only:
-
Type the Administration Station's 32-character certificate ID (MKID), obtained in "To Install a Self-Generated Certificate." Do not type the leading two characters: 0x. After you type the ID, click Next.
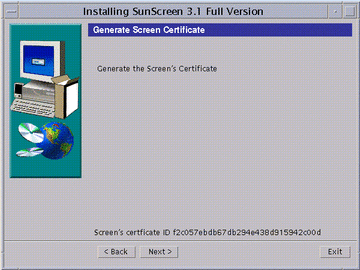
The Generate Screen Certificate window appears. Wait while the Screen's certificate ID is generated. When completed, the Screen's 32-character certificate ID appears at the bottom of the window, as shown in the following figure.
Figure 5-4 Generate Screen Certificate Window With Screen's Certificate ID
-
Write down the Screen's 32-character certificate ID (MKID) that appears at the bottom of the window.
-
Go to Step 8.
-
-
Issued Certificate only:
From the Select Certificate Type window, select Issued Certificate and click Next.
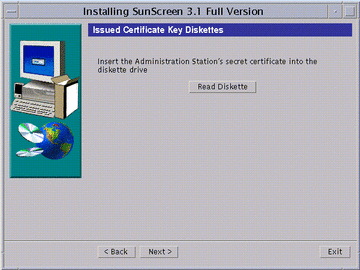
The Issued Certificate Key Diskettes window next appears (as shown in the following figure).
Figure 5-5 Issued Certificate Key Diskettes Window
-
Insert the Administration Station's Key and Certificate diskette and click Read Diskette.
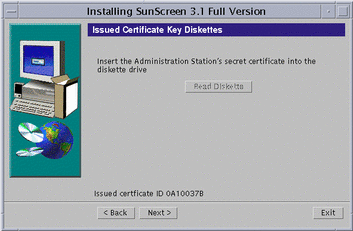
Wait until the issued certificate ID appears at the bottom of the window, as shown in the following figure.
Figure 5-6 Issued Certificate Key Diskettes Window With Issued Certificate ID
-
Write down the Administration Station's eight-character certificate ID, and click Next.
The Issued Certificate Key Diskettes window re-appears, and prompts you to use the Screen's certificate ID diskette.
-
Insert the Screen's certificate ID diskette into the diskette drive and click Read Diskette.
The issued certificate ID for the Screen appears at the bottom of the window.
-
Write down the Screen's eight-character certificate ID then go to Step 8.
-
-
-
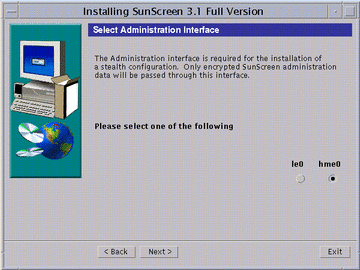
Click Next, the Select Administrative Interface window appears.
This window (as shown in the following figure) lets you select the interface that will use SKIP to communicate with the remote Administration Station.
Note -The interfaces shown are already plumbed with IP and cannot be used as stealth interfaces. You configure your stealth interfaces after you complete the software installation.
The other interfaces not selected for administration do not have Screen modules pushed onto them and as a result are left unprotected after installation. One of your first tasks should be to configure these interfaces and remove this potential vulnerability.
Figure 5-7 Select Administrative Interface Window
-
Select an administrative interface and click Next.
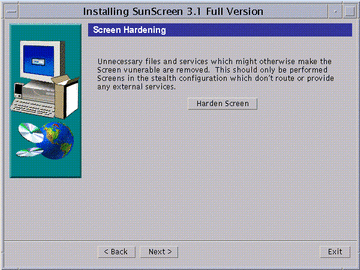
After the interface configures, the Screen Hardening window appears (as shown in the following figure).
Figure 5-8 Optional Screen Hardening Window
 Caution -
 Hardening is optional and if chosen, is an automated removal of Solaris files and packages that might otherwise make the Screen vulnerable to an attack. Once you have hardened your Screen, it becomes a dedicated firewall and the machine cannot be used for another purpose without first reinstalling the Solaris operating environment.
-
To finish without hardening your Screen, click Next. Optionally, to harden your Screen, click the Harden Screen button then click Next.
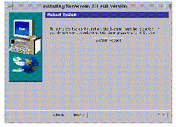
The Reboot System window appears (as shown in the following figure).
Figure 5-9 Reboot System Window
-
Click the System Reboot button to finish the installation.
The installation wizard disappears.
Note -You must reboot the machine at this time in order to complete the installation process. If you wish to delay rebooting your machine, click Next instead of System Reboot. An Installation Summary window appears from which you can exit the installation.
- © 2010, Oracle Corporation and/or its affiliates
