Adding a Boot Actor With Ews
The ChorusOS configuration tools enable configuration of the system image with user provided actors (which may be user or supervisor actors). After the system has initialized, it starts the actors automatically and creates a main thread for each of them. These actors are often referred to as boot actors.
There are two stages in adding a boot actor to the system image:
-
Specify the characteristics of the new actor.
Open the Applications folder in the ChorusOS System Image Configuration folder. A newly-created System Image Configuration folder contains two templates for defining actors, one for user actors (user_actor), and one for supervisor actors (supervisor_actor). To create your actor definition, either modify or duplicate one of these templates, or choose New Actor from the context menu of the Applications folder:
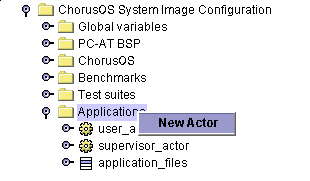
A new actor called my_actor is created. Click on the handle icon to the left of the actor, or double-click on my_actor itself, to reveal a list of fields or children:
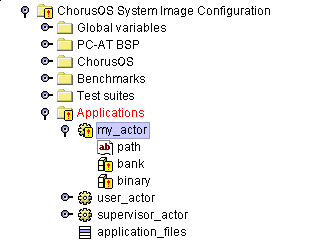
Invalid elements are indicated by an exclamation mark (!) on top of the icon. The new actor is invalid because its field values are empty. Double-click on the path field to open the Properties Inspector window within the Multiple Document Interface (MDI):
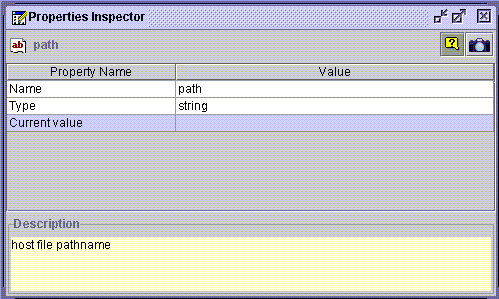
Enter the absolute pathname of the actor by double-clicking in the Value field of the Current Value property. For example:
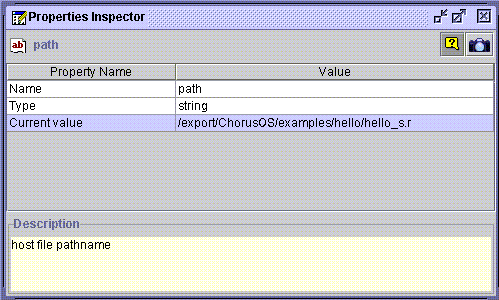
Now, double-click on the bank property to open up its Properties Inspector window, then double-click in the Value field of the Reference property. An ellipsis (...) is displayed in the right of the field:
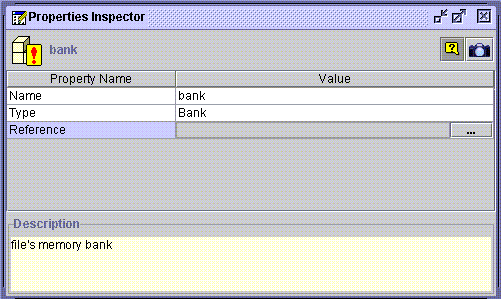
Click on the ellipsis to open the reference selecting window, Select a reference window:
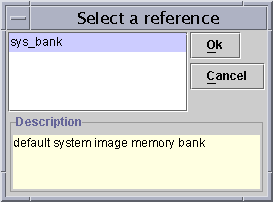
Click on the required reference, sys_bank, then click Ok.
Now, double-click on the binary property and perform the same actions as those performed when setting the bank property.
-
Add the actor to the list of application files present in the system image.
The application_files list in the ChorusOS System Image Configuration folder contains references to the actors that will be present in the ChorusOS operating system image. If an actor is defined but not referenced in this list, it will not be added to the image. Add your actor to this list by choosing New element from its context menu:
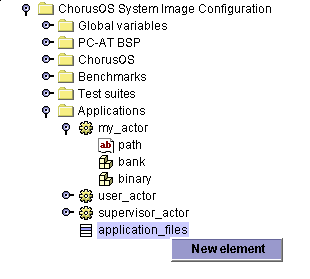
An empty element is displayed:
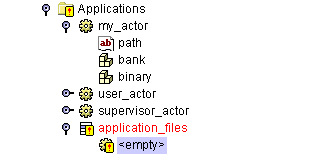
Update the new element by opening it in the Properties Inspector and changing the Value field of the Reference property. Scroll down and select your newly defined actor (my_actor in this example), from the opened Select a reference window:
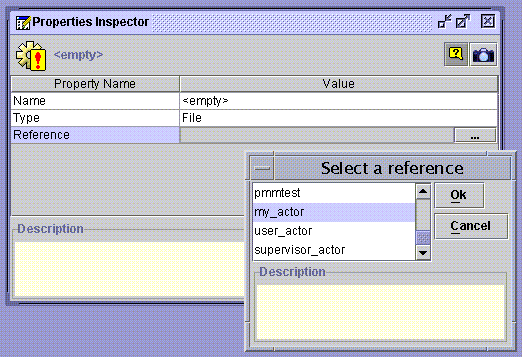
Click Ok to complete the operation.
Note -
Applications that are device drives can be added using the same method.
After a configuration has been edited it must be saved. To do this, select the ChorusOS configuration item from the navigation tree (the root element of a configuration), and use its context menu. It is also possible to save the configuration using the Save option in the File menu on the main menu bar, or the Save button on the toolbar.
Note -
A modified configuration that is displayed in red indicates the file has been changed.
The new actor has now been added and you are ready to rebuild the system image.
- © 2010, Oracle Corporation and/or its affiliates
