How to Replace a StorEdge MultiPack Enclosure
Use this procedure to replace a StorEdge MultiPack enclosure. This procedure assumes that you want to retain the disk drives in the enclosure you want to replace and retain the references to these same disk drives.
If you want to replace your disk drives, see "How to Replace a StorEdge MultiPack Disk Drive".
-
If possible, back up the metadevices or volumes that reside in the disk array.
For more information, see your Solstice DiskSuite or VERITAS Volume Manager documentation.
-
Perform volume management administration to remove the disk array from the configuration.
For more information, see your Solstice DiskSuite or VERITAS Volume Manager documentation.
-
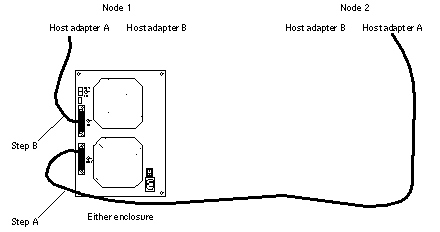
Disconnect the SCSI cables from the enclosure, removing them in the order shown in Figure 4-4.
Figure 4-4 Disconnecting the SCSI cables

-
Power off, and disconnect the enclosure from the AC power source.
For more information, see the documentation that shipped with your enclosure and the labels inside the lid of the enclosure.
-
Connect the new enclosure to an AC power source.
Refer to the documentation that shipped with the enclosure as well as the labels inside the lid of the enclosure.
-
Connect the SCSI cables to the new enclosure by reversing the steps shown in Figure 4-4.
-
Move the disk drives one at time from the old enclosure to the same slot in the new enclosure.
-
Power on the enclosure.
-
On all nodes attached to the enclosure, run the devfsadm(1M) command.
# devfsadm
-
One at a time, shut down and reboot the nodes connected to the enclosure.
# scswitch -S -h nodename
# shutdown -y -g 0 -i 6
For more information on shutdown(1M), see Sun Cluster 3.0 System Administration Guide.
-
Perform volume management administration to add the disk array to the configuration.
For more information, see your Solstice DiskSuite or VERITAS Volume Manager documentation.
- © 2010, Oracle Corporation and/or its affiliates
