 How to Manually Add a Printer by Using the OpenSolaris
Print Manager
Use this procedure to manually add a new printer queue for a local or a network printer, if for some reason, the printer is not auto-discovered.
-
From the Printer Menu, choose Add Printer Queue.
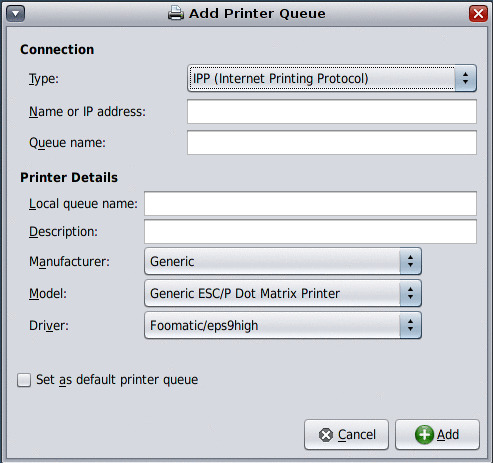
The Add Printer Queue dialog opens.

-
To configure the new printer queue, enter all the appropriate information for the printer in the dialog:
-
In the Connection section of the dialog, select the connection type from the drop-down menu.
If you are adding a local printer queue, the connection type is Local Device.
-
Enter the name or IP address of the print server. (Applies to network printer queues only)
Note –For local printer queues, no print server or IP address is required.
-
-
In the Printer Details section of the dialog, enter all the appropriate information.
-
To set the printer as the default, select the Set Printer as Default checkbox.
-
To add the printer queue, click Add.
The new printer queue is displayed in the Queue pane of the Print Manager window.
-
(Optional) To print a test page, click the Print Test Page button.
- © 2010, Oracle Corporation and/or its affiliates
