How to Use OpenBoot Diagnostics (OBDiag)
When you turn on the system power, OBDiag runs automatically if any of the following conditions apply:
-
The OpenBoot PROM variable diag-switch? is set to true.
-
You hold down the keyboard's Stop and D keys as you power on the system.
-
You power on the system by turning the front panel keyswitch to the Diagnostics position.
In the event of an automatic system reset, POST diagnostics run under either of the following conditions:
-
The diag-switch? variable is set to true and the diag-trigger variable is set to error-reset or soft-reset.
-
The front panel keyswitch is in the Diagnostics position and the diag-trigger variable is set to error-reset or soft-reset.
For information about the various keyswitch positions, see "About the Status and Control Panel".
OBDiag tests run automatically, without operator intervention, under the conditions described above. However, you can also run OBDiag in an interactive mode and select which tests you want to perform. The following procedure describes how to run OBDiag interactively from the system ok prompt.
What to Do
Note -
Perform this procedure with the power on and the keyswitch in the Power-on position.
-
With the keyswitch in the Power-on position, press the Break key on your alphanumeric terminal's keyboard, or enter the Stop-a sequence on a Sun keyboard.
To enter the Stop-a sequence, press the Stop key and the a key simultaneously. The ok prompt is displayed.
-
(Optional) Select a diagnostic level.
Four different levels of diagnostic testing are available for OBDiag; see "How to Set the Diagnostic Level for POST and OBDiag".
-
(Optional) Select a diagnostic target.
You can choose to run OBDiag with or without external loopback tests by using the OpenBoot PROM variable diag-targets. For more information, see "OBDiag Configuration Variables".
-
Enter obdiag at the ok prompt:
ok obdiag
-
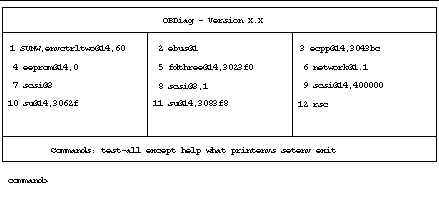
When the OBDiag menu appears, enter the appropriate command and test name/number at the command prompt.
For command usage and descriptions, see "OBDiag Commands".
Figure 12-3

Note -For more information about OBDiag tests, see "About OpenBoot Diagnostics (OBDiag)".
- © 2010, Oracle Corporation and/or its affiliates
