Enterprise 6500/5500 Tape or CD-ROM Drive
To remove and replace an existing device, perform steps 1 through 5. To install a tape device for the first time, proceed to step 6.
To prevent breakage, do not grasp the panel by the bottom edge.
-
Remove the key from the key switch.
-
Remove the top panel.
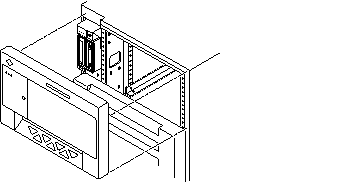
Grasp the panel on both sides at the top and pull to disengage the ball studs (FIGURE 8-4).
Figure 8-3 Removing the Top Front Panel

Note -It is not necessary to remove the media tray to replace a device; it is only necessary to remove the device enclosure from the media tray.
-
Remove the left side panel.
See Section 12.3.6 "Side Panels for removal instructions.
-
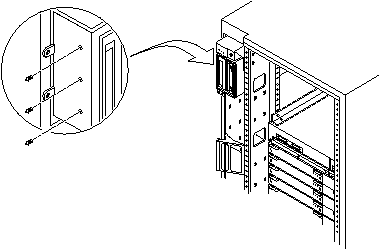
Release the device enclosure from the media tray by removing three screws on the left side of the media tray (FIGURE 8-5).
-
Pull the device enclosure forward and disconnect the data and power cables from the rear of each device.
Figure 8-4 CD-ROM/Tape Drive Removal and Replacement

-
After the cabling is removed, remove the device enclosure from the media tray.
-
To remove a drive:
-
CD-ROM drive: remove two screws from each side where the device is secured to the device enclosure. Proceed to Step 9.
-
Tape drive: remove 2 screws from each side where the tape is fastened to the device enclosure, and then remove 4 screws securing the device to the enclosure side plate. Proceed to Step 9.
-
-
To install a tape drive in an unused slot:
-
On the replacement device set the SCSI ID address to 6 (for a CD-ROM drive) or 5 (for a tape drive).
-
To complete installation of a CD-ROM or tape drive, reverse Step 2 through Step 5.
- © 2010, Oracle Corporation and/or its affiliates
