| Netra CT Server Installation Guide |
| Netra CT Server Installation Guide |
| C H A P T E R 6 |
|
Cabling the System |
This chapter provides instructions for connecting cables to CompactPCI boards and instructions for assembling and connecting the input power cable. This chapter contains the following topics:
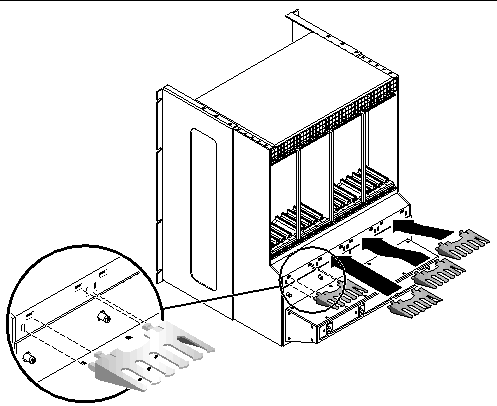
The purple cable management brackets for the chassis are located in the Netra CT server shipping kit. The cable management brackets bundle the various cables connected to the rear of the chassis. The Netra CT chassis comes with four cable management brackets.
|
1. Align the notches on the sides of the bracket to the chassis holes.
FIGURE 6-1 shows where the brackets are installed at the rear of the chassis.
2. Push the bracket straight into the chassis holes until it engages with the chassis.
If necessary, push down slightly on the top notchesuntil they engage with the holes in the chassis. See FIGURE 6-1.
3. Repeat Step 1 and Step 2 until all four cable management brackets are installed.
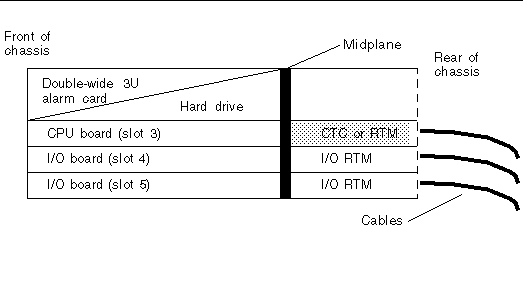
This section provides instructions for connecting cables to host rear transition modules (RTMs), alarm RTMs, and satellite and I/O RTMs.
|
1. Go to the rear of the chassis and locate the RTM corresponding to the host board.
FIGURE 6-2 shows the location of RTMs in a Netra CT 810 server, and FIGURE 6-3 shows the location of RTMs in a Netra CT 410 server.

2. Make the necessary cable connections to the RTM.
Tighten the screws on the cable to a torque of 0.23 N.m (2 in.-lb).
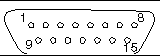
FIGURE 6-4 shows the connectors on RTMs. The RTMs are the same for both the Netra CT 810 server and Netra CT 410 servers; only the locations in the rear board cages differ.


The following sections provide the pinouts for the connectors on RTMs:
The SCSI port on the RTM paired with a Netra CP2140 host board is a 68-pin CHAMP very high density connector (VHDC). A VHDC-to-SCSI 3 cable is available through Sun.
The TTY A and B ports are stacked mini 9-pin connectors. The signal interface of the connector is as follows:
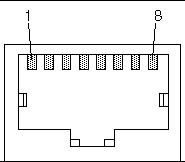
The Ethernet A and B ports on the CPU RTC are RJ-45 connectors for 10/100 Ethernet.
The host CPU RTM supports a PMC I/O module (PIM). A PIM is generally located on a rear transition module to enable rear I/O from the CompactPCI bus chassis. Custom PIMs provide additional I/Os that do not fit on the standard rear transition module panel. (For more information on PIM slot mechanics and electrical and logical information, refer to VITA 36 - PMC I/O Module Standard available at http://www.vita.com and the IEEE P1386 Standard). The single-sized PIM measures 2.92 inches (74 mm) wide and 2.72 inches (69 mm) deep.
The PIM board must be mounted on the host CPU RTM before the RTM is inserted in a Netra CT server.

|
Caution - A PIM board must be used with its matching PCI mezzanine card (PMC). Any other combination could lead to damage of the PMC or the PCI mezzanine card (PMC) I/O module (PIM). |
|
1. Go to the rear of the chassis and locate the alarm RTM.
FIGURE 6-7 shows the slot available for the alarm RTM in a Netra CT 810 server, and FIGURE 6-8 shows the slot available for the alarm RTM in a Netra CT 410 server.


2. Make the necessary cable connections to the alarm RTM.
Tighten the screws on the cable to a torque of 0.23 N.m (2 in.-lb).
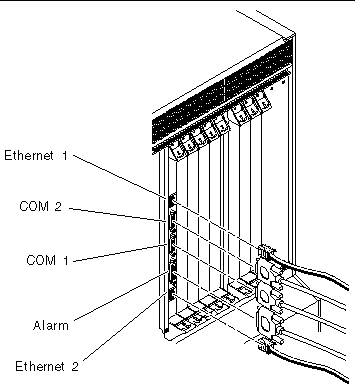
FIGURE 6-9 shows the connectors on the alarm RTM.
The following sections provide the pinouts for the connectors of the alarm RTM:
Ethernet ports 1 and 2 on the alarm RTM use standard RJ-45 connectors. Ethernet port 1 is a 10-Mbps Ethernet port, and Ethernet port 2 is a 10/100-Mbps Ethernet port.

COM ports 1 and 2 on the alarm RTM use standard DB-9 male connectors.

The alarm port on the alarm RTM uses a standard male DB-15 connector.
|
1. Locate the satellite CPU or I/O board.
FIGURE 5-2 shows the possible locations for the satellite CPU or I/O boards in a Netra CT 810 server, and FIGURE 5-3 shows possible locations for the satellite CPU or I/O boards in a Netra CT 410 server.
2. Make the necessary cable connections to the RTM.
Tighten the screws on the cable to a torque of 0.23 N.m (2 in.-lb).
For information on connectors on satellite CPU or I/O RTMs, refer to the documentation that you received with the modules.

|
Caution - Verify that your site meets the source site requirements outlined in Power Source Requirementsbefore proceeding with the following instructions. |
|
Note - If you already assembled the input power cables, skip to Connecting the Power Cable. |
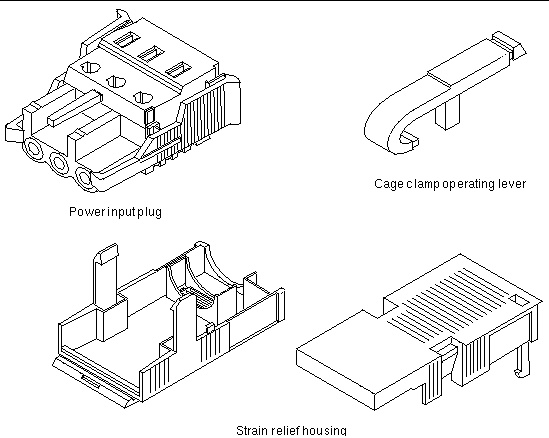
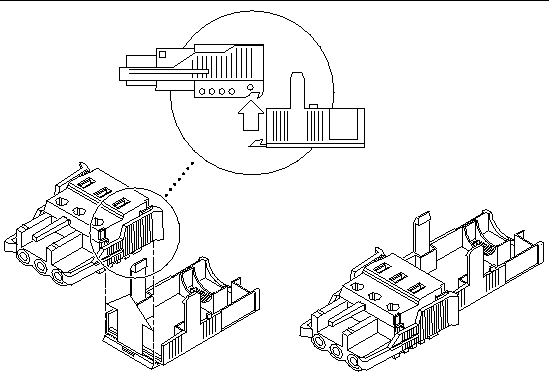
1. Identify the parts that you need to assemble the input power cable (FIGURE 6-13).
The following connection parts are provided in this kit so that you can assemble one or more power input cables. These cables connect the -48V DC input source to the power supply units in your:
2. Turn off power from the power source through the circuit breakers.

|
Caution - Do notproceed with these instructions until you turn off the power from the power source through the circuit breakers. |
3. Get a DC input plug from the shipping kit.
4. Locate the three wires coming from the DC power source that you will use to connect to your unit:
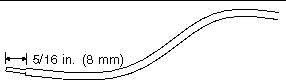
5. Strip 5/16 inches (8 mm) of insulation from each of the wires coming from the power source.
Do not strip more than 5/16 inches (8 mm) from each wire. Doing so leaves uninsulated wire from the connector exposed after the assembly is complete.
6. Open the cage clamp in one of the following ways:
a. Open the cage clamp by inserting the tip of the cage clamp operating lever into the rectangular hole directly above the hole in the input plug where you want to insert the first wire, then press down on the cage clamp operating lever.

b. Open the cage clamp by inserting a small slotted screwdriver into the rectangular hole directly above the hole in the input plug where you want to insert the first wire, then by press down on the screwdriver.
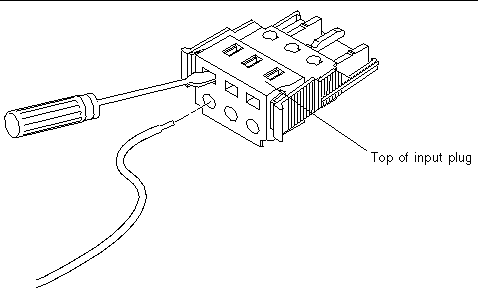
7. Feed the exposed section of the appropriate wire into that hole in the input plug.
FIGURE 6-17 shows which wires should be inserted into each hole in the input plug.

8. Repeat Step a and Step 7 for the other two wires to complete the assembly of the input power cable.
9. Repeat Step 4 through Step 8 to create as many input power cables as you need for your unit.
You need one input power cable for every power supply that you have in a Netra CT server chassis.
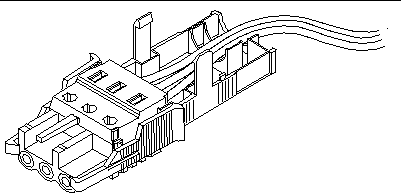
If you need to remove a wire from the input plug, insert the cage clamp operating lever or a small screwdriver into the slot directly above the wire, then press down (FIGURE 6-15 and FIGURE 6-16), and pull the wire from the input plug.
1. Take the input plug and insert the bottom portion of the strain relief housing into the notch on the input plug until it snaps into place.
Make sure the strain relief housing snaps into place on the input plug; you cannot complete the assembly correctly until the strain relief housing is snapped into place.
2. Route the three wires coming from the power source through the opening at the end of the bottom portion of the strain relief housing.
3. Get the tie wrap and insert it into the bottom portion of the strain relief housing.
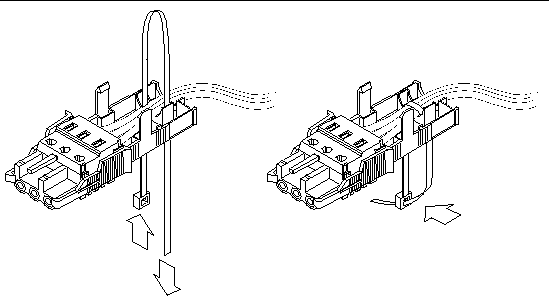
4. Loop the tie wrap over the wires and back out of the strain relief housing, then tighten the tie wrap to secure the wires to the strain relief housing (FIGURE 6-20).
5. Lower the top portion of the strain relief housing so that the three prongs on the top portion insert into the openings in the input plug, then push the top and bottom portions of the strain relief housing together until they snap into place.


|
Caution - An energy hazard is present when energized units are not properly earth grounded. |
1. Go to the rear of the chassis and locate the connectors.
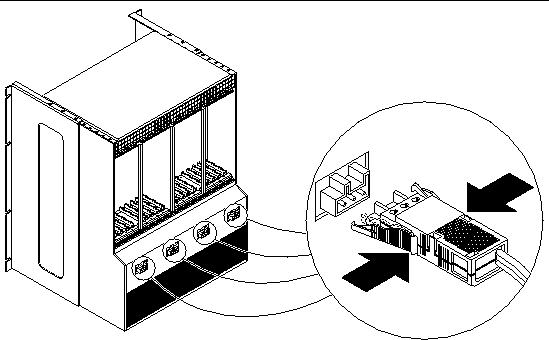
2. Connect the input power cables to the connectors.
FIGURE 6-23 shows how the input power cable is connected to the connectors.

3. Turn on the circuit breakers to provide power to the server.

|
Caution - Do notattempt to disconnect the input power cable from the connector until you have turned off the power from the power source through the circuit breakers. |
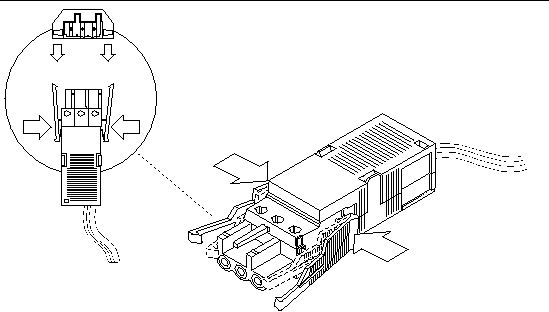
After completing the cabling, if you want to disconnect the input power cable from the connector at some point in the future, turn the circuit breakers off, then squeeze the two tabs on the sides of the input power cable and gently disconnect the input power cable from the power supply (FIGURE 6-24).
| Netra CT Server Installation Guide | 819-2740-10 |
Copyright © 2007, Sun Microsystems, Inc. All Rights Reserved.
 To Install the Cable Management Brackets