To Log In and Assume a Role
-
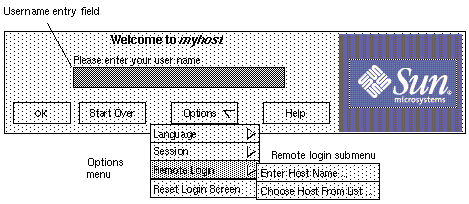
(Optional) If you are starting a login session on a remote host, choose Remote Login from the Options drop-down menu. You can either select your host name from a list (by choosing Choose Host From List) or choose Enter Host Name and type it yourself.
-
Type your username in the field, then supply a password when prompted.
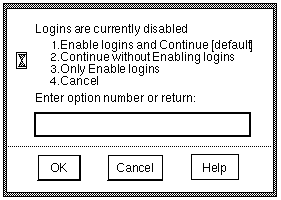
Note -If a message appears stating that logins are currently disabled, you are not currently authorized to enable logins. Ask the security administrator to give you the needed authorization, or ask an authorized person to enable logins.
-
Choose one of the options in the Enable Options dialog box shown in the following figure, then click OK.
-
Review the information in the Workstation Information dialog box shown in the following figure.
Figure 1-1 Workstation Information Dialog Box
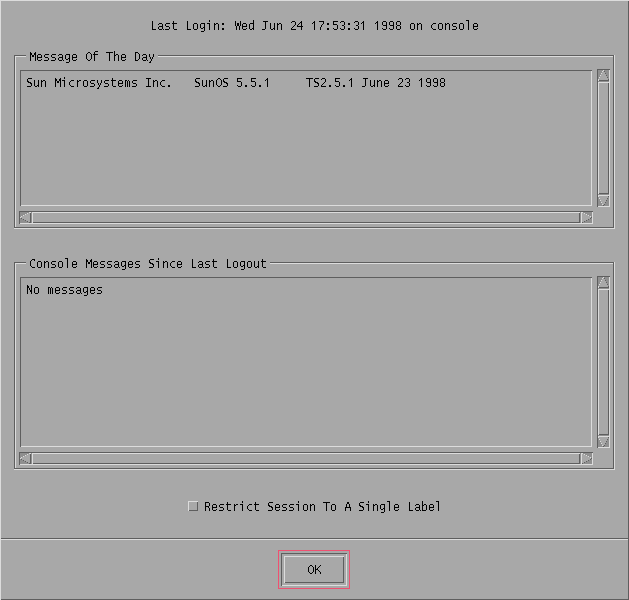
Investigate any suspicious logins, messages that could indicate inappropriate activities, and the date and time of the last login to see if it occurred at an unusual time of day, for example. Check the message of the day and the console messages since the last logout.
-
Decide whether the session should be single- or multiple-label.
If your account is configured to work at only one label, Single Level Session Label: Label appears at the bottom of the dialog box.
-
If your account is configured to work at multiple labels and you want to work with multiple labels, proceed to the next step.
-
If your account is configured to work at multiple labels but you want to work at only one label, select Restrict Session to a Single Label at the bottom of the dialog box.
-
-
Press Return or click OK.
-
If you can work at only one label or if you restricted the sessions to a single label, the Single-Label Session Login: Setting Session Label dialog box appears.
-
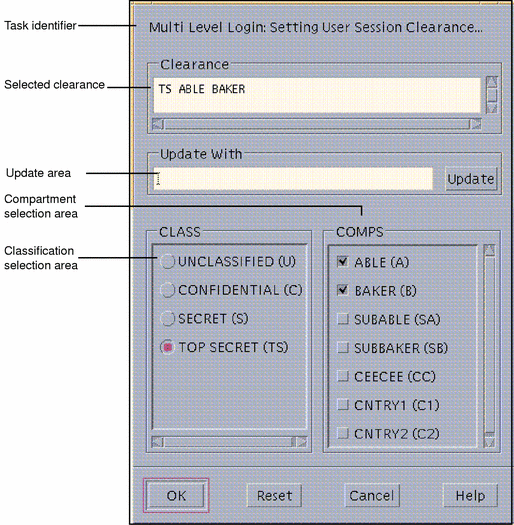
If you are allowed to work at multiple labels and decided to do so, the Multilabel Login: Setting Session Clearance dialog box appears.
-
-
Set the clearance (for a multiple-label session) or the label.
-
To accept the default clearance or default label, click OK.
-
To specify a different clearance, type the clearance name in the Clearance field or the name of the label in the Update With field.
-
To build a clearance (for multiple-label sessions) or label (for single-label sessions) interactively, select a classification in the Class area and the desired compartment components in the Comps area, then click OK.
Note -Other words may be configured at your site to appear instead of Class and Comps. See "Changing Label Component Names on Label Builders" in Trusted Solaris Label Administration for information on how the words can be changed.
-
-
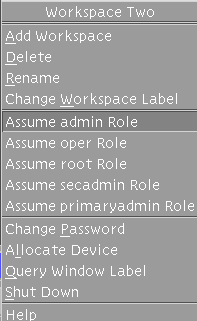
Right-click the center of the Front Panel and choose the Assume role_account_name Role option from the Trusted Path (TP) menu.
This option does not appear if you have not been assigned a role.
The following figure shows the Trusted Path menu for a user who is configured to assume the System Administrator role.
-
Type the role password when prompted and click OK.
An administrative role workspace becomes active, and a new administrative role workspace button is added to the workspace switch area.
- © 2010, Oracle Corporation and/or its affiliates
