| Sun LSI 106x RAID User’s Guide |
| Sun LSI 106x RAID User’s Guide |
| C H A P T E R 8 |
|
Using MegaRAID Storage Manager |
This chapter explains how to launch and use the MSM (MegaRAID Storage Manager) program. Use the program to create RAID arrays, and then manage and monitor the RAID arrays after array creation. The following sections describe how to start and use the MSM program:
The following sections describe how to start and log in to the MSM program:
|
1. On the taskbar, click Start and choose All Programs.
2. Choose the MSM program group, and click StartupUI.
| Tip - Alternatively, double click the MSM icon on the desktop. |
|
 On the taskbar, click Applications > System Tools > MegaRAID Storage Manager StartupUI.
|
On the taskbar, click Computer > System > MegaRAID Storage Manager StartupUI.
After you have started MSM, the MSM server window appears. The first screen is the Select Server window, similar to the one shown in FIGURE 8-1.
| Note - If a warning appears indicating the Windows Firewall has blocked some features of the program, click Unblock to allow MSM to start. The Windows Firewall might block some Java based programs like MSM. If there are multiple servers on the network, you might experience a delay before the Select Server window appears. A network with multiple servers might look similar to the Select Server window shown in FIGURE 8-1. |
FIGURE 8-1 MSM Select Server Window (Opening Screen)

The Host server icon status is indicated by an LED-like indicator located within the host server icon, to the left of the center to the left of the IP address.
For example, a disk drive used as a virtual disk has failed.
|
1. Type the IP address in the Connect to remote Framework at field, located at the bottom of the screen.
Use the IP address of a server operating in the desired subnet where MSM has access.
3. To access the standalone server running MSM with a network connection, select the check box to the left of Connect to remote Framework at.
|
1. Double-click the icon of the desired Host server in the Select Server window.
See FIGURE 8-1 or FIGURE 8-2.
FIGURE 8-2 MSM Select Server Window (Simplified)

2. Select the check box next to Connect to remote Framework at in the lower portion of the screen, as shown in FIGURE 8-2.
The User Name & Password dialog box appears. See FIGURE 8-3.
FIGURE 8-3 MSM User Name & Password Dialog Box

3. Select a login mode from the drop-down list. See FIGURE 8-3.
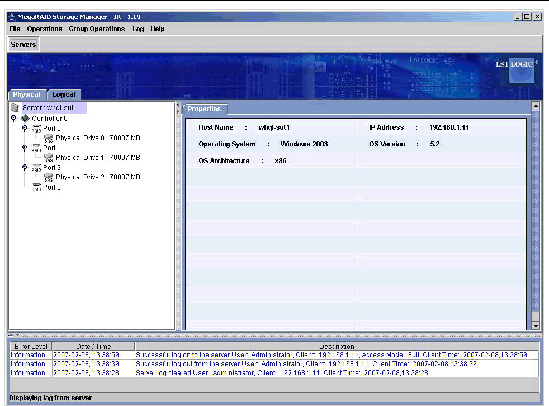
If your user name and password are correct, the MSM Physical/Logical window appears, similar to the one shown in FIGURE 8-4.
4. (View Only Access) Type your user name and password, and then click Login.
5. (Full Access) Type the Administrator user name and password, and then click Login. See FIGURE 8-3.
The MSM Physical/Logical window displays similar to the one shown in FIGURE 8-4.
FIGURE 8-4 MSM Physical/Logical Window

This section describes the MSM Physical/Logical window, which appears after you have logged in to the MSM program. The following topics describe the panels and menu options that display in this window.
The left panel of the MSM window displays either the Physical view or the Logical view of the host server and the devices, depending on which tab you select.
TABLE 8-1 shows the icons that appear in the left panel to represent the controllers, disk drives, and other devices:
The lower part of the MSM window displays the system event log entries. New event log entries appear during the session. Each entry has a timestamp and date, an error level indicating the severity of the event, and a brief description of the event.
FIGURE 8-5 MSM Window (Events and Icons)
The right panel of the MSM window has two or three tabs, depending on the device type selected in the left panel.
MSM version 2.63 and later handles dual-path disk drives automatically.
When you have SAS disk drives with dual paths, you see a single disk in the left panel of the main menu screen with the Physical tab chosen.
Select a drive in this panel and choose the Properties tab in the right panel of the screen. If the disk drive has two paths, you see a SAS Address 0 and SAS Address 1 in the Properties tab. You also see that the Redundant Paths property has the value ‘Yes.’
If you remove one of the paths (for example by removing a Multi-Function NEM that connects a server blade to a disk blade), you see only one SAS address and the Redundant Paths property has the value ‘No.’ When you restore the path, the Redundant Paths property has the value ‘Yes’ once again.
| Note - You can view the Redundant Paths property when you remove and restore a path to verify that your version of MSM is multi-path aware. |
You get an Alert Event Notification whenever a second path is added or deleted. The messages are:
The brief descriptions listed here refer to the main selections in the MSM menu bar.
An Advanced Operations submenu is also available. This is where you access the Configuration Wizard and other configuration-related commands. To access this menu, select Operations > Advanced Operations.
Use the MSM RAID configuration wizard to create, delete, or modify RAID configurations.
|
1. In the Physical tab, click Controller 0. See FIGURE 8-6.
You can also use the Menu bar to access the RAID configuration wizard, by choosing Operations > Advanced Operations.
FIGURE 8-6 MSM Window (RAID Creation)
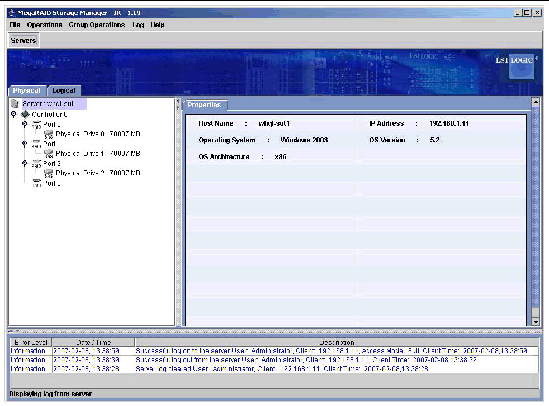
FIGURE 8-7 MSM Configuration Wizard Dialog Box

2. Click Configuration Wizard to start the MSM RAID configuration wizard.
The Configuration Wizard dialog box displays.
3. Select the physical disk drive(s) and add the selected disk drive(s) to the new array.
| Note - Two disks can be selected at the same time by using the shift key after making the first disk drive selection. |
a. In the Unconfigured Physical Drive List section, click a physical disk drive to select it (highlight).
b. Skip to Step c, or make a second selection by holding down the shift key, while your first physical disk drive is selected (highlighted).
Both physical disk drives should be highlighted.
c. Click the right arrow to move the physical disk drive(s) into the section labeled: Arrays with Available Space.
4. When you are finished, click Accept, and then click Next.
The Virtual Disk Creation dialog box displays. See FIGURE 8-8.
FIGURE 8-8 MSM Virtual Disk Creation Dialog Box

5. Select a RAID Level, Size (in Mbytes), and a Disk Cache Policy from Virtual Disk Properties.
6. Click the active Accept button, and then click Next. See FIGURE 8-8 and FIGURE 8-9.
The Finish dialog box displays with RAID 0 (New Array) selected and accepted.
FIGURE 8-9 MSM RAID Finish Screen

7. Click Finish to create the RAID.
The MSM Configuration Wizard builds the RAID and the resultant updated RAID configuration is displayed in the MSM window. See FIGURE 8-10.
FIGURE 8-10 MSM Physical Window (New RAID Array)

|
After you create a new RAID configuration, you need to create a partition and format the partition using Windows Disk Manager.
1. On the taskbar, click Start, and then click Run.
2. In the Open field, enter diskmgmt.msc, and then click OK.
The Windows Disk Manager Initialize Wizard displays.
FIGURE 8-11 Windows Disk Manager Initialize Wizard

3. Click Cancel to exit the Windows Disk Manager Initialize wizard.
4. Right-click the Disk containing the new RAID created by MSM, and then click Initialize Disk.
FIGURE 8-12 Windows Disk Manager Initialize Disk

5. Right-click on the Un-allocated Drive section of the new initialized partition, and then select New Partition.
FIGURE 8-13 Windows Disk Manager New Partition Wizard

6. Follow the onscreen prompts to page through the New Partition wizard to create and format a new Windows partition.
Once the New Partition wizard completes, the RAID file system is built and available for use. See FIGURE 8-14.
FIGURE 8-14 Windows Display of New RAID File System

| Note - MSM might also be installed from the BIOS. For details see the Service Manual for your product. |
This section describes the virtual disk parameters that you can set when you use the Guided Configuration or Manual Configuration modes of the Configuration Wizard. You do not necessarily need to change these parameters when you create a storage configuration; you can leave the values at the default settings.
You can change a virtual disk’s Read Policy, Write Policy, and other properties at any time after the virtual disk is created.
1. Select a virtual disk icon in the left panel of the MSM window.
2. In the right panel, select the Properties tab, and select Set Virtual Disk Properties.
A list of virtual disk properties displays in the right panel.
3. Change the virtual disk properties as needed in the right panel.
4. Click Go to accept the changes.
You can delete virtual disks for a number of reasons, including rearranging the storage space.
1. Back up all user data on the virtual disk you intend to delete.
2. In the left panel of the MSM window, select the Logical tab and click the icon of the virtual disk to delete.
3. In the right panel, select the Operations tab and select Delete Virtual Disk.
5. When the warning message appears, click Yes to confirm the deletion of the virtual disk.
There is a Save Configuration command on the Operations > Advanced Operations > Configuration menu. The purpose of this command is to save an existing controller configuration to a file so that it can be applied to the same or another controller at a later date.

|
Caution - This SaveConfigurationcommand is problematical and is not supported. |
To create a new configuration on the controller, the existing storage configuration must be cleared.
1. Select a controller icon in the left panel of the MSM window.
2. On the menu bar, select Operations > Advanced Operations > Configuration
> Clear Configuration.
3. To clear the configuration, click Yes.
MSM enables you to monitor the status of disk drives, virtual disks, and other storage devices. This section has the following subsections:
MSM monitors the activity and performance of all controllers in the system and the storage devices connected to the controllers. When an event occurs (such as the creation of a new virtual disk or the removal of a physical disk drive), an event message appears in the log displayed at the bottom of the MSM window.
Each event in the log includes an error level (Info, Warning, Caution, Fatal, or Dead) a date and timestamp, and a brief description.
The Log menu has three options:
MSM enables you to see the status of all
controllers in the left panel of the MSM window. The controller’s status is indicated by the controller icon(s).

1. Click a controller icon in the left panel of the MSM window.
2. Click the Properties tab in the right panel.
The Properties tab lists information such as Product Name, Serial number, Vendor ID, and Host Port Count.
All controller properties are defined in Glossary.
MSM enables you to see the status of all physical disk drives in the left panel of the MSM window. The physical disk drive status is indicated by the physical disk drive icon(s):
1. Click a disk drive icon in the left panel of the MSM window.
2. Click the Properties tab in the right panel.
The Properties tab lists information such as Vendor Name, Device ID, and Physical Drive State. All disk drive properties are defined in Glossary.
1. Click a drive icon in the left panel of the MSM window.
2. Click the Graphical View tab.
In Graphical View, the drive’s storage capacity is color-coded according to the legend shown on the screen:
MSM enables you to see the status of all virtual disks. The virtual disk status is indicated by the virtual disk icon.
For example, if a physical disk has failed, the virtual disk icon reflects this degraded condition

1. Click a virtual disk icon in the left panel of the MSM window.
2. Click the Graphical View tab.
In Graphical View, the icon for this disk group (array) indicates the virtual disk usage.
MSM enables you to monitor the progress of rebuilds and other lengthy processes in the Group Show Progress window. Open this window by selecting Group Operations > Show Progress on the menu bar.
Operations on virtual disks appear in the left panel of the Group Show Progress window, and operations on physical disk drives appear in the right panel. The following operations appear in this window.
This section explains how to use MSM to maintain and manage storage configurations. This section has the following subsections:
|
MSM normally detects newly installed disk drives and displays icons for them in the MSM window. If MSM fails to detect a new drive (or drives), you can use the Scan for Foreign Config command to find it.
1. Select a controller icon in the left panel of the MSM window.
2. Select Operations > Scan for Foreign Config.
If MSM detects any new disk drives, it displays a list of them on the screen.
3. Follow the instructions on the screen to complete the disk detection.
Due to the definition of a RAID 1 virtual drive, the system is protected from data loss if a single drive fails. However, the failed drive must be replaced, and the failed drive’s data must be rebuilt on a new drive to restore the system to a fault-tolerant condition. You can also rebuild a failed drive, if the failed drive is still operational.

If you see that the virtual disk is in a degraded state, then view the physical disk in the virtual disk configuration for drive indications.
1. Record the number of the failed drive(s) (0, 1, 2, 3) in the MSM window.
2. Shut down the system, disconnect the power cord, and open the server chassis.
3. Find the failed disk drive and remove it from the server chassis.
You can identify the disk drive by reading the number (0, 1, 2, 3) on the drive cable. This corresponds to the drive number displayed in the MSM window. Also, the drive 0 cable is color-coded. For an Integrated RAID controller, the hard drive number is on the motherboard next to the cable connector.
4. Replace the failed disk drive with a new drive of equal or greater capacity.
5. Close the computer case, reconnect the power cord, and restart the server.
When the new drive spins up, the drive icon changes back to normal status, and the rebuild process begins automatically.
If a disk drive is currently part of a redundant configuration and you want to use it in another configuration, you can use MSM commands to remove the disk drive from the first configuration for this purpose. When you do this, all data on that drive is lost. You can remove the disk drive from the configuration without harming the data on the virtual disk.
1. In the left panel of the MSM window, right-click the icon of a disk drive in a redundant virtual disk.
2. Select Make drive offline from the pop-up menu.
The disk drive status changes to Offline.
3. Right-click the disk drive icon again and select Mark physical disk as missing.
The disk drive status changes to Unconfigured Good. At this point, the data on this disk drive is no longer valid.
The following section lists known issues by product.
On Windows Server 2003 (32- and 64-bit), MSM-IR 1.19 does not show the correct disk count information at the physical and logical level before the RAID set is created. There is no workaround, but this was fixed in software release 1.1 (February, 2007).
In a non-RAID configuration only, the status log does not show an entry when a disk is removed. There is no workaround.
For firmware prior to Phase 11, MSM 2.29, the MSM server and client must be in the same subnet; otherwise, the applications reports “No server found.”
When you have a virtual disk highlighted in the logical view and you choose the Locate Virtual Disk command in the Operations tab, LEDs should blink on all the physical disks that make up the virtual disk. These LEDs are not blinking on disks controlled by the X6240, X6440 server blades.
In MSM 2.63, the Prepare for Removal function does not work for single disk drives in a Sun Blade 6000 Disk Module. If the disk is in a RAID volume, however, the Make Drive Offline function does work.
| Sun LSI 106x RAID User’s Guide | 820-4933-15 |
Copyright © 2006, 2007 by LSI Logic Corporation. All rights reserved. © 2008 Sun Microsystems, Inc. All Rights Reserved.
 To Start MSM on the Windows 2003 Server


