| C H A P T E R 10 |
|
Managing HBAs, Disk Drives, and Enclosures |
This chapter describes how to manage the HBAs, disk drives, and enclosures in your storage space. The chapter contains the following sections:
Click on any component in the main window of the Sun StorageTek RAID Manager software, then click the Properties button (shown at right) to view version numbers, status, model numbers, and other information about that component.

The properties listed vary, depending on which type of component you select.
You can blink the LEDs on enclosures, or disk drives inside enclosures, to identify where they are physically located in your storage space. This table describes how to blink specific enclosures and disk drives.
|
1. In the Sun StorageTek RAID Manager software, right-click the component, then click Blink....
| Note - If the component you select (for instance, a HBA) doesn’t support the blink function, the Blink... option won’t appear in the menu. |
The LEDs on the disk drives or enclosures begin to flash.
2. Click OK to stop blinking the component.
This section describes how to use the Sun StorageTek RAID Manager software to manage the disk drives that are part of your storage space.
You can replace one or more disk drives in a logical drive. You may want to do this to upgrade to larger disk drives, or to make disk drive size uniform across the logical drive.

|
Caution - If another disk drive in the logical drive fails during rebuild (see Rebuilding Logical Drives), you may lose data. |
1. In the Physical Devices View, click the disk drive you want to replace.
2. Set the drive state to failed.
See Setting a Disk Drive to ‘Failed’.
3. Remove and replace the disk drive with one of equal or larger size.
4. Wait for the logical drive to rebuild.
See Rebuilding Logical Drives.
5. Repeat Step 1 to Step 4 for all the disk drives you want to replace.
For help solving disk drive problems, see Recovering From a Disk Drive Failure.
Before you can remove a disk drive, you must set it to a failed state to protect your data.

|
Caution - You may lose data or damage your disk drive if you remove a disk drive without first setting it to a failed state. |
You can set a disk drive to a failed state if:
You can’t set a disk drive to a failed state if doing so will take a logical drive offline.
1. In the Physical Devices View, click the disk drive.
2. From the menu bar, choose Actions > Set drive state to failed.
3. Click Yes to set the drive status to failed.
4. Remove and replace the disk drive.
5. If the logical drive that the disk drive belongs to is failed, see Recovering From a Disk Drive Failure.
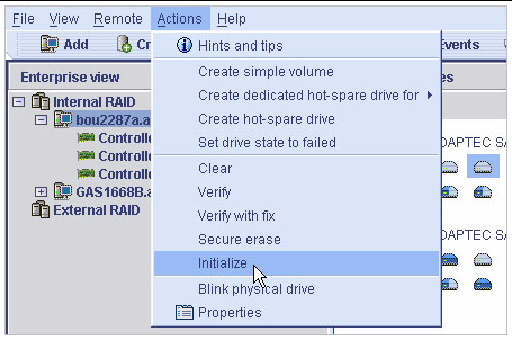
You can use the Sun StorageTek RAID Manager software to initialize any disk drives that are in a Ready state, if required. You may want to do this to erase all existing data and metadata (including all logical drive information).
1. In the Physical Devices view, click the disk drive you want to initialize.
2. In the menu bar, choose Actions > Initialize.
FIGURE 10-1 Initializing a Disk Drive
3. Click Yes to initialize the disk drive.
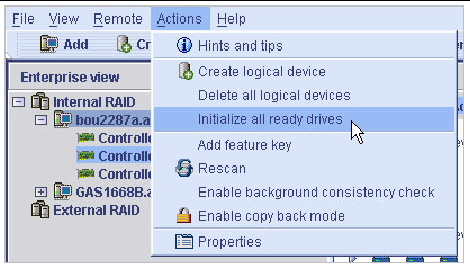
1. In the Enterprise View, click the HBA whose disk drives you want to initialize.
2. In the menu bar, choose Actions > Initialize all ready drives.
FIGURE 10-2 Initializing All Ready Disk Drives
3. Click Yes to initialize the disk drives.
This section describes how to use the Sun StorageTek RAID Manager software to manage the HBAs that are part of your storage space. It contains the following subsections:
|
When you log into the Sun StorageTek RAID Manager software, it searches for new HBAs in your storage space. If it detects a new HBA, you are prompted to register it.
 Click Register Now on the New hardware detected window.
Follow the on-screen instructions to complete the registration.
|
| Note - Not all HBAs have alarms. Refer to your HBA documentation for more information. |
1. Ensure that the speakers on your local system aren’t muted.
2. In the Enterprise View, select the HBA you want.
3. In the menu bar, choose Actions > Alarm actions > Test alarm.
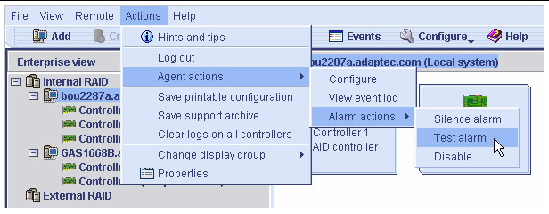
4. To stop the test, click OK.
|
You can silence the alarm on a HBA while you fix the problem.
 Click the Silence button in the main Sun StorageTek RAID Manager software window.

|
You can disable the alarm for a selected HBA.

|
Caution - If you disable the alarm, no audible signal will sound when an error occurs on the HBA. |
1. In the Enterprise View, select the HBA you want.
2. In the menu bar, choose Actions > Alarm Actions > Disable.
The alarm is disabled for that system.
|
After you connect a disk drive to or remove a ‘Ready’ (non-failed) disk drive from an HBA, the Sun StorageTek RAID Manager software may not recognize the change until it rescans the HBA.
1. In the Enterprise View, click the HBA.
2. From the menu bar, choose Actions > Rescan.
FIGURE 10-4 Rescanning the HBA
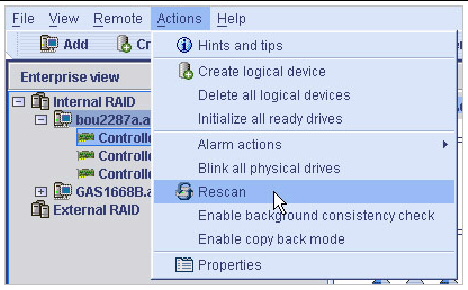
The Sun StorageTek RAID Manager software scans all the channels or ports on the HBA you selected.
When the scan is complete, a report is displayed.
3. Click Done after you have reviewed the scan report.
|
If you require a record of your HBA configurations, you can use the Sun StorageTek RAID Manager software to create a text file with this information about all HBAs on a selected system:
1. In the Enterprise View, click the local or remote system.
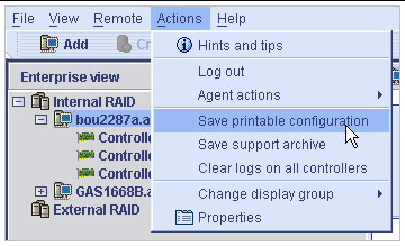
2. From the menu bar, choose Actions > Save printable configuration.
FIGURE 10-5 Saving the HBA Configuration
3. In the Save window, browse to the directory you want, then enter a file name for the report.
The default directory is the directory in which the Sun StorageTek RAID Manager software is installed. The default file name is RaidCfg.log.
This section describes how to manage the enclosures in your storage space. The section contains the following subsections:
|
1. Ensure that the speakers on your local system are not muted.
2. In the Enterprise View, select the HBA that is connected to the enclosure you want.
3. In the Physical Devices View, right-click the enclosure icon of the enclosure that you want.
A navigational menu is displayed.
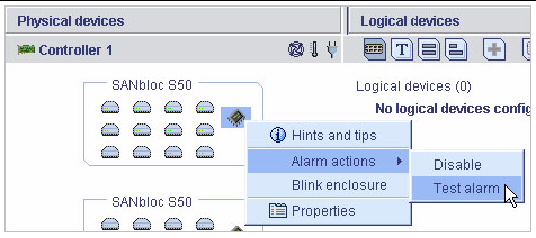
4. Choose Alarm actions > Test alarm.
FIGURE 10-6 Testing the Enclosure Alarm
5. To stop the test, click OK.
|
You can silence the alarm on an enclosure while you fix the problem.
 Click the Silence button in the main Sun StorageTek RAID Manager software window.

|
You can disable the alarm for a selected enclosure, if required.

|
Caution - If you disable the alarm, no audible signal will sound when an error occurs on the enclosure. |
1. In the Enterprise View, select the HBA that is connected to the enclosure you want.
2. In the Physical Devices View, right-click the enclosure icon of the enclosure that you want.
A navigational menu is displayed.
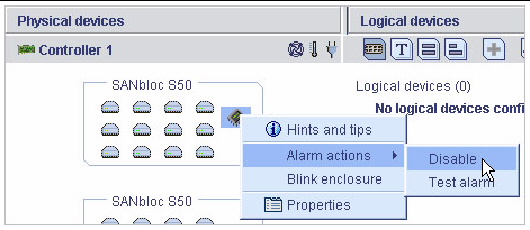
3. Choose Alarm actions > Disable.
FIGURE 10-7 Disabling the Enclosure Alarm
The alarm is disabled for that system.
| Note - Do not perform this task if you are not and advanced user. |
The Sun StorageTek RAID Manager software provides a wizard to help you update the BIOS and firmware for the HBAs in your storage space. The ROM Update wizard updates the BIOS and firmware for all HBAs of the same type on local and remote systems. You can update one type of HBA at a time.
Before you begin, download the latest firmware images from http://support.intel.com/support/go/sunraid.htm. Image files typically come in sets of two or more and have a .ufi file extension.
|
1. In the Enterprise View, right-click Direct attached storage.
A navigational menu is displayed.
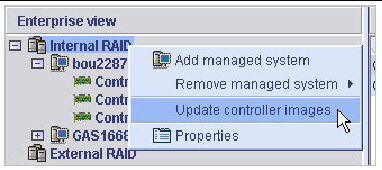
2. Choose Update controller images.
FIGURE 10-8 Updating the HBA BIOS and Firmware
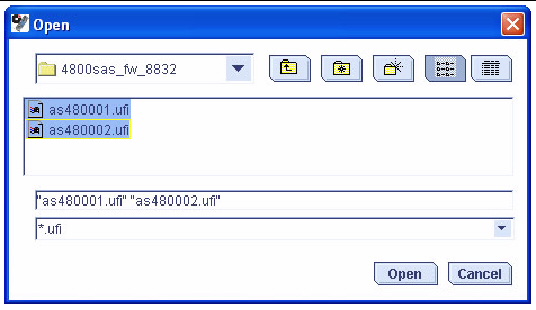
4. Click Add to browse to the firmware image files you downloaded, select the files, then click Open.
FIGURE 10-9 Opening the Firmware Image Files
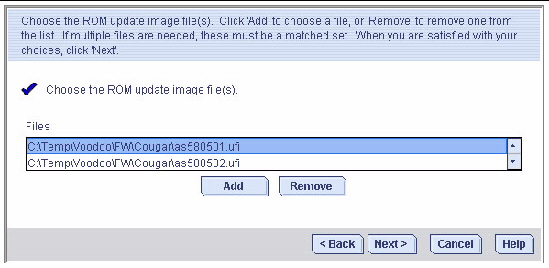
5. In the wizard, select the image files you want, then click Next.
FIGURE 10-10 Selecting the Image Files in the Wizard
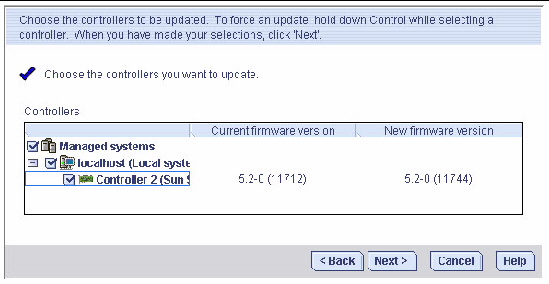
6. Select the HBAs you want to update, then click Next.
FIGURE 10-11 Choosing the HBAs You Want to Update
7. Review the update summary, then click Apply.
8. When prompted, click Yes to begin the update.

|
Caution - Do notpower down the HBA(s) during the update. |
9. When the update is complete, click OK.
10. Restart the server(s) to activate the new firmware images.
Copyright © 2009 Sun Microsystems, Inc. All rights reserved.