| Sun Installation Assistant for Windows and Linux User’s Guide |
| A P P E N D I X B |
|
Identifying the Linux Boot Device on a Sun Fire X4500 Server |
This appendix describes how to identify the boot drive on a Sun Fire X4500 server when installing Linux using SIA. If you do not have a Sun Fire X4500, skip this appendix.
You should have already completed the steps described in Chapter 3 up to the point where SIA launches the Linux native OS installer.
Once SIA launches the Linux native OS installer, you need to identify the boot device for your Sun Fire X4500 server.
|
1. If you are installing Linux (RHEL or SLES) on a Sun Fire X4500, you must perform one of the following OS-specific steps (either for RHEL or SLES) to ensure proper installation:
i. At the Boot Loader Configuration dialog, select the Configure advanced boot loader options checkbox, then click Next.
ii. At the Advanced Bootloader Configuration dialog, click the Change Drive Order button.
iii. At the Edit Drive Order dialog, select /dev/sdy and move it up to the top of the list using the up arrow key (this requires approximately 96 clicks), then click OK.
iv. Select “/dev/sdy Master Boot Record (MBR)” and click Next.
v. Proceed through the OS installer until it is done. Once the installer program exits and the SIA Installing Additional Software dialog appears, go to Step 2.
i. At the Installation Settings dialog, click the Expert tab.
ii. Under the Expert tab, click the Change button.
iii. At the Boot Loader Setting dialog, select the Boot Loader Installation tab.
iv. In the “Boot Loader Location” section, select Other. In the entry field type: /dev/sdy
v. Click the Boot Loader Installation Details button.
vi. At the “Disk Order” list box, select /dev/sdy and move it to the top of the list using the Up button. Click OK when done.
vii. Click the Finish button (bottom right of screen).
viii. Proceed through the OS installer until it is done. Once the installer program exits and the SIA Installing Additional Software dialog appears, go to Step 2.
2. In the Installing Additional Software dialog, review the information presented.
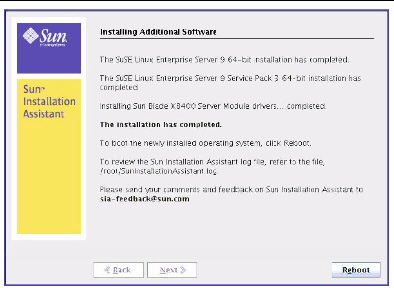
3. Remove the SIA media and click the Reboot button.
The server reboots and continues with the installation of the operating system. If remote update was selected, SIA retrieves the latest files from the web. Otherwise it uses the files on the OS distribution media. Follow the on-screen instructions and perform reboot(s) as prompted.
4. After completing the OS installation, do the following:
| Sun Installation Assistant for Windows and Linux User’s Guide | 820-3357-19 |
Copyright © 2009 Sun Microsystems, Inc. All rights reserved.
 To Identify the Boot Device on a Sun Fire X4500 During Linux Installation