|
Installing the Sun  Control Station 2.0 software Control Station 2.0 software
|
The Quick Start Guide details the system requirements for running the Sun Control Station 2.0 software on a server.
The guide also takes you through the process for installing the software on your server and installing the control-station agent on the hosts that you want to manage.
|
Note - For known issues, refer to the Release s on the Sun Control Station CD-ROM.
|
The Sun Control Station 2.0 software has been tested on the following operating systems (OSs).
The server on which you install the Sun Control Station software must have a static IP address.
The following list of RPMs must be installed on the server before you install the Sun Control Station 2.0 software.
The Installer program verifies that the following RPMs are present. If any one of these RPMs is not found, the Installer program exits.
Sun strongly recommends that you run the Sun Control Station software on a server dedicated solely to running the software and storing packages files.
The Sun Control Station 2.0 software makes modifications to certain areas of your OS that can affect other programs that are running on the server.
If you uninstall the software, certain programs and directories are deleted. For more information, see Uninstalling the Sun Control Station 2.0 Software.
Sun recommends the following server configuration for running the Sun Control Station 2.0 software.
If you want to create custom partitions on your HDD, create the directories
/var/mgmt and /var/tomcat4, and allocate as much space as possible to these two directories.
The server running the Sun Control Station 2.0 software should meet the following minimum configuration.
The following ports must be free for the Sun Control Station to use:
The Sun Control Station 2.0 software makes the following modifications to the OS:
To manage the Sun Control Station from the browser-based UI, you must enable cookies, cascading style sheets and JavaScript on your browser (these features are normally enabled by default).
The Sun Control Station 2.0 software has been tested on the following combinations of Web browsers Java plug-ins and platforms.
 Operating System (8.0 and 9.0)
 The Sun Control Station 2.0 software should function properly on the following browsers:
Released product versions of the browsers are usually more reliable than beta versions, and later versions typically work the most reliably. A browser program failure, although annoying, does not adversely affect your data on a Sun Control Station.
If the server on which you are installing the software has a CD-ROM drive, insert the Sun Control Station 2.0 Software Install CD into the drive.
To install the Sun Control Station 2.0 software from the CD:
su -
If the following line is in your system fstab file:
/dev/cdrom /cd iso9660 ro,user,noauto,unhide
You can mount the CD with one of the two following commands:
mount /dev/cdrom
mount /cd
3. Move to the directory <cd_mount>.
cd <cd_mount>
4. Run the installation script.
/bin/sh ./install/install
The following message appears:
The software is now ready to install. Continue? Y / N
Enter Y on your keyboard to proceed with the installation.
The Installer program now performs a number of validations, such as:
A number of information and installation messages appear on the screen as the installation proceeds.
Once the installation is complete, the system displays a message stating so.
You may experience some problems once the installation is complete.
If you are unable to access the UI through a browser window, tomcat4 may not have started on the server.
1. ssh in to the Sun Control Station server.
su -
/etc/init.d/tomcat4 stop
/etc/init.d/tomcat4 start
5. Verify that several java processes are now running.
/bin/ps -et | grep java
If there are no java processes running, try Steps B and C.
If the UI still does not appear, check the permissions on the file
/var/tomcat4/logs/catalina.out.
The owner and group of the file should both be tomcat4. If they are not tomcat4, you need to set them as such.
1. ssh in to the Sun Control Station server.
su -
3. Change the ownership of the file:
chown tomcat4:tomcat4 /var/toncat4/logs/catalina.out
/etc/init.d/tomcat4 stop
/etc/init.d/tomcat4 start
You can also verify whether the file /var/lock/subsys/tomcat4 exits.
If this file does exist, remove it and then kill any currently running java processes.
Now stop and start tomcat4 again.
|
Note - The package files for the different agents are also found in the directory
|
You can manually load the package file for the agent on to a Linux-based host that you want to manage, or you can automatically load it from a URL.
On the control station, the agent file for a Linux-based host is found in the following location:
/var/tomcat4/web/pkgs/base-mgmt-agent-1.1-16.i386.rpm
http://<host_name_of_SCS_server>/pkgs/base-mgmt-agent-1.1-16.i386.rpm
To load the agent manually, download the RPM to the system and then run the command:
rpm -ivh base-mgmt-agent-1.1-16.i386.rpm
To load the agent automatically, run the command:
rpm -ivh http://<host_name_of_SCS_server>/pkgs/base-mgmt-agent-1.1-16.i386.rpm
You must manually load the package file for the agent on to a Solaris-based host that you want to manage.
On the control station, the file for a Solaris-based host is found in the following location:
/var/tomcat4/web/pkgs/base-mgmt-agent-1.1-16.sparc.pkg.Z
http://<host_name_of_SCS_server>/pkgs/base-mgmt-agent-1.1-15.s6arc.pkg.Z
To load the agent, you must download the package to the system, uncompress the file and then add the package file. This last command loads the package into the correct directory on a Solaris-based host.
uncompress base-mgmt-agent-1.1-16.sparc.pkg.Z
pkgadd -d base-mgmt-agent-1.1-16.sparc.pkg
The Sun Linux 5.0.x operating system (OS) contains the control-station agent but the agent is disabled by default.
To enable the agent on a host running Sun Linux 5.0.x:
1. ssh to the host or use the serial console port and log in as root.
2. From the command line, execute the following command.
/sbin/chkconfig init.agent on
This command ensures that the agent remains enabled if the host is rebooted.
3. From the command line, execute the following command.
/etc/rc.d/init.d/init.agent start
The Sun Control Station agent is now enabled on the host running Sun Linux 5.0.x.
Once you have installed the Sun Control Station software on a server, you can access the features through a browser-based user interface (UI).
To access the Sun Control Station UI:
1. Open a browser window and enter the following URL.
http://<IP_address_of_server>
|
Note - If you do not want to use the SSL connection, enter the following URL instead: http://<IP_address_of_server>:8080/sdui/ |
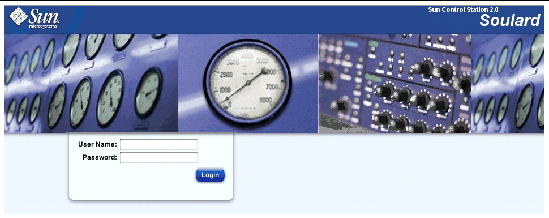
The Login page appears; see FIGURE 1.
2. Enter the user name admin and the password admin.
|
Note - Sun recommends that, once you log in, you change the admin password as soon as convenient. See the section "Password" in Chapter 2 of the Administrator Manual. |
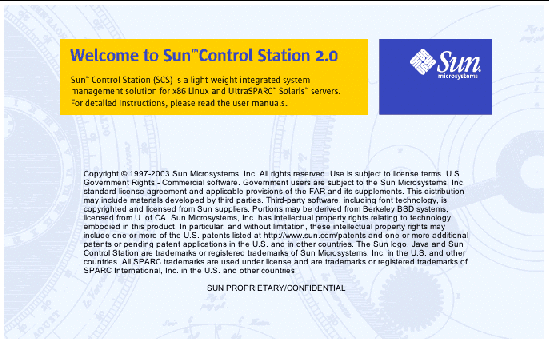
The main splash page of the Sun Control Station 2.0 software appears; see FIGURE 2.
You can change the admin password under the Station Settings menu item. For more information, see Chapter 2 of the PDF Administrator Manual.


Uninstalling the Sun Control Station 2.0 software removes all of the server-side components of the software from your server, as well as all of the control modules.
|
Note - The uninstall program does not remove the agent(s) or any client-side components of the software or control modules. |
|
Note - When you uninstall Sun Control Station 2.0 software, the uninstall program asks whether you also want to remove tomcat and jdk from your server. |
To uninstall the Sun Control Station 2.0 software:
su root
2. Move to the uninstall directory.
cd /usr/mgmt/uninstall
./uninstall
4. The system asks you to confirm that you want to proceed with the uninstall process. The default is N (no).
5. In separate steps, whether you also want to remove tomcat and jdk. The default for each of these prompts is Y (yes).
If you enter Y (or accept the default value), the rpm or package for that component is removed.
If you enter N, the rpm or package for that component is left intact.
6. The uninstall operation proceeds.
Uninstalling the Sun Control Station agent from a managed host removes the agent itself and any client-side components of the modules that are installed on the host.
|
Caution - This command does not ask you to confirm the uninstall operation once you run the command. |
To uninstall the Sun Control Station agent:
1. ssh in to the managed host.
su root
3. Move to the uninstall directory.
cd /usr/mgmt/libexec
./agentcleanup.sh
5. The uninstall operation proceeds.
 You can access the user manuals in PDF format from the UI. If you have installed third-party software on the Sun Control Station, the relevant documentation is also available.
To access the PDF file for a user manual, click on the help icon in the top-right corner. A separate browser window opens displaying a list of PDF files available. Click the link for a PDF file; you can open the PDF file in the browser window or save it to your personal computer.
In the UI, the status of each service or hardware component is indicated by a colored circle and icon--grey with dotted line, green with checkmark, yellow with exclamation mark or red with X mark--beside each item. The colors have the following significance:
 Grey with dotted line--No information is available, or the service or the monitoring feature is not enabled on the host.
 Green with checkmark--The service or component is functioning normally.
 Yellow with exclamation mark--There is moderate use on the host or a component is recovering.
 Red with X--There is heavy use on the host or a failure.
Copyright © 2003, Sun Microsystems, Inc. All rights reserved.