 To Install a Hard Drive
-
Power off the workstation using procedures in section, To Power Off the Workstation.
-
Remove the side access panel as described in section, To Remove the Left-Side Access Panel.
-
Gently lay the system on its right side on a stable, nonslip surface.
-
If you are replacing a hard drive, see To Remove a Hard Drive.
-
Remove the new HD from its antistatic packaging.
 Caution –
 Handle the HD with care. Dropping or jarring the HD can cause damage.
-
Push the plastic latch in the direction of the engraved arrow (away from the metal handle) until the HD handle pops out.
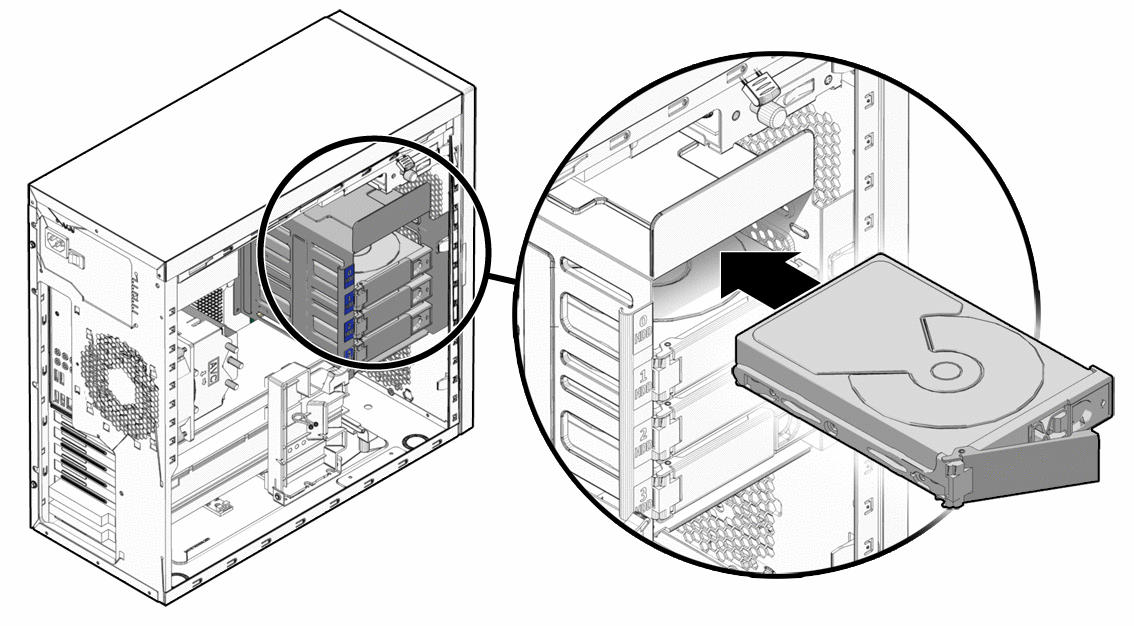
Figure 3–6 Installing a Hard Drive

-
Locate the HD assembly and HD cage guides.
You must install a boot drive in HD0, the top slot. Install a second HD in HD1, the second slot. You can install up to four HDs. The third and fourth HD slots are designated as HD2 and HD3, respectively.
-
Align the HD so the drive is centered with the slot numbering on the HD cage. Be sure that the labeled side of the HD faces upward and the handle hinge is on the left.
-
Slide the HD into the HD cage until the metal locking handle begins to close.
Note –Press on the plastic parts on either side of the metal locking handle to ensure that the handle engages the HD cage.
-
Press the metal locking handle closed until it locks the HD into the HD cage.
When correctly installed, the hard drive connector seats firmly into the storage backplane connector.
-
Inspect the hard drive assembly to verify the following items:
-
Close the workstation using the procedure in the section, Closing the Workstation and Preparing for Operation.
- © 2010, Oracle Corporation and/or its affiliates
