 To Replace the Power Supply
-
Power off the workstation using the procedure described in the section, To Power Off the Workstation.
-
Remove the left-side access panel using the procedure described in the section, To Remove the Left-Side Access Panel.
-
Unplug the AC power cord from the system.
-
Gently lay the system on its right side on a stable, nonslip surface.
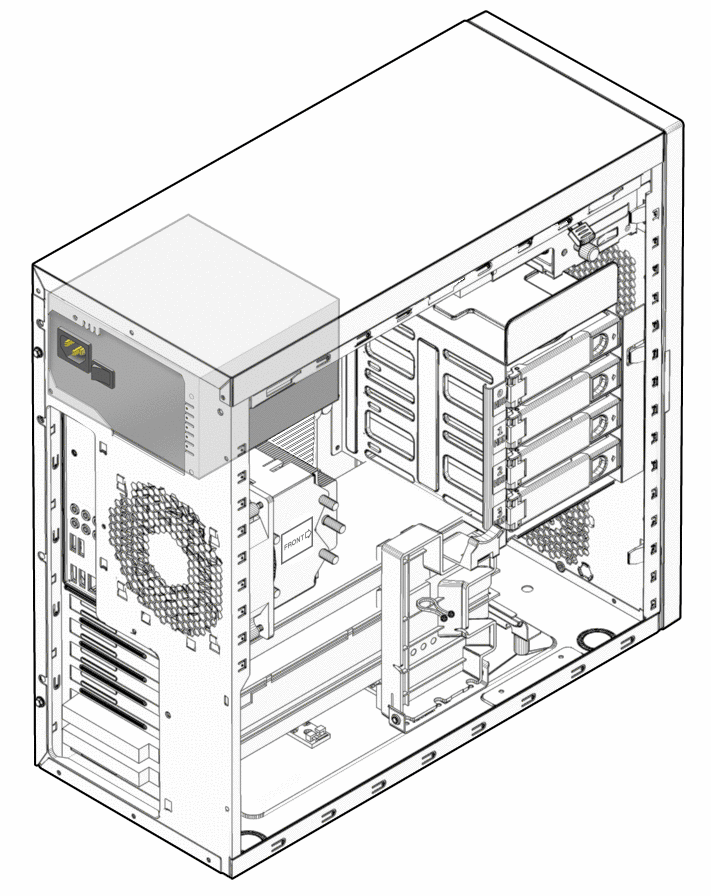
The power supply is located in the upper left corner of the interior of the chassis (see Figure 3–26).
Figure 3–26 Location of the Power Supply

-
Disconnect the power connectors attached to the motherboard, DVD drive, and storage backplane.
For locations of the power suply connections, see Figure 1–4.
-
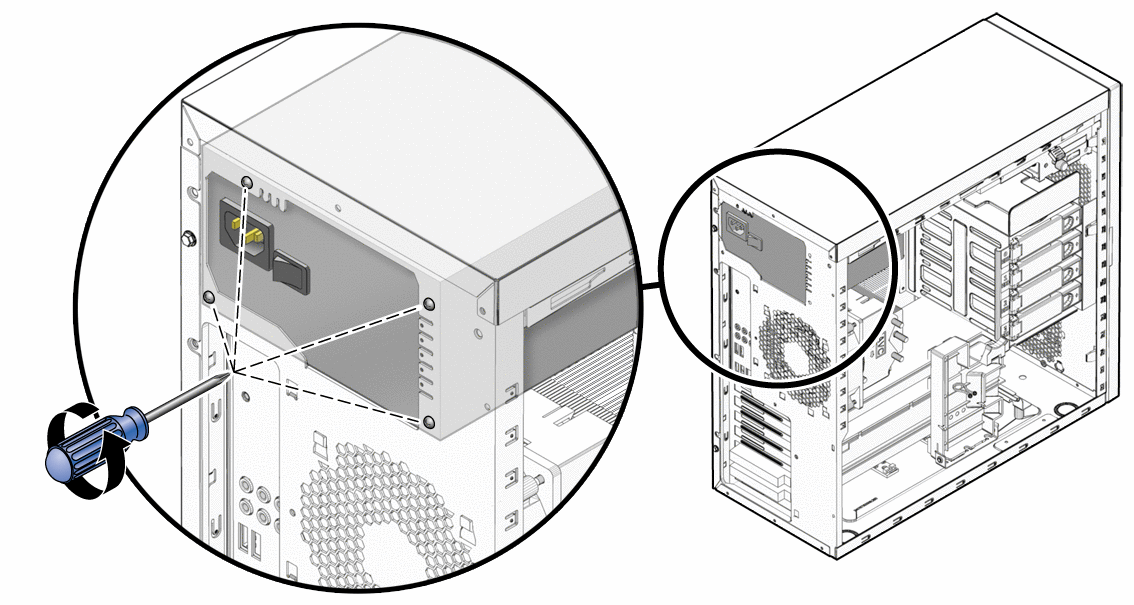
While supporting the power supply from the interior of the workstation chassis, unscrew the four mounting screws on the back panel (see Figure 3–27).
Retain the four screws.
-
Remove the power supply from the interior of the system chassis.
Figure 3–27 Removing the Power Supply From the Chassis

-
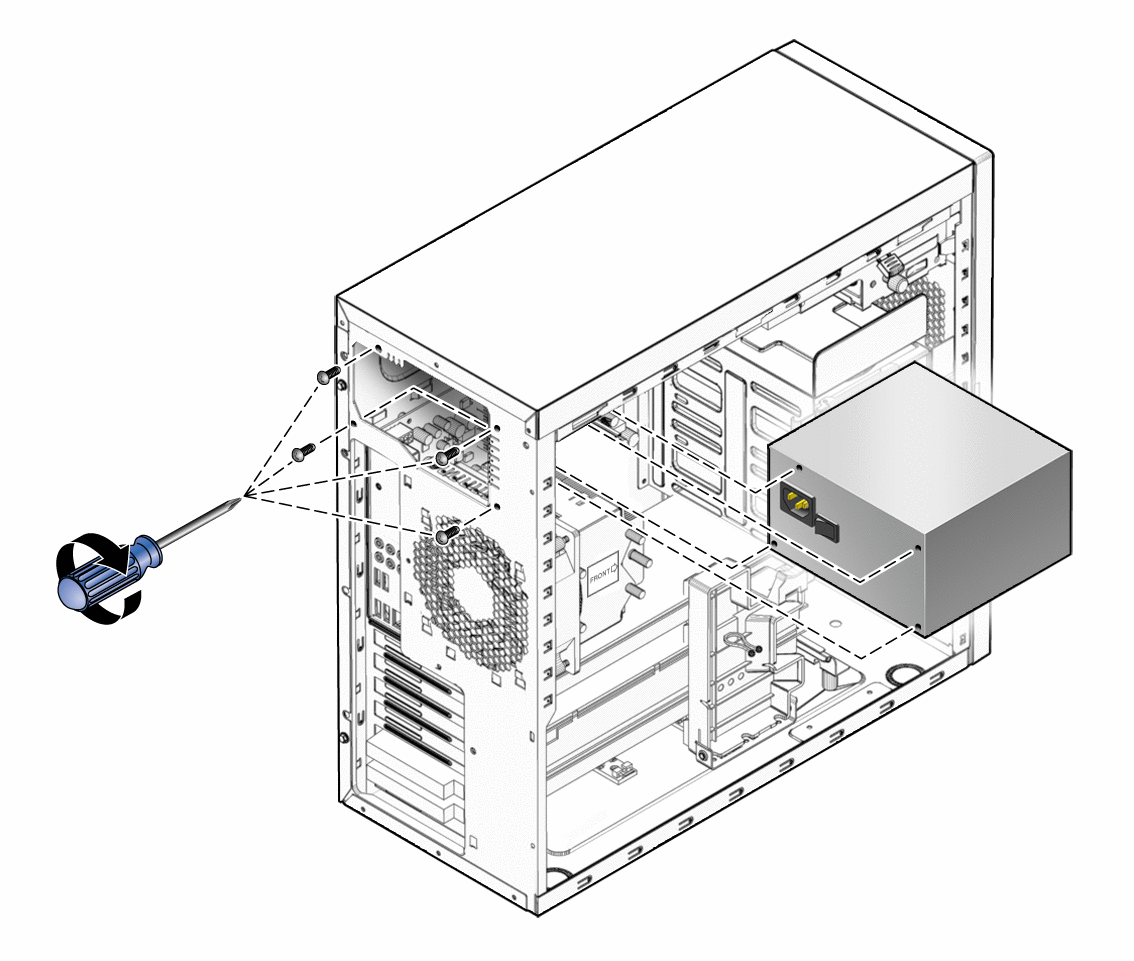
Position the new power supply against the internal back panel and align the holes in the power supply with the holes in back panel.
-
Secure the power supply with the four screws.
Figure 3–28 Installing the Power Supply

-
Connect the power supply cables to the connectors on the motherboard, the DVD drive, the storage backplane, and the graphics card (optional).
-
Close the workstation and prepare for operation using the procedures described in the section, Closing the Workstation and Preparing for Operation
- © 2010, Oracle Corporation and/or its affiliates
