| Skip Navigation Links | |
| Exit Print View | |

|
Sun Fire X4800 Server Product Documentation |
Installing the Server In the Rack Using the Standard Rack Mounting Kit
Contents of the Standard Rack Mounting Kit
Location of the Rack Mounting Kit and the Shipping Bracket Kit
Installing the Server In a Rack Using the Standard Rack Mounting Kit
How to Remove Components to Reduce Weight
How to Replace the Components in the Server
How to Install the Rack Mounting Hardware in Standard Rack
Removing and Installing the Standard Rack Mounting Kit Shipping Brackets
How to Remove the Standard Rack Mounting Kit Shipping Brackets
How to Install the Standard Rack Mounting Kit Shipping Brackets
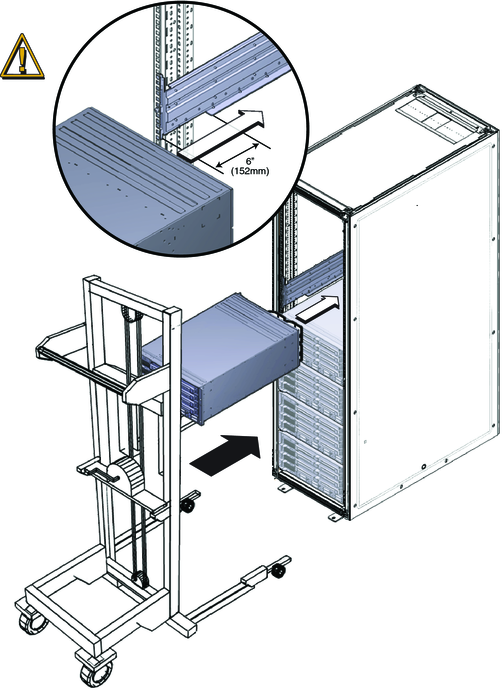
The following procedure explains how to insert the server into the rack and on to the shelf rail assemblies on the rack.
Before You Begin
Perform the steps in How to Install the Rack Mounting Hardware in Standard Rack.
The use of a lift is recommended.
 | Caution - The server weighs 180 pounds (82 kg). To reduce the risk of serious personal injury or equipment damage, use a mechanical lift to install the server into the rack. If a lift is not available, remove components as instructed in How to Remove Components to Reduce Weight and use two persons to lift the server into place. |
 | Caution - Drop Hazard! Do not release the server until it is more than 6 inches (152 mm) into the rack, and is firmly supported by the shelf rails. The shelf rails will not support the server until it is more than 6 inches (152 mm) inside the rack. |
Note - If the server is still on a pallet, you can leave it on the pallet and lift both the server and the pallet with the mechanical lift, and slide the server off the pallet and onto the shelf rails.

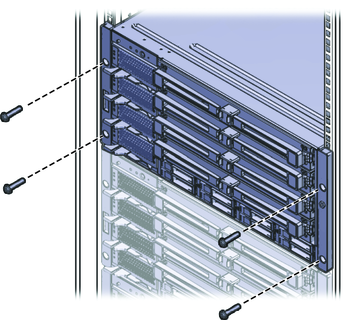
Use either the M6 x 25, or the 10-32 x 1 screws.
On a threaded rack, use four M6 x 25, or four 10-32 x 1 screws.
On a square-hole rack, use four M6 x 25 screws.

See Also