 To Upgrade the Runtime Components
-
Navigate back to the directory where you downloaded the GlassFish ESB installers.
-
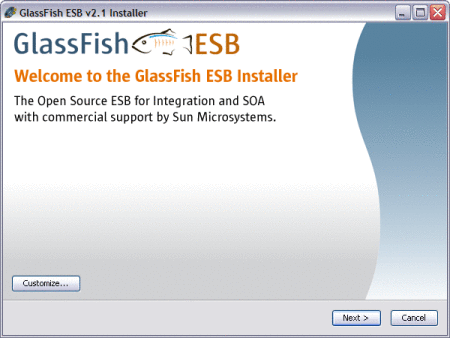
Launch the component installer by running the file named glassfishesb-v2.2-installer-OperatingSystem.
The GlassFish ESB Installer appears.

-
In the lower right, click Customize.
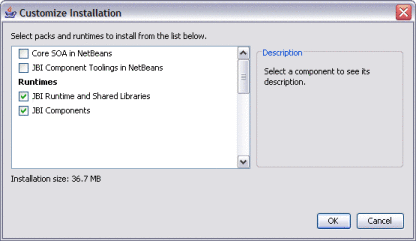
The Customize Installation dialog appears.
-
Deselect Core SOA in NetBeans, and deselect JBI Component Toolings in NetBeans.

-
Click OK, and then click Next.
-
Agree to the terms of the license, and then click Next.
-
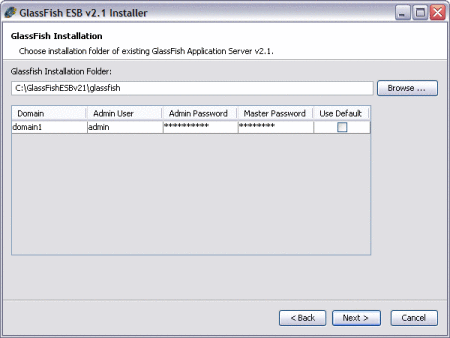
On the GlassFish Installation window, browse to and select the GlassFish home directory in GlassFish ESB v2.2.
-
Enter the Admin login information.

-
Click Next, and then click Install.
-
When the installation is complete, click Finish.
-
To verify the components were upgraded, do the following:
-
Start the upgraded GlassFish 2.2 application server.
-
Start the Admin Console for the upgraded server.
-
In the left navigation bar, expand Components under JBI, and then select any component.
-
Verify that the Version is 2.6.0 and the Build Number is 091207.
-
In the Components list, verify that there are new entries for sun-scheduler-binding and sun-iep-engine.
-
- © 2010, Oracle Corporation and/or its affiliates
