Sun™ ONE Portal Server 6.2 Release Notes
Version 6.2
Part Number 816-6761-10
April 2004
These release notes contain important information available at the time of release of Version 6.2 of Sun™ Open Net Environment (Sun ONE) Sun ONE Portal Server. New features and enhancements, known limitations and problems, technical notes, and other information are addressed here. Read this document before you begin using Sun ONE Portal Server 6.2.
The most up-to-date version of these release notes can be found at the Sun ONE documentation web site: http://docs.sun.com/prod/sunone. Check the web site prior to installing and setting up your software and then periodically thereafter to view the most up-to-date release notes and manuals.
These release notes contain the following sections:
Revision History
| Date |
Description of Changes |
|---|---|
| December, 2003 |
Initial general availability release of these release notes. |
About Sun ONE Portal Server, Version 6.2
Sun ONE Portal Server provides a platform to create portals for your organization’s integrated data, knowledge management, and applications. The Sun ONE Portal Server platform offers a complete infrastructure solution for building and deploying all types of portals, including business-to-business, business-to-employee, and business-to-consumer.
What’s New in Sun ONE Portal Server, Version 6.2
New features in Sun ONE Portal Server 6.2 include:
- Secure Remote Access support and components are now part of the Sun ONE Portal Server product.
- Support for the Portlet specification, JSR 168, via a Portlet Container and some sample portlets.
- Subscriptions and Discussions services - with these new services, users can add their feedback on documents that they find, create a set of profile of interest over a source of information, and collaborate via threaded discussions in the context of specific documents or topics.
- New APIs in the Provider API (PAPI).
- New Properties in the display profile.
- Additional Content Providers such as a Mail provider, Calendar provider, Address Book provider, and Instant Messaging provider.
- The Yahoo! Provider Service has been removed from this release
Portlet Container
Portlet Container refers to an implementation of the Portlet Specification as defined by the JSR168 Expert Group. Portlet refers to pluggable web components that process requests and generate content within the context of a portal. In the Sun ONE Portal Server software, portlets are managed by the Portlet Container. Conceptually they are equivalent to the Sun ONE Portal Server software Providers.
The Sun ONE Portal Server product includes four sample portlets shipped as part of the sample portal.
|
| |
| Note |
The portlet samples are not localized in this release. All UI messages on portlet channels are displayed in English. |
|
| |
Subscriptions
The Subscriptions service enables users to create a set of profile of interest over a source of information. In this release, the source of information supported are categories, discussions, and searchable documents. The profile is updated with the latest information every time the user accesses the Subscription Channel. The Subscription Channel summarizes the number of hits (relevant information) that matches each profile entry the user defined for categorized document and/or discussions.
More information is contained in the Sun ONE Portal Server 6.2 Desktop Online Help.
Discussions
Discussions are tied to topics and specific documents. It is a powerful way for people to add and talk about existing documents or create their own. It provides an easy way to share information about specific documents or new topics.
The Sun ONE Portal Server software discussions feature includes discussion threads, starting discussions based on documents or new topics, searching discussions, and rating discussions. By default, the Discussions Channel is available on the sample portal for anonymous users. However, an anonymous user cannot subscribe to a discussion or edit the Discussion Channel.
The DiscussionLite Channel and the Discussions Channel are based on the DiscussionProvider. Similar to the Search Channel JSPs, they have a query portion, a display portion, and use Desktop themes.
More information is contained in the Sun ONE Portal Server 6.2 Administrator’s Guide.
New APIs in the Provider API (PAPI)
The PAPI now includes the PropertiesFilter Class and the JSPSingleContainerProvider. The JSPSingleContainerProvider also contains a new container channel called JSPDynamicSingleContainer. More information can be found in the Sun ONE Portal Server 6.2 Developer’s Guide.
New Properties
The following new properties have been added:
Conditional Properties
This provides a generic operation for retrieving conditional properties; it allows you to define and base properties on any sort of condition.
authlessState Property
The authlessState property determines how client specific state is managed when the Desktop is operating in authless mode.
encoderClassName Property
The encoderClassName client type property maps an encoding algorithm (class) to a specific client type. This information is used by the ProviderContext.escape() method to escape strings in a client type specific manner.
For more information on these properties, see the Sun ONE Portal Server 6.2 Desktop Customization Guide.
Content Providers
The Communication Channels are now installed with the Sun ONE Portal Server software. The Communication Channels consist of:
More information about the Communication Channels can be found in the Sun ONE Portal Server 6.2 Administrator’s Guide.
Yahoo! Provider Service
The Yahoo! Provider Service has been removed from this release and is supported only for existing Portal customers who have a contract with Yahoo! and have purchased Yahoo! content. This service will be supported for current My Yahoo! Enterprise Edition customers through December 31, 2004.
Enhancements in Sun ONE Portal Server, Version 6.2
This release of the Sun ONE Portal Server software includes:
Enhancements to Simple Web Services Provider
The Simple Web Services (SWS) Provider provides the ability to access data-oriented Web Services. The Simple Web Service now uses Java™ API for XML-based RPC (JAXRPC).
As a sample, this provider demonstrates Web Services’ implementation by accessing a currency conversion rate service.
There are two types of simple web service channels:
Pre-Configured Web Service Channel
Configurable Web Service Channel
The Sample Pre-Configured Web Service Channel is available on the sample Desktop by default. The Sample Configurable Web Service Channel can be added by the administrator via the administration console.
At any given time, a channel based on this provider can be bound to a single web service and associated method. The Simple Web Service Provider will support simple data types, such as integer, string, double. In this release, the Simple Web Service Provider:
The Simple Web Service Provider will support the following WSDL configuration property types:
Pre-Configured Web Service Channel
The sample pre-configured web service channel provides a sample currency converter service. To set up a pre-configured Web Service channel, you will be required to specify the WSDL URL and method name via the administration console.
Configurable Web Service Channel
The Configurable Web Service Channel allows the user to switch the channel to point to a user specified web service. This is achieved by giving the user the ability to modify values for the WSDL URL and the method name belonging to the web service. However, unlike the pre-configured channel type, the configurable web service channel will not allow the user any facility to store default values for the web service input parameters.
The Configurable Simple Web Service Channel will only be suited to use with relatively simple web services; for example, web services that have non-complex input parameters and user interface presentation requirements. If the Simple Web Service Provider detects that it is not equipped to handle a particular web service, it will display a suitable message to the user.
More information is contained in the Sun ONE Portal Server 6.2 Desktop Online Help.
User Defined Channels
This feature provides the ability for the end user to create new channels. Each tab in the sample Desktop includes a Content link. If you select the Content link, a page where a user can select the channels they would like to appear in the current tab’s container is displayed. In this release, an additional link on the top right of this page, Create New Channel link, is included.
More information can be found in the Portal Server Desktop Online Help.
New Methods in the API
This section lists the new methods in the following API:
ProfileProviderAdapter Class
The following new methods are included in the ProfileProviderAdapter class. See the Javadoc™ for more details. The first column of the following table lists the method name.
The second column provides a description of the method.
| getTemplate(String) |
Convenience method. |
| get*Property(channelname, propertykey, anOrderedListOfPropertiesFilterObjects) |
Gets filtered property. |
Provider Interface
The following new method is included in the Provider interface. See the Javadocs for more details.
The first column of the following table lists the method name. The second column provides a description of the method.
ProviderContext Interface
The following new methods are included in the ProviderContext interface. See the Javadocs for more details.
The first column of the following table lists the method name. The second column provides a description of the method.
JSPProvider Class
The following new methods are included in the ProviderContext interface. See the Javadocs for more details.
The first column of the following table lists the method name. The second column provides a description of the method.
JSPSingleContainerProvider Class
A new method, getSelectedChannel(HttpServletRequest req), is included in the JSPSingleContainerProvider. This method gets the selected channel name by querying the request for parameter ContainerName.selectedChannel and stores the selectedChannel name in session for future requests. For example, for a URL of the type:
http://hostname.domain/portal/dt?action=content
&provider=ContainerName&ContainerName.selectedChannel=ChannelName
ChannelName is taken from the request parameter (ContianerName.selectedChannel) instead of from the display profile. If selectedChannel cannot be obtained either from the request or from the session, then selectedChannel from a call to getSelectedChannel() is returned.
New Tags
This section contains the following:
More information on these tags, see the Sun ONE Portal Server 6.2 Developer’s Guide.
New Tags in the Tag Library
New tags have been added to the following tag libraries:
New Tags for the Templates
The following new tag is included for the Desktop templates.
The first column of the following table lists the tag name. The second column provides a description of the tag.
New Tag in the DTD
The following tag is included in the DTD.
The first column of the following table lists the tag name. The second column provides a description of the tag.
Advanced Properties in the Administration Console
With this release, the display profile properties set to advanced are displayed in the administration console. That is, even if a display profile property is set to advanced (or if advanced=true), it will be displayed in the administration console under Advanced Properties section/heading.
More information is contained in the Sun ONE Portal Server 6.2 Administrator’s Guide.
New Attributes in the DTD
The version attribute to Provider type in display profile allows code to check which version of the display profile definition is being used.
New Attributes in SSOAdapter Templates
A new attribute called domain has been added to the SUN-ONE-MAIL and SUN-ONE MAIL-POP3 SSOAdapter templates. This attribute appends the user’s domain to the uid so users that have uids that are unique within a domain but not unique across multiple domains can access mail when using proxy authentication.
The Sun™ ONE Messaging Server provides the ability for one mail server to handle multiple email domains. However, a problem can occur if these domains contain users that have uids that are unique to the domain, but are not unique across multiple domains.
For example:
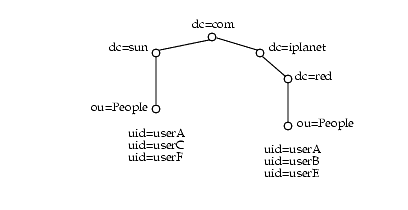
If proxy authentication is being used, having multiple users with the same uid across multiple domains causes the mail for the uid in the default domain to be displayed. For example if proxy authentication is being used, userA in the red.iplanet.com domain will see the mail for userA in sun.com (the default domain).
The domain attribute has been added to the SUN-ONE-MAIL and SUN-ONE MAIL-POP3 SSOAdapter templates to allow configuration of unique uids across multiple domains so that proxy authentication can be used.
In the templates, the domain attribute looks like: &default=domain. In the following example, the domain attribute for the SUN-ONE-MAIL SSOAdapter template is the last attribute.
Adding the Mail Domain in the SSO Adapter Template
The domain attribute is set by adding the string &domain=domain-name after the domain attribute in the SUN-ONE-MAIL or SUN-ONE MAIL-POP3 SSO Adapter templates.
To set the domain attribute:
- Log in to the Identity Server administration console.
- Select the Service Configuration Tab.
- Scroll down the navigation pane to the Single Sign-on Adapter Configuration heading and click the arrow next to SSO Adapter to bring up the SSO Adapter page in the data pane (lower right frame).
- Select the SUN-ONE-MAIL template.
- In the edit field, add the following string after &default=domain.
- Click Save to save the changes.
&domain=domain-name
If there is no domain value, nothing is appended to the uid, but if there is a domain value then it will be appended to the uid. For each domain, you will need to create a separate SSOAdapter template.
Adding the Mail Domain in an SSO Adapter Configuration
To set the domain attribute in an SSOAdapter configuration, modify the SSOAdapater template by changing &default=domain to &merge=domain in the SSOAdapter template and then at the SSOAdapter configuration add &domain=domain-name.
To add the mail domain in the SSO Adapter configurations:
- Log in to the Identity Server administration console.
- Select the Service Configuration Tab.
- Scroll down the navigation pane to the Single Sign-on Adapter Configuration heading and click the arrow next to SSO Adapter to bring up the SSO Adapter page in the data pane (lower right frame).
- From the SSO Adapter Templates list, select the SUN-ONE-MAIL template.
- In the edit field, change the string &default=domain to &merge=domain.
- From the SSO Adapter Configurations list, select the sunOneMail configuration and add &domain=domain-name.
- Click Save to save the changes.
New Command-Line Version
In this release, the -V or --version argument to a command will print the version number of the command to stdout. For example:
dpadmin -V|--version
Will print the version number of the dpadmin command to stdout.
Changes in Sun ONE Portal Server, Version 6.2
This section outlines some of the changes in the Sun ONE Portal Server software since the 6.1 release of the software. The changes are as follows:
Changes in the Administration Console
The Administration console of the portal server contains modifications to the Desktop Type Attribute and the Search Service Administration Interface.
Desktop Type Attribute
In this release, the Desktop type attribute of the Desktop service is changed from a single string to a comma-separated string. It is still a string type, but the Desktop uses it as an ordered Desktop type list. The list is used by the Desktop lookup operation when searching for templates and JSPs.
Search Service Administration Interface
There are five main grouped tasks for Search administrator.
Each of above group has set of tasks. The whole search administrator user interface is mapped by those tasks with sub level menu bar for its sub tasks.
URLScraper Edit Properties Form
Setting the URL for a URL Scraper Channel is now different. There is no URL field on the channel’s Edit Properties form. You must now click the Edit Conditional Properties button the channel’s Edit Properties form. The URL field at the bottom of the new form. This change is required by the Mobile Access product, which requires the extra properties to configure the rendering engine to create output for the different devices that the Mobile Access product supports.
Creating a New Display Profile
Whenever you create a new Display Profile, some of the default values must be changed manually by typing in new values. In previous version these values were inherited.
Specifically the Default Channel Name field must be upgraded to the name of a valid top-level container JSP, such as JSPTabContainer. The default value in that field is now DummyChannel. If you leave that value in the field you will typically see the following error message when the system tries to render that Display Profile:
“The desktop you are using is not configured with any channel in it.”
Likewise you may need to upgrade the default value in the Portal Desktop Type field.
More information is contained in the Sun ONE Portal Server 6.2 Administrator’s Guide and in the Sun ONE Portal Server 6.2, Secure Remote Access Administrator’s Guide.
Changes in the Provider API
The following methods in the ProviderContext Interface have changed. See the Javadocs for more details.
encodeURL()
getDesktopURL()
Changes in the Tag Libraries
desktopPC:getDesktopURL
It now encodes the Desktop URL before returning a string with the Desktop URL. The id and scope attributes are optional.
More information is contained in the Sun ONE Portal Server 6.2 Desktop Customization Guide.
Changes to the Desktop
This release of Sun ONE Portal Server includes changes to the following:
Desktop Channel Windows
With this release, channel windows will be closed if the user logs out of the Desktop. Also, channels can be in one of the following three window states:
- Normalized - In this state, a channel is displayed in normal size. In previous releases, this window state is referred to as Maximized.
- Minimized - In this state, a channel is displayed in a minimized state and only the channel menu icons are displayed.
- Maximized - In this state, a channel is displayed in the entire screen.
Cookieless Support
With this release, the Desktop can be accessed by devices that do not support cookies or have cookies disabled.
Authless Desktop
You can enable or disable the authless Desktop using the radio button. If authless access is disabled for federated users then they must do a liberty login. If authless access is enabled for federated users, then such users will see authless desktop if they are not liberty signed-on.
More information is contained in the Sun ONE Portal Server Desktop Online Help.
Changes in the Sample Portal
This release includes changes to the following:
More information on sample portal dependencies and portal templates and JSPs is contained in the Sun ONE Portal Server 6.2 Desktop Customization Guide.
Sample Portal Dependencies
The Sun ONE Portal Server software sample portal depends on:
Base Desktop
The base Desktop includes:
Others Components
The other components include:
- Provider Java class files for their component specific providers
- Provider Display Profile definitions for their component specific providers
- Some channel Display Profile definitions are referenced by component Display Profile XML or component templates / JSP
- Provider resource bundles (properties files)
- Default Templates and JSPs
- Help files
Sample Portal Templates and JSPs
In this release, the Sample Portal includes:
Changes to the JSPTableContainerProvider
The JSPTableContainerProvider is now responsible for drawing the detached windows. Previously, the detached windows were drawn by the JSPPopupContainer.
Template and JSP Location
The default (provider) templates and JSPs are installed in /etc/opt/SUNWps/desktop/default directory and the sample portal templates and JSPs are installed in /etc/opt/SUNWps/desktop/sampleportal directory. That is, in this release, if the sample portal is selected to be installed, the templates and JSPs used by the sample portal are installed in the sampleportal directory under the Desktop template base directory. All other Desktop templates and JSPs are installed in the default directory under the Desktop template base directory, and will be installed even if the sample portal is not installed.
Table 2 is a three column table that contains detailed information on the old to new mapping. Column one lists the JSP or template file name, column two lists the old location of the files, column three lists the new location of the files. Note that $BASE refers to Desktop template base directory.
| Filename |
Old Install Location |
New Install Location |
|---|---|---|
| framePreferenceHeader.jsp |
$BASE/default |
$BASE/default |
| tabPreferenceHeader.jsp |
||
| tablePreferenceHeader.jsp |
||
| singlePreferenceHeader.jsp |
||
| defaultHeader.jsp |
||
| searchbox.jsp |
||
| framePreferenceMenubar.jsp |
||
| tabPreferenceMenubar.jsp |
||
| tablePreferenceMenubar.jsp |
||
| singlePreferenceMenubar.jsp |
||
| defaultMenubar.jsp |
||
| PortletBanner.jsp |
Not Applicable |
$BASE/default |
| PortletEdit.jsp |
||
| PortletHelp.jsp |
||
| PortletMenubar.jsp |
||
| PortletBanner.jsp |
Not Applicable |
$BASE/sampleportal |
| PortletMenubar.jsp |
||
| banner.jsp |
$BASE/default/ |
$BASE/sampleportal/ |
| frametabmenu.jsp |
||
| menubar.jsp |
||
| frameset.jsp |
||
| header.jsp |
||
| remove.jsp |
||
| frametab.jsp |
||
| makeNewTab.jsp |
||
| removeRenameTab.jsp |
||
| frametabedit.jsp |
||
| makeTopic.jsp |
||
| selectedTab.jsp |
||
| contentedit.jsp |
$BASE/default/ |
$BASE/sampleportal/ |
| contentLayoutBar.jsp |
$BASE/default/ |
|
| contentdoedit.jsp |
||
| contentedit.jsp |
||
| createchanneldoedit.jsp |
Not Applicable |
$BASE/sampleportal/ |
| createchanneledit.jsp |
||
| createchannel.jsp |
||
| deletechannelui.jsp |
||
| createchannelcontent.jsp |
||
| createchannelui.jsp |
||
| deletechannel.jsp |
||
| colorselector.html |
$BASE/default/ JSPCustomThemeContainer |
$BASE/sampleportal/ |
| customthemeedit.jsp |
||
| customthemedoedit.jsp |
||
| themepreview.jsp |
||
| dynamicSingle.jsp |
Not Applicable |
$BASE/sampleportal/ |
| header.jsp |
||
| menubar.jsp |
||
| layoutedit.jsp |
$BASE/sampleportal/ |
|
| arrangeProvider.js |
$BASE/default/ |
$BASE/default/ |
| layoutedit.jsp |
||
| contentLayoutBar.jsp |
||
| performColumnSubstitution.js |
||
| detectCheckedRadioButton.js |
||
| performSubstitution.js |
||
| layout1.jsp |
||
| selectAll.js |
||
| layout2.jsp |
||
| selectLayout.jsp |
||
| layout3.jsp |
||
| switchColumns.js |
||
| layoutdoedit.jsp |
||
| popup.jsp |
$BASE/default/ |
$BASE/sampleportal/ |
| popupMenubar.jsp |
||
| providerWrapper.jsp |
||
| providerCommands.jsp |
$BASE/default/ |
|
| themedoedit.jsp |
$BASE/default/ |
$BASE/sampleportal/ |
| themeedit.jsp |
||
| themepreview.jsp |
||
| header.jsp |
$BASE/default/ |
$BASE/sampleportal/ |
| menubar.jsp |
||
| availableTabs.jsp |
$BASE/default/ |
$BASE/default/ |
| makeTopic.jsp |
||
| selectedTab.jsp |
||
| footer.html |
||
| menubar.jsp |
||
| tab.jsp |
||
| header.jsp |
||
| remove.jsp |
||
| tabedit.jsp |
||
| makeNewTab.jsp |
||
| removeRenameTab.jsp |
||
| tabs.jsp |
||
| header.jsp |
$BASE/default/ |
|
| menubar.jsp |
||
| header.jsp |
$BASE/default/ |
$BASE/default/ |
| menubar.jsp |
||
| maximizedTemplate.template |
$BASE/default/ |
$BASE/default/ |
| contentBarInContent.template |
||
| contentBarInLayout.template |
||
| userTemplate.template |
||
| contentLayout.template |
||
| banner.template |
$BASE/sampleportal/ |
|
| menubar.template |
||
| banner.template |
$BASE/default/ |
N/A |
| menubar.template |
||
| banner.template |
$BASE/default/ |
$BASE/sampleportal/ |
| menubar.template |
||
| banner.template |
$BASE/default/ |
|
| makeNewTab.template |
||
| selectedTab.template |
||
| display.template |
||
| menubar.template |
||
| tab.template |
||
| editForm.template |
||
| noCache.template |
||
| tabs.template |
||
| inlineError.template |
||
| removeRenameTab.template |
||
| tabs_r.template |
||
| banner.template |
$BASE/default/ |
$BASE/sampleportal/ |
| menubar.template |
||
| banner.template |
$BASE/default/ |
$BASE/sampleportal/ |
| maximizedTemplate.template |
||
| contentBarInContent.template |
||
| menubar.template |
||
| contentBarInLayout.template |
||
| userTemplate.template |
||
| contentLayout.template |
||
| banner.template |
$BASE/default/ |
$BASE/sampleportal/ |
| menubar.template |
||
| content.template |
Not Applicable |
$BASE/default/ |
| linebreak.template |
||
| edit.template |
||
| msgPrefix.template |
||
| editNoteListWrapper.template |
||
| msgSuffix.template |
||
| subscontent.jsp |
$BASE/default/ |
|
| subsdoedit.jsp |
||
| subsedit.jsp |
||
| subscontent.jsp |
$BASE/default/ |
|
| subsdoedit.jsp |
||
| subsedit.jsp |
Changes in the Display Profile
In the display profile XML, the following attributes are not listed in the XML file and displayed in the administration console unless the attribute’s default value has been changed:
<advanced="false" lock="false" merge="fuse" propagate="true">
If a default value is reset, only the attribute whose default value has been changed is included in the XML fragment and displayed in the administration console. For more information on these attributes, see “Document Type Element Definition Attributes” in Chapter 5 of the Sun ONE Portal Server 6.2 Administrator’s Guide.
The default properties are inherited from provider. If the default property is edited, it is displayed as customized.
Changes to the Display Profile Properties
This section describes changes to the:
helpURL Property
The helpURL property is now a conditional property. Multiple values can be associated with the helpURL property and the display profile API returns the proper value depending on the client type and locale. If your portal server is configured to serve multiple clients (such as HTML, WML) in multiple locales (such as english, french), the helpURL property will allow you to set up multiple help files based on the type of client and type of locale you are serving.
Unnamed Properties
In this release of the Sun ONE Portal Server software:
- Only String and Integer types of properties can be unnamed.
- Unnamed properties can exist only inside a collection and top-level unnamed properties are ignored in the administration console.
- When adding a property, name is a required field.
- Unnamed properties are displayed as a list with add and remove buttons. However, the default unnamed properties displayed as a list cannot be edited.
More information on the display profile properties can be found in the Sun ONE Portal Server 6.2 Administrator’s Guide.
Changes to the dpadmin Command-Line Interface
The dpadmin command:
- Subcommands add and modify can take more than one input file.
- Subcommand batch can take optional argument --runasdn (-u) and --password (-w) which will then be used to authenticate throughout the entire batch process unless overridden by the individual subcommand in the batch file. The --runasdn (-u) and --password (-w) parameters are now optional within the batch mode.
Hardware and Software Requirements
The following hardware and software are required for this release of Sun™ ONE Portal Server.
Table 3 is a two column table that lists the component requirements for the Sun ONE Portal Server. The first column lists the component, and the second column provides the requirements for the component.
| Component |
Solaris™ Requirement |
|---|---|
| Operating system |
Solaris™ 8 or Solaris ™ 9 Operating System (SPARC® platforms) Note: For an installation of the Sun ONE Portal Server on BEA WebLogic Server ™ or IBM WebSphere® Application Server, only the Solaris 8 Operating System is supported. |
| CPU |
Sun SPARC or Solaris™ Operating System (x86 Platform Edition) workstation |
| RAM |
512 Mbytes of RAM for evaluation install 1.2 Gbytes of RAM for regular deployment |
| Disk space |
1 Gbyte of disk space |
|
| |
| Note |
The Sun Java Enterprise System installer checks for operating system patches required by the Sun ONE Portal Server product and will not allow the installation to proceed if the patches are not installed. |
|
| |
Software Requirements
The following list of software is required for a successful installation of the Sun ONE Portal Server product. The Sun ONE Portal Server is installed as a component product of the Sun Java Enterprise System enterprise solution. The Sun Java Enterprise System provides a common installer that is used to install the Sun ONE Portal Server and the following required component products used by the Sun ONE Portal Server.
When you install Sun ONE Portal Server 6.2, the Sun Java Enterprise System automatically selects the required software.
The Sun ONE Portal Server, Secure Remote Access components require the following software if they are being installed as stand-alone components on an independent node. The following components are also installed by the Sun Java Enterprise System installer.
The Gateway Component
The Netlet Proxy
The Rewriter Proxy
Browser Recommendations
The following browsers are supported for administration and for accessing the Sun ONE Portal Server Desktop:
Browser Limitations
The user may experience the following browser problems:
- Scraped channels with more than six nested tables causes a bus error in Netscape Navigator 4.7x.
- When using Netscape Navigator 7.0 - 7.02, the Layout Edit page (on the Sun ONE Portal Server Desktop) selects additional channels when the user clicks the up and down buttons. This behavior does not occur when using Netscape 4.76 or 7.1.
- Basic search page is not being refreshed well if search button is pressed a few time. So, refresh the browser if search page is not displayed correctly.
Known Issues
This section address known issues associated with the following software products. Workarounds are provided where possible.
Communication Channels
In the Mail Channel, Japanese characters are not displayed correctly when the Japanese characters are next to English characters without spaces. (4944098)
Workaround
Change the mail.jar file which comes with JavaMail1.3.1 and configure the system property mail.mime.decodetext.strict to false.
No Single Sign-on and proxy authentication support for exchange and notes. (4888129)
Single Sign-on and proxy authentication features will not be supported for the exchange and Notes Channels on Microsoft and IBM products. However they are supported for Sun ONE products.
Tasks (To do items) created in Lotus Notes are not displayed in the Calendar Channel. (4804912)
The number of tasks created in Lotus Notes does not matter, the total number of tasks displayed in lotus notes are zero.
This problem occurs if a Portal Server user performs the following to add new items in Lotus Notes Calendar Channel:
The updated task will not be displayed for the Lotus Notes Calendar Channel until the portal user logs out and logs back in.
The Calendar Channel has excess white space. (4933489)
Workaround
Modify the display-dayView.template file and reduce the number of table rows.
Desktop
Moving a channel on the layout page causes two lines to be selected. (4860608)
The iwtTabProvider Edit button appears even if the Edit Button feature is disabled. (4874778)
If the administrator configures certain Portal Desktop channels as non-editable, the Edit button is still visible on the Desktop. If the Desktop user clicks the edit button, an error message is displayed.
Desktop tabs cannot be made read-only. (4889622)
Localized tab names are displayed incorrectly when selecting an option on the Layout page. (4925850)
Uncategorized strings cannot be localized. (4925862)
Uncategorized strings cannot be localized. They do not get translated and are displayed in English on the Desktop.
Portal Server Desktop service related Object classes get added to the user node at install time. (4926498)
Portal Server Desktop service related Object classes get added to the user node at install time when the psDesktop.ldif file is loaded. Several of these attributes are not intended for customization at user level. Adding these object classes gives the user privilege to add attributes to an entry using the ldapmodify command from an external host with the user’s own credentials.
The attributes that are allowed to be added to the user node at runtime are:
Installation
The Java Enterprise System minimal installation mode for Sun ONE Portal Server does not differ from custom mode install when the web container is IBM WebSphere Server or BEA WebLogic Server. (4946769)
The Java Enterprise System minimal installation mode for Sun ONE Portal Server does not differ from custom mode install when the web container is IBM WebSphere Server or BEA WebLogic Server. The installer does not allow for configuration of Sun ONE Identity Server against a third-party web container unless the Portal Server is also being mapped against the same web container.
During the installation of Sun ONE Portal Server software, no error message is displayed if you enter invalid administrator password for the underlying application server. (4869488)
Localization
Users cannot unzip multi-byte files in Internet Explorer 6.0. (4935010)
When using Internet Explorer 6.0, users are unable to unzip multibyte zip files created by NetFile.
This problem occurs if the zip utility is used to unzip files in the Windows environment.
Workaround
If using the Windows platform, use the gzip utility to unzip multibye files.
NetFile
Java1 and Java2 files and folders that are uploaded or created in WebNFS have write permissions for all. (4915585)
When a WebNFS host or share is added to NetfFile Java1 or Java2, the files or folders have permissions set to write for all.
Changes to NetFile and Netlet cannot be saved at the service level. (4925144)
This problem occurs in the Netscape 7 and Internet Explorer browsers.
The Save button function does work in the services under Identity Management tab.
Files cannot be uploaded using NetFile Java2 with ProFTP. (4878316)
Files cannot be uploaded using NetFile Java2 with ProFTP. An error message is displayed “Operation could not be performed for unknown reason(s). Please try again.”
Workaround
For upload to be possible on a directory, which is being accessed by the user, the AllowStoreRestart permission must be set on that directory in the proftpd.conf file.
Multibyte files cannot be sent with NetFile Java1. (4910252)
For localized installations of Sun ONE Portal Server on Solaris 8 deployed on IBM WebSphere Application Server Netfile Java 1 and Java 2 are unable to send multibyte files.
This problem also occurs for NetFile Java1 on BEA WebLogic and Sun™ ONE Web Server deployments. However, files can be sent using NetFile Java2.
Netlet
The Netlet does not work with a KSSL_SSL3_RSA_EXPORT_WITH_RC4_40_MD5 algorithm. (4918746)
This may happen if the users use a Java plugin version lower than 1.4. In this case, the administrator should not select this algorithm while creating a Netlet rule.
The Show client port link in the Netlet window does not work correctly. (4917167)
When using Internet Explorer 5.5 (with Java plugin) the browser crashes when user clicks on the Show client port link and the Java console does not show the ports.
In the following cases, the Show client port link on the Netlet window does not work, but the Java console does show the ports.
The Show client port link in the Netlet window works in Netscape Navigator 7.0 and Internet Explorer 6.0 with the Java 1.4.1 plugin
Initial Dynamic Netlet FTP connections fail for Internet Explorer. (4849197)
If a dynamic Netlet FTP rule is created at the user level with URL like ftp://uid@localhost:30021, and then the user creates a target for the Netlet rule and tries to launch the Netlet link, the browser returns a DNS error.
Workaround
Select enter again from the URL field. The FTP authentication window is displayed.
Users must re-authenticate after ever command for Netlet FTP. (4820333)
Users must re-enter the Netlet password after every FTP command because the re-authentication feature is fixed to server ports, and FTP uses dynamic ports.
Workaround
Disable re-authentication on the Netlet service page in Sun ONE Identity Server administration console.
The Netlet keep-alive feature is broken. (4857086)
The Netlet connection, if idle, will time-out if this attribute is set to a value other than 0.
Hosts in the denied list can be accessed by using the IP address with a static rule. (4921775)
The hosts in the denied list can be accessed through a Netlet telnet session if a static rule for that host exists.
For example, if the host’s IP address is in the denied hosts list, and if a new static rule is created with the host name, the host can be accessed by a Netlet telnet session. Or, if the host name is in the denied hosts list and a static rule is created with the host IP address, the host can be accessed through a Netlet telnet session.
Workaround
The denied list should have host name, fully qualified host name and the IP address.
Adding host name in allow list does not work. (4918818)
If you add a host name (not the fully qualified host name) to allow hosts list. The host cannot be accessed using a dynamic Netlet rule by giving either the host name or fully qualified host name.
Workaround
Use the fully qualified host name in the allow hosts list.
When the host name in allow hosts list is changed to the fully qualified host name, the Netlet to the host works.
NetMail
NetMail and NetMail Lite do not load localized messages properly if the web container’s preferred language attribute is not set to the user’s locale. (4934828)
For example, if the Sun ONE Application Server is running the en_US locale and the user wants to run the NetMail application in the Japanese locale, the preferred language attribute must be set to “ja.”
Workaround
You can set the user preferred language attribute in the Identity Server administration console or in the User Information Channel on the Portal Server Desktop.
To set the preferred language attribute in the administration console:
To set the preferred language attribute in the Portal Server Desktop, the Desktop user must do the following:
A self-registered user cannot launch localized NetFile. (4934330)
If the NetFile application has been localized, self-registered users cannot launch NetFile.
English NetFile launches, even if the user’s locale is not en_US.
Workaround
The preferred language attribute needs to be set. You can set the user preferred language attribute in the Identity Server administration console or in the User Information Channel on the Portal Server Desktop.
To set the preferred language attribute in the administration console:
To set the preferred language attribute in the Portal Server Desktop, the Desktop user must do the following:
The search function in NetMail Lite does not work if correct date format for a locale is not used. (4923793)
The date format when performing a search in NetMail is locale specific.The search function in NetMail Lite does not work if correct date format for a locale is not used.
Depending on your locale, the date format can be:
The date format specified in the online help of NetMail Lite for search section is incorrect. (4920181)
The date format must contain slashes (/) instead of a dashes (-).
For example, use the pattern mm/dd/yy or mm/dd/yyyy instead of mm-dd-yy.
Online Help Documentation
Administration Console Help Topics May Be Displayed with Hidden Characters.
When viewing help topics for the Portal Server administration console, your web browser may display hidden characters (such as line return or a fixed space) in tables and cautionary notes. This problem does not occur if you are using Netscape Navigator 4.7x.
English and Localized Versions of the Administration Console Help May Differ. (4934184)
The localized versions of the following administration console help topics may differ from the English version due to last-minute changes to the user interface:
Help Links for Single Sign-on Adapter Help are Broken in Localized Versions. (4930671)
The descriptions which should be referred to in the links’ destination are included in the table of contents page itsself, so the user can read them by scrolling in the table of contents page.
The table of contents links and the context-sensitive links for the Single Sign-on Adapter administrator help do work in the US English version.
Portal Services
Users can override service attribute values that have been set by the administrator. (4922441)
The Sun ONE Portal Server adds some attributes to allow customization of Portal services at user level. However these attributes should only be modified by the user interface provided by the Portal Server. To avoid unexpected results due to changes made by users using the ldapmodify command, the host running the directory server should be configured to prevent users from executing ldapmodify command from external hosts.
Workaround
Add an ACI that can be used to protect these types of attributes. The following is a sample ACI definition
Rewriter
Lotus Notes calendar page does not work. (4927929)
The schedule tab on the Lotus notes page does not work. This prevents iNotes from working.
The Lotus notes help link does not get rewritten. (4894817)
Clicking on the Help link when using iNotes with Sun ONE Portal Server, Secure Remote Access, causes a warning box to appear. Although the warning appears, the Help page can be viewed.
The rwadmin command does not give the usage for an invalid option. (4930762)
The command’s usage should be given instead of an exception message when an invalid option is used with the command.
Clicking a link within URLScraper Channel makes the browser directly follow the link in URLScraper. (4837398)
Instead of opening a new browser window to display the new page, the Portal Server Desktop to be replaced with the new web page.
The gateway protocol is not the same as the original URI for a dynamic URI. (4890583)
The following example describes the conditions under which this behavior occurs:
- Set up the gateway profile with https (448) and http (80) enabled.
- Enable “Make Gateway protocol same as Original URI Protocol.”
- Access the gateway https://gateway:448.
- Create a bookmark for the intranet https site. For example, https://intranet.com.
The Portal Server is running in http mode.
It gets redirected to http://gateway/http://portalserver.
This URI gets rewritten with the https gateway, but on clicking the link the URI is wrapped by the psSRAPRewriter_convert_expression() function which contains the gateway URI as http://gateway. An https intranet URI is fetched by the http gateway.
Search
The categories search is not set by default. (4911483)
The categories search is not the default setting. The categories search check box needs to be turned on.
Workaround
Verify that this value is set on the Search edit page.
Authless anonymous users cannot search when document level security is turned on. (4850491)
Technical Notes
Chroot
The following libraries need to be added to the chroot environment to make NetMail and NetMail Lite work.
/usr/dt/lib/libXm.so.4
/usr/openwin/lib/libXt.so.4
/usr/openwin/lib/libXext.so.0
/usr/openwin/lib/libXtst.so.1
/usr/openwin/liblibX11.so.4
/usr/lib/libSM.so.6
/usr/lib/libICE.so.6
Importing Chrooted Instance From Another Search Server
If import manager is run from a chrooted environment that is accessing another Portal Server, the regular portal instance must be added to the instance that is running as chroot. For example, if Portal Server instance A is a chrooted instance, and Portal Server B is a normal instance, you must add the name and IP address of instance B under A /chrootDIR/etc/hosts in order to run the import manager and get data from instance B.
Errata and Sun ONE Portal Server Documentation Updates
Sun ONE Portal Server 6.2 Installation Guide
The following correction applies throughout the Sun ONE Portal Server 6.2 Installation Guide.
The path name for the install log file is:
/var/sadm/install/logs/Java_Enterprise_System_install.BMMddhhmm
The path name for the uninstall log file is:
/var/sadm/install/logs/Java_Enterprise_System_uninstall.BMMddhhmm
Preface; “How This Book is Organized”
The descriptions for Chapter 3 and Chapter 4 are incorrect.
The description for Chapter 3 should read:
The description for Chapter 4 should read:
Chapter 2; “Installing Sun ONE Portal Server”
The manual states:
The manual should read:
Chapter 2; “Configuring the Application Server Instance”
Instructions for starting the admin instance of the Sun ONE Application Server contain an incorrect directory path name. The manual reads:
The manual should read:
Chapter 2; “Changing the MIME Mapping for Secure Remote Access”
The subsection “Changing the MIME Mapping for Secure Remote Access” is no longer a Post-installation requirement if you have installed Secure Remote Access.
Chapter 2; “IBM WebSphere Application Server”
It is no longer necessary to explicitly associate the .jar and .cab extension to mime type application/octet-stream in the portal web application deployment descriptor file. The instructions in the Sun ONE Portal Server 6.2 Installation Guide can be disregarded.
Chapter 2; “Netlet and Rewriter Proxy”
The post-installation section for the Netlet and Rewriter proxy contains the following statements:
The Sun ONE Portal Server Gateway, Netlet Proxy, and Rewriter Proxy work only with JSS 3.2, NSS 3.4.2, and NSPR 4.2. After installing Gateway, Netlet Proxy, and Rewriter Proxy:
This information should be a pre-installation task. The manual should read:
The Sun ONE Portal Server Gateway, Netlet Proxy, and Rewriter Proxy work only with the JSS/NSS/NSPR packages shipped with Java Enterprise System Installer. Before installing Gateway, Netlet Proxy, and Rewriter Proxy, remove the following packages: SUNWtlsu, SUNWjssx, SUNWtlsx, SUNWprx, SUNWjss, SUNWtls and SUNWpr.
Chapter 4; “Performance and Tuning”
The path name for the web-apps.xml path name contains a typo. The following correction applies throughout Chapter 4. The correct path name for the web-apps.xml file is:
web-server-install-root/https-hostname/config.
Appendix B; “Setting Up Sun ONE Portal Server on BEA Clusters”
Appendix B of the Sun ONE Portal Server 6.2 Installation Guide has been updated. The following information replaces the section “Setting Up Sun ONE Portal Server on BEA Clusters.”
This section gives a brief description and example of how the Sun™ ONE Portal Server software can be used with BEA WebLogic Server™ clusters.
|
| |
| Note |
|
|
| |
For this example, there are five machines. All the machines must be on the same subnet. One has a directory server only (DSmach). Another is the BEA WebLogic administration server (AS). There are three cluster machines (CS1, CS2, and CS3). If you want to support load balancing, an additional machine or the administration server machine may be configured as a proxy server for load balancing. Load balancing is needed for clusters. In this example, the proxy is on the administration server.
Install the directory server on DSmach. Install BEA WebLogic Server on all four of the other machines using the default installation. Check that all servers are working correctly. On the administration server(AS) machine with BEA WebLogic Server, using the BEA WebLogic instructions, create a new domain (NEWDOMAIN) consisting of an administration server with listen port of 80. The name of the instance should be PORTALSERVER.
Install the Sun ONE Portal Server software on the AS machine with the following details.
On the other three machines with BEA WebLogic Server, using the BEA WebLogic instructions, create a new domain (NEWDOMAIN on all the three machines) consisting of an administration server with listen port of 7001 (ADMINSERVER on all the three machines) and another server with a listen port of 80 (PORTALSERVER on all the three machines). Each listen port should be the same; the example uses 80.
Next install the Portal Server software on the three machines to the managed server instance (PORTALSERVER) giving the following details.
- Server Port: 80
- Server Domain: NEWDOMAIN
- Server Name: PORTALSERVER
- Managed Server: Yes
- Stop and restart all the servers (the Portal Server, the managed server and the administration server) on all the machines.
- Check and see that the installations were successful.
- Log in to the Sun ONE Identity Server admin console as administrator.
- Choose Service Configuration in the location pane.
- Click on the Properties arrow next to Platform in the navigation pane.
- Check that the Server List has the full Sun ONE Portal Server name for the machine you plan to put the proxy on. In this example, the machine is http://AS.example.com:80.
- Click Save.
By default, Identity Management is selected in the location pane and All created organizations are displayed in the navigation pane.
Perform the steps required for deploying portal as mentioned in chapter 2.
To set up a cluster:
On the administration server(AS) machine with BEA WebLogic Server, using the BEA WebLogic instructions, create a new server instance listen port of 7001 and make the instance the administration server instance.
- Using the administration console of the admin machine AS (http://AS:7001/console), create a server for each of the machines to be in the cluster.
- Stop all the servers on the machines to be in the cluster.
- Restart those servers, but have them connect to the administration server AS. For example,
- Using the administration console of the administration machine AS (http://AS:7001/console), create the cluster.
- Select Clusters, Configure a new Cluster.
- For Address, put in the names for the servers representing the machines to be clustered: CS1,CS2,CS3.
- Inside this same window, select the Servers tab, then select the servers CS1, CS2, and CS3; move them from the Available box to the Chosen box.
./startManagedWebLogic.sh CS1 AS:7001
For Name, the example uses NEWCLUSTER.
For more detail, see the BEA WebLogic Server instructions to set up a cluster.
As you set up clusters remember the following:
Check to see that cluster is set up correctly by going the BEA WebLogic Server administration console, selecting Cluster in the left pane, selecting the Monitoring tab in the right pane, then select Monitor server participation in cluster. If one or more of the started server instances does not appear in the display, use the BEA WebLogic Server tool to verify the correct multicast addresses and port numbers.
|
| |
| Note |
If you want to start and stop the BEA WebLogic managed servers remotely from the administration console, you need to configure and run a BEA Node Manager. See the BEA WebLogic Server documentation for detailed information. |
|
| |
If you plan on using a proxy servlet for load balancing, create a web.xml file for your cluster to use to configure the load balancing servlet. Using a temporary directory make a subdirectory WEB-INF. The web.xml file is the only file in a directory (WEB-INF). Use the fully qualified machine names in the file.
|
- Make web.xml with your cluster server values into a .war file. In a terminal window, type:
- Deploy the .war file on the BEA WebLogic administration server using the java weblogic.deploy command supplied by the BEA WebLogic Server software.
- In the BEA WebLogic Server administration console on the administration server, expand Servers and select PORTALSERVER:80.
- Click the HTTP tab.
- Set the Default Web Application to the proxy.
- Restart the Portal Server.
- Select Web Applications.
- Click Configure a new Web Application.
- Enter proxy as the Name and give the complete path to the .war file.
- Click Create.
- In the left pane under Web Applications, click proxy.
- In the right pane, click the Target tab, and move Portal Server from the Available box to the Chosen box.
jar cvf proxy.war WEB-INF
Or after making the .war file, copy the .war file to the applications directory in the new domain on the administration machine (AS).
Next you need to deploy the Portal Server software to the cluster. For each web application (amconsole, amserver, amcommon, ampassword and portal) follow these steps.
- Go to the BEA WebLogic Server administration console for the administration server (AS:7001/console).
- Expand Web Applications in the left pane, then select one of the Portal Server software web applications (amconsole, amserver, amcommon, ampassword and portal).
- Undeploy the admin server (you have installed the Sun ONE Portal Server software on this server, but it is not part of the cluster, so the admin server must be removed from this server).
- Click the Edit Web Application Descriptor link.
- Click the Configure a new Web App Ext Descriptor link.
- In the left pane under WebApp Ext, Select Session Descriptor.
- In the right pane, change Persistent Store Type to replicated. Click Apply.
- Select top topic in the left pane, Web Descriptor or Identity Server Services. Select Persist. Close this window.
- Select the Target tab, then the Cluster sub-tab.
- Move your cluster name (NEWCLUSTER) from Available to Chosen box and click Apply.
- For each of the three Portal Server machines, go to the identity-server-install-root/SUNWam/lib directory and open the AMConfig.properties files with a text editor.
- Set the following values on all the machines:
com.iplanet.am.session.failover.enabled=true
com.iplanet.am.naming.url=http://AS.example.com:80/amserver/namingservice
com.iplanet.am.notification.url=http://AS.example.com:80/amserver/notificationservice
com.iplanet.am.server.host=AS.example.com
com.iplanet.am.console.host=AS.example.com
com.iplanet.am.profile.host=AS.example.com
Appendix C; “Setting the Cookie Encoding Values”
The last paragraph of this section reads:
The manual should read:
Appendix D; “To Create an Instance of the Server”
The code example for the procedure ‘To Create an Instance of the Server” should be changed to read:
Appendix E; “Setting Up LDAP Replication for the Sun ONE Portal Server”
Appendix E of the Sun ONE Portal Server 6.2 Installation Guide has been updated. The following information replaces the section “Setting Up LDAP Replication for the Sun ONE Portal Server”
Setting Up Replication on the Sun ONE Portal Server Machine
- As root, in a terminal window start the directory server console by typing:
- In the login window that is displayed, enter admin as the user name and the passphrase you chose earlier.
- In the left pane of the console, expand the directory.
- Select Directory Server (portal-server).
- In the right pane, click Open.
- Select the Configuration tab.
- Expand Data in the left pane.
- Expand The directory tree used during install in the left pane.
- Select Replication in the left pane.
- Select Enable Replication in the right pane.
- Select Master Replica. Select Next.
- Assign a number for this node. Select Next.
- Either use the default change log or input a new location. Select Next.
- Provide a password for the replication manager, select Next, and close.
- Select New in the right pane.
- Select other in the replication Agreement window.
- Input the fully qualified name of the other host and port and select OK.
- Input the password for other host and select OK.
/var/opt/mps/serverroot/startconsole
A pop-up window is displayed.
For instance dc=mydomain,dc=com.
For example:
If you select test and the other server has not had replication enabled yet then the test will fail. In this case select continue.
Setting Up Replication on the Dedicated LDAP Machine
- As root, in a terminal window start the directory server console by typing:
- In the login window that is displayed, enter admin as the user name and the passphrase you chose earlier.
- In the left pane of the console, expand the directory.
- Select Directory Server (x-ldap-server).
- In the right pane, click Open.
- Select the Configuration tab.
- Expand Data in the left pane.
- Expand The directory tree used during install in the left pane.
- Select Replication in the left pane.
- Select Enable Replication in the right pane.
- Select Master Replica. Select Next.
- Assign a number for this node. Select Next.
- Either use the default change log or input a new location. Select Next.
- Provide a password for the replication manager, select Next, and close.
- Select New in the right pane.
- Select other in the replication Agreement window.
- Input the fully qualified name of the other host and port and select OK
- Input the password for other host and select OK.
- Go back to the original machine, for example, portal-server and select Defined Replication Agreement.
- Select Action in the right pane.
- Select Initialize remote replication and click Yes.
- Go back to the second machine, for example, x-ldap-server.
- Select Tasks, Restart Directory Server, and Yes.
- Stop each LDAP instance that has been initialized then restart.
/var/opt/mps/serverroot/startconsole
The console is displayed.
A pop-up window is displayed.
For instance dc=mydomain,dc=com.
For example:
In this set up the Sun ONE Portal Server machines LDAP is a consumer of this LDAP and this LDAP is a consumer of the Portal Server machine’s LDAP.
Adding Additional LDAP Servers for Sun ONE Identity Server Identity Server and Sun ONE Portal Server
When making the replication agreements, each master must have an agreement with every other master. Any supplier you initialize, you need to restart.
Configuring the Sun ONE Portal Server Software
- In a terminal window, restart the web application container instance.
- Log in to the Sun ONE Identity Server admin console as administrator.
- Select User Management in the View menu and click on the organization name link in the navigation pane.
- Select Services in the Show menu in the navigation pane.
- Click on the Properties arrow next to LDAP Authentication in the navigation pane.
- Check that the Primary LDAP box only has the full-portal-server-name listed. If you have multiple LDAP servers, the Primary LDAP box should list localhost or full-portal-server-name|full-portal-servername:389.
- To the Secondary LDAP box Add the x-ldap-full-server-name to the list.
- Click Save to save the configuration.
- If you have a number of Portal Server installations, complete Step 14 to Step 18. If not, you are finished.
- Return to the root level by clicking root suffix (default isp) in the location pane.
- In the View menu, select Service Management.
- Click on the Properties arrow next to Platform in the navigation pane.
- Check that the Server List has all of the Portal Server machines listed using the full-portal-server-name for each server.
- Click Save.
By default, Identity Management is selected in the location pane and All created organizations are displayed in the navigation pane.
Appendix F; “Setting Up the Sun ONE Portal Server to Use Secure External LDAP Directory Server”
Appendix F of the Sun ONE Portal Server 6.2 Installation Guide has been updated. The following information replaces the section “Setting Up the Sun ONE Portal Server to Use Secure External LDAP Directory Server.”
In the default install, the Sun™ ONE Portal Server, the Sun™ ONE Identity Server, and the Sun™ ONE Directory Server software are all running on the same host. However, depending on the performance, security, and integration requirements of your deployment, you might want to run the directory server on a separate, external host and have the Portal Server access the directory over a secure connection using Secure Sockets Layer (SSL). In order to access the Directory Server over a secure connection, the Sun™ ONE Application Server must be configured to trust the certificate authority that signed the directory’s certificate.
Setting up the Sun ONE Portal Server to use an external LDAP directory, requires the following procedures:
Configuring the Directory Server to Run in SSL
- Verify that both the Directory Server (ns-slapd process) and the administration server (ns-httpd process) are started and running.
- As root, in a terminal window start the directory server console by typing:
- In the login window that is displayed, enter admin as the user name and the passphrase for the Directory Server.
- In the left pane of the console, expand the directory until you see the Directory Server instance under Server Group.
- Select Directory Server instance and click Open.
- Select Tasks and then Manage Certificates.
- Click Request.
- After the certificate request is sent to the CMS, have the administrator of the CMS approve the request and send back the approved certificate.
- Get the generated certificate for the DS and the CMS certificate.
- Select Manage Certificates, Server Certificates and then click Install.
- Copy and paste the approved certificate data from Step 8 into the text area and follow the steps of the wizard to install the certificate.
- With the Manage Certificates window open, select the CA Certificates tab.
- Click Close to close the Manage Certificates window.
- Select the Configuration tab.
- On the Network tab verify or specify a valid port number in the Encrypted port field on the and click Save.
- Click the Encryption tab, check the Enable SSL for this server and Use the cipher family: RSA check boxes and click Save.
- Restart the Directory Server and supply the certificate database password entered in Step 6.
/var/opt/mps/serverroot/startconsole
The first time you perform this task, you’ll be asked to create a certificate database by entering a password. Make a note of this password as you will need it later to start up the Directory Server.
The Certificate Request Wizard appears. Follow the wizard and complete the steps to generate a certificate request. The request is sent to a Certificate Management Server (CMS) for approval. The CMS returns the real certificate. Save a copy of the certificate request by copying the request data to a file.
Since the CMS generated the certificate for DS, the CMS will also have to be trusted by importing its certificate as a root CA.
The Certificate Install Wizard appears.
When the certificate is successfully installed, the certificate displays as a line item on the Server Certificates tab.
If the CA from which you got your certificate in Step 9 is in the CA certs list, you do not need to install the certificate in that list.
If the certificate is not in the list, you need to obtain the root CA certificate from your certificate authority and install it.
The default port is 636.
Your Directory is now listening on port 636 (default) for SSL connections.
Creating a Certificate Database
When you create the certificate database, you specify a password that will be used for a key-pair file. You will also need this password to start a server using encrypted communications.
In the certificate database you create and store the public and private keys, referred to as your key-pair file. The key-pair file is used for SSL encryption. You will use the key-pair file when you request and install your server certificate. The certificate is stored in the certificate database after installation.
The procedure for creating a certificate database depends on the type of web container that you are using. The following instructions are for creating a certificate database on the Sun ONE Web Server and can also be found in Sun ONE Web Server, Enterprise Edition Administrator’s Guide at http://docs.sun.com.
For instructions on creating a certificate database on the Sun ONE Application Server refer to Sun ONE Application Server 7 Administrator’s Guide to Security on http://docs.sun.com.
To create a certificate database on the Sun ONE Web Server, perform the following steps:
- Start the administration server instance for the web container and access administration console.
- Click Manage.
- Click the Security tab.
- Click on the Create Database link.
- Enter a password for the database.
- Repeat
- Click OK.
For the Server Manager you must first select the server instance from the drop-down list.
Using the password.conf File
By default, the web server prompts the administrator for the key database password before starting up. If you want to be able to restart an unattended web server, you need to save the password in a password.conf file. Only do this if your system is adequately protected so that this file and the key databases are not compromised.
Normally, you cannot start an Unix SSL-enabled server with the /etc/rc.local or the /etc/inittab files because the server requires a password before starting. Although you can start an SSL-enabled server automatically if you keep the password in plain text in a file, this is not recommended. The server’s password.conf file should be owned by root or the user who installed the server, with only the owner having read and write access to them. On Unix, leaving the SSL-enabled server’s password in the password.conf file is a large security risk. Anyone who can access the file has access to the SSL-enabled server’s password. Consider the security risks before keeping the SSL-enabled server’s password in the password.conf file.
Installing A Root Certificate Authority (CA) Certificate
The procedure for installing a root CA certificate depends on the type of web container that you are using.
For instructions on installing a root CA certificate on the Sun ONE Application Server refer to Sun ONE Application Server 7 Administrator’s Guide to Security on http://docs.sun.com.
The following procedure describes how to install a root CA on the Sun ONE Web Server, and can also be found in Sun ONE Web Server, Enterprise Edition Administrator’s Guide at http://docs.sun.com.
The source that provided your certificate is the same source from which you obtain your root CA certificate.
- Log in to the Web Server console and Select the instance.
- Click on the Security tab.
- Click Install Certificate.
- Click on Trusted Certificate Authority (CA).
- Enter the Certificate Database password in the Key Pair File Password field.
- Paste the certificate into the provided text field, or check the radio button and enter the filename in the text box. Click Submit.
- Click Add Server Certificate.
- You can click on Manage Certificates to verify that your certificate is in the list.
- Restart the web container.
The browser will display the certificate, and provide a button to add the certificate.
Enabling Identity Server to use SSL to Communicate with the Directory Server
To enable SSL for the Directory server, edit the identity-server-install-dir/SUNWam/lib/AMConfig.properties file. This step is container independent and must be done for Sun ONE Web Server as well as Sun ONE Application Server.
Change the following settings in the AMConfig.properties file from:
|
to
|
Change the connection port and the connection type values in the identity-server-install-dir/SUNWam/config/ums/serverconfig.xml file to change from open mode to SSL.
Edit the serverconfig.XML file and change the following line from:
to:
After making these changes to the serverconfig.xml file restart the web container.
Sun ONE Portal Server, Secure Remote Access 6.2 Administrator’s Guide
Chapter 2; “Obtaining Client Information”
Table 2-3 lists the information you can find in HTTP headers.
The header labeled PS-GW-CLientIP is not available in this release, due to a JSS/NSS bug.
Chapter 4; “Configuring Unix Authentication”
The instructions for configuring Unix Authentication have changed. The new instructions are as follows:
Before configuring NetFile to work with NFS shares, you must first enable and configure Unix authentication.
To Enable Unix Authentication
- Log in to the Identity Server administration console as administrator.
- Select the Identity Management tab from the administration console.
- Select Services from the View drop down menu in the left view pane. If UNIX doesn’t show in the left view pane, it needs to be registered. UNIX will show up in the right pane by clicking Register in the left view pane.
- Register the service by selecting the checkbox next to UNIX and click Register in the right pane.
- Click the arrow next to UNIX in the left view pane and click Create.
- Click Save.
- Log out of the administration console.
- Restart the Identity Server as root (or restart as the user that Identity Server has been configured to run as):
- Verify that the doUnix process is running:
The service template is created.
/etc/init.d/amserver stoptall
/etc/init.d/amserver startall
ps -ef | grep doUnix
To Configure Unix Authentication
- Telnet to the local host on the configuration port as follows:
- Type the Unix Helper Listen Port number.
- Type the Unix Helper Session Timeout value in seconds.
- Type the Unix Helper Max Sessions value.
telnet localhost 58946
Specify the default value of 57946 for the Listen Port.
A message saying “doUnix configured successfully” is displayed.
Chapter 9; “Create List of Non-authenticated URLs”
The subsection “Create List of Non-authenticated URLs” should include the following additional information:
The Security tab of the gateway configuration interface accepts fully qualified URLs. The URLs that you add to the list of non-authenticated URLs can be Portal hosts, or external hosts.
Appendix A; “Sun Crypto Accelerator 1000”
Step 4 in the manual lists the path in which the tools are located for SRA 6.2:
The path name should be changed, so the paragraph should read:
Step 9 contains a typo. The letters in the SUNWps package are transposed. The manual reads:
The manual should read:
Appendix A; “Sun Crypto Accelerator 4000”
Step 3 in the manual lists the path in which the tools are located for SRA 6.2:
The path name should be changed, so the paragraph should read:
Step 10 contains a typo. The letters in the SUNWps package are transposed. The manual reads:
The manual should read:
Sun ONE Portal Server 6.2 Administrator’s Guide
Chapter 12; “Inserting Instant Messaging Links in an Organization”
The manual reads:
The manual should read:
Chapter 12; “Enabling Secure Mode for Sun ONE Instant Messenger in Sun ONE Portal Server”
Step 9 reads:
Select the Download Applet check box and enter the following string:
$IM_DOWNLOAD_PORT:$IM_WEBSERVER_HOST:$IM_WEBSERVER_PORT
For example:
49916:company22.example.com:80
where,
IM_DOWNLOAD_PORT. The port on which Instant Messaging resources are downloaded using Netlet.
IM_WEBSERVER_HOST. The host name of the web server serving the Instant Messenger. For example. company22.example.com
IM_WEBSERVER_PORT. The port number of the web container serving the Instant Messenger. For example, 80.
Step 9 should read:
Select the Download Applet check box and enter the following string:
$IM_DOWNLOAD_PORT:$IM_HOST:$IM_PORT
For example:
49916:company22.example.com:80
where,
IM_DOWNLOAD_PORT. The port on which Instant Messaging resources are downloaded using Netlet.
IM_HOST. The host name of the web container serving Instant Messenger. For example. company22.example.com
IM_PORT. The port number of the web container serving the Instant Messenger. For example, 80.
Chapter 13; “Enabling Secure Mode for Sun ONE Instant Messenger in Sun ONE Portal Server”
Steps 12 and 13 read:
Steps 12 and 13 should read:
Chapter 14; “Configuring a Sun ONE Portal Server Instance to Use an HTTP Proxy”
The jvm12.conf file has been replace with the file server.xml in the Sun ONE Portal Server product, so the document should refer to server.xml instead of jvm12.xml.
Step 2 of the procedure to configure a Sun ONE Portal Server instance to use an HTTP proxy reads:
http.proxyHost=proxy_host
http.proxyPort=proxy_port
|
| |
| Note |
If the jvm12.conf file has a proxy set up (using the http.proxyHost= and http.proxyPort= options) you may want to add the http.nonProxyHosts=proxy_host option. It is possible that the portal server may not be accessible through the proxy server, unless the portal server is added to the proxy server access list. |
|
| |
Step 2 should read:
JVMOPTIONS-Dhttp.proxyHost=proxy_host/JVMOPTIONS
JVMOPTIONS-Dhttp.proxyPort=proxy_port/JVMOPTIONS
|
| |
| Note |
If the server.xml file has a proxy set up (using the http.proxyHost= and http.proxyPort= options) you may want to add the http.nonProxyHosts=proxy_host option. It is possible that the portal server may not be accessible through the proxy server, unless the portal server is added to the proxy server access list. |
|
| |
A clarification to the subsection “Configuring a Sun ONE Portal Server Instance to Use an HTTP Proxy,” should be added that states the Portal Server is configured to use an HTTP proxy by setting the http.proxyHost and http.proxyPort Java Virtual Machine (JVM) system properties in the web container that is running the Portal Server web application. The method for setting JVM system properties varies on different web containers. The procedure described in this section of the Sun ONE Portal Server 6.2 Administrator’s Guide is specifically for configuring the Sun ONE Web Server instance to use an HTTP proxy.
How to Report Problems and Provide Feedback
If you have problems with Sun™ ONE Portal Server, contact Sun customer support using one of the following mechanisms:
- Sun Software Support services online at
http://www.sun.com/service/sunone/software
So that we can best assist you in resolving problems, please have the following information available when you contact support:
- Description of the problem, including the situation where the problem occurs and its impact on your operation
- Machine type, operating system version, and product version, including any patches and other software that might be affecting the problem
- Detailed steps on the methods you have used to reproduce the problem
- Any error logs or core dumps
Sun Welcomes Your Comments
Sun is interested in improving its documentation and welcomes your comments and suggestions. Email your comments to Sun at this address:
Please include the part number (816-6746-10) of the document in the subject line and the book title (Sun ONE Portal Server 6.2 Release Notes) in the body of your email.
Additional Sun Resources
Listed below are the documents released with the Sun™ ONE Portal Server 6.2 documentation suite:
- Sun ONE Portal Server 6.2 Installation Guide
- Sun ONE Portal Server 6.2 Administrator’s Guide
- Sun ONE Portal Server 6.2 Migration Guide
- Sun ONE Portal Server, Secure Remote Access 6.2 Adminstrator’s Guide
- Sun ONE Portal Server 6.2 Desktop Customization Guide
- Sun ONE Portal Server 6.2 Developer’s Guide
- Sun ONE Portal Server 6.2 Deployment Guide
Useful Sun ONE information can be found at the following Internet locations:
- Documentation for Sun ONE Portal Server can be found at:
http://docs.sun.com/db/prod/s1portalsrv - Sun ONE Documentation
http://docs.sun.com/prod/sunone - Sun ONE Professional Services
http://www.sun.com/service/sunps/sunone - Sun ONE Software Products and Service
http://www.sun.com/software - Sun ONE Software Support Services
http://www.sun.com/service/sunone/software - Sun ONE Support and Knowledge Base
http://www.sun.com/service/support/software - Sun Support and Training Services
http://www.sun.com/supportraining - Sun ONE Consulting and Professional Services
http://www.sun.com/service/sunps/sunone - Sun ONE Developer Information
http://sunonedev.sun.com - Sun Developer Support Services
http://www.sun.com/developers/support - Sun ONE Software Training
http://www.sun.com/software/training - Sun Software Data Sheets
http://wwws.sun.com/software
Copyright © 2003 Sun Microsystems, Inc. All rights reserved.
Sun, Sun Microsystems, the Sun logo, Solaris, Java and the Java Coffee Cup logo are trademarks or registered trademarks of Sun Microsystems, Inc. in the United States and other countries. Use of Sun ONE Portal Server is subject to the terms described in the license agreement accompanying it.
Portions of this product were developed from soif.h - Summary Object Interchange Format (SOIF) based on adaptions to the original Harvest code:
src/common/include/template.h, Original Harvest Copyright: http://harvest.cs.colorado.edu/ Copyright(c) 1994, 1995. All rights reserved.
Portions of this product were developed using server/robot/src/base/util.c Copyright (c) 1989 The Regents of the University of California. All rights reserved.
Redistribution and use in source and binary forms, with or without modification, are permitted provided that the following conditions are met:
1. Redistributions of source code must retain the above copyright notice, this list of conditions and the following disclaimer.
2. Redistributions in binary form must reproduce the above copyright notice, this list of conditions and the following disclaimer in the documentation and/or other materials provided with the distribution.
3. All advertising materials mentioning features or use of this software must display the following acknowledgement: This product includes software developed by the University of California, Berkeley and its contributors.
4. Neither the name of the University nor the names of its contributors may be used to endorse or promote products derived from this software without specific prior written permission.
THIS SOFTWARE IS PROVIDED BY THE REGENTS AND CONTRIBUTORS ‘‘AS IS’’ AND ANY EXPRESS OR IMPLIED WARRANTIES, INCLUDING, BUT NOT LIMITED TO, THE IMPLIED WARRANTIES OF MERCHANTABILITY AND FITNESS FOR A PARTICULAR PURPOSE ARE DISCLAIMED. IN NO EVENT SHALL THE REGENTS OR CONTRIBUTORS BE LIABLE FOR ANY DIRECT, INDIRECT, INCIDENTAL, SPECIAL, EXEMPLARY, OR CONSEQUENTIAL DAMAGES (INCLUDING, BUT NOT LIMITED TO, PROCUREMENT OF SUBSTITUTE GOODS OR SERVICES; LOSS OF USE, DATA, OR PROFITS; OR BUSINESS INTERRUPTION) HOWEVER CAUSED AND ON ANY THEORY OF LIABILITY, WHETHER IN CONTRACT, STRICT LIABILITY, OR TORT (INCLUDING NEGLIGENCE OR OTHERWISE) ARISING IN ANY WAY OUT OF THE USE OF THIS SOFTWARE, EVEN IF ADVISED OF THE POSSIBILITY OF SUCH DAMAGE.
/
Portions of this product were developed using common/src/libcs/md5.c
Copyright (C) 1990, RSA Data Security, Inc. All rights reserved. License to copy and use this software is granted provided that it is identified as the "RSA Data Security, Inc. MD5 Message Digest Algorithm" in all material mentioning or referencing this software or this function.
License is also granted to make and use derivative works provided that such works are identified as "derived from the RSA Data Security, Inc. MD5 Message-Digest Algorithm" in all material mentioning or referencing the derived work.
RSA Data Security, Inc. makes no representations concerning either the merchantability of this software or the suitability of this software for any particular purpose. It is provided "as is" without express or implied warranty of any kind.
These notices must be retained in any copies of any part of this documentation and/or software.
Portions of this product were developed using common/src/libcs/getop.c
Copyright (c) 1987 Regents of the University of California.
All rights reserved.
Redistribution and use in source and binary forms, with or without modification, are permitted provided that the following conditions are met:
1. Redistributions of source code must retain the above copyright notice, this list of conditions and the following disclaimer.
2. Redistributions in binary form must reproduce the above copyright notice, this list of conditions and the following disclaimer in the documentation and/or other materials provided with the distribution.
3. All advertising materials mentioning features or use of this software must display the following acknowledgement: This product includes software developed by the University of California, Berkeley and its contributors.
4. Neither the name of the University nor the names of its contributors may be used to endorse or promote products derived from this software without specific prior written permission.
THIS SOFTWARE IS PROVIDED BY THE REGENTS AND CONTRIBUTORS ‘‘AS IS’’ AND ANY EXPRESS OR IMPLIED WARRANTIES, INCLUDING, BUT NOT LIMITED TO, THE IMPLIED WARRANTIES OF MERCHANTABILITY AND FITNESS FOR A PARTICULAR PURPOSE ARE DISCLAIMED. IN NO EVENT SHALL THE REGENTS OR CONTRIBUTORS BE LIABLE FOR ANY DIRECT, INDIRECT, INCIDENTAL, SPECIAL, EXEMPLARY, OR CONSEQUENTIAL DAMAGES (INCLUDING, BUT NOT LIMITED TO, PROCUREMENT OF SUBSTITUTE GOODS OR SERVICES; LOSS OF USE, DATA, OR PROFITS; OR BUSINESS INTERRUPTION) HOWEVER CAUSED AND ON ANY THEORY OF LIABILITY, WHETHER IN CONTRACT, STRICT LIABILITY, OR TORT (INCLUDING NEGLIGENCE OR OTHERWISE) ARISING IN ANY WAY OUT OF THE USE OF THIS SOFTWARE, EVEN IF ADVISED OF THE POSSIBILITY OF SUCH DAMAGE.