Configuring the Approval Form (Approvals Tab, Approval Form Configuration Section)
Note –
The Delete User Template does not contain an Approval Form Configuration section. You can configure this section for Create User and Update User Templates only.
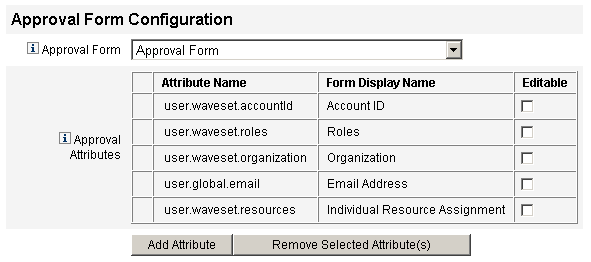
You can use features in the Approval Form Configuration section to select an approval form, and add attributes to (or remove attributes from) the approval form.
Figure 9–17 Approval Form Configuration

By default, the Approval Attributes table contains the following standard attributes:
-
user.waveset.accountId
-
user.waveset.roles
-
user.waveset.organization
-
user.global.email
-
user.waveset.resources
Note –
The default approval form was instrumented to allow approval attributes to display. If you are using an approval form other than the default form, you must instrument your form to display the approval attributes specified in the Approval Attributes table.
 To Configure an Approval Form for Additional Approvers
-
Select a form from the Approval Form menu.
Approvers will use this form to approve or reject an approval request.
-
Enable checkboxes in the Editable column of the Approval Attributes table to allow approvers to edit the attribute value.
For example, if you enable the user.waveset.accountId checkbox the approver can change the user’s account ID.
Note –If you modify any account-specific attribute values in the approval form, you will also override any global attribute values with the same name when the user is actually provisioned. For example, if resource R1 exists in your system with a description schema attribute, and you add user.accounts[R1].description attribute to the approval form as an editable attribute, any changes to the description attribute value in the approval form will override the value propagated from global.description for resource R1 only.
-
Click the Add Attribute orRemove Selected Attributes buttons to specify attributes from the new user’s account data to display in the approval form.
-
To add attributes to the form, see To Add Attributes to the Approval Form.
-
To remove attributes from the form, see Removing Attributes.
You cannot remove the default attributes from an approval form unless you modify the XML file.
-
 To Add Attributes to the Approval Form
-
Click the Add Attribute button located under the Approval Attributes table.
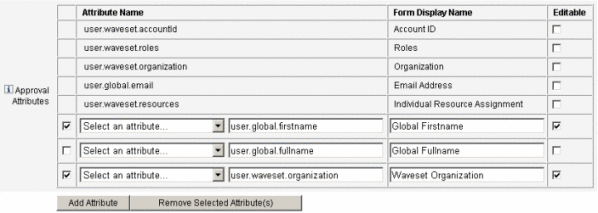
The Attribute name menu becomes active in the Approval Attributes table, as shown in the following figure.
Figure 9–18 Adding Approval Attributes

-
Select an attribute from the menu.
The selected attribute name displays in the adjacent text field and the attribute’s default display name displays in the Form Display Name column.
For example, if you select the user.waveset.organization attribute, you can:
-
Change the default attribute name or the default Form Display Name if necessary by typing a new name into the appropriate text field.
-
Enable the Editable checkbox to allow the approver to change the attribute’s value.
For example, the approver might want to override information such as the user’s email address.
-
-
Repeat these steps to specify additional attributes.
Removing Attributes
Note –
You cannot remove the default attributes from an approval form unless you modify the XML file.
 To Remove Attributes From the Approval Form
-
Enable one or more checkboxes in the leftmost column of the Approval Attributes table.
-
Click the Remove Selected Attributes button to immediately remove the selected attributes from the Approval Attributes table.
For example, user.global.firstname and user.waveset.organization would be removed from the following table when you clicked the Remove Selected Attributes button.
Figure 9–19 Removing Approval Attributes

- © 2010, Oracle Corporation and/or its affiliates
