 To Create a Resource
Once a resource type is enabled, you can then create an instance of that resource in Identity Manager. To create a resource, use the Resource Wizard.
The Resource Wizard will guide you in setting up the following items:
-
Resource-specific parameters. You can modify these values from the Identity Manager interface when creating a specific instance of this resource type.
-
Account attributes. Defined in the schema map for the resource. These determine how Identity Manager user attributes map to attributes on the resource.
-
Account DN or identity template. Includes account name syntax for users, which is especially important for hierarchical namespaces.
-
Identity Manager parameters for the resource. Sets up policies, establishes resource approvers, and sets up organization access to the resource.
-
Log in to the Administrator interface.
-
Click the Resources tab. Verify that the List Resources subtab is selected.
-
Locate the Resource Type Actions drop-down list and select New Resource.
The “New Resource” page opens.
-
Select a resource type from the drop-down list. (If the resource type you are looking for is not listed, you need to enable it. See Managing the Resources List.)
-
Click New to display the Resource Wizard Welcome page.
-
Click Next to begin defining the resource.
The Resource Wizard steps and pages display in the following order:
-
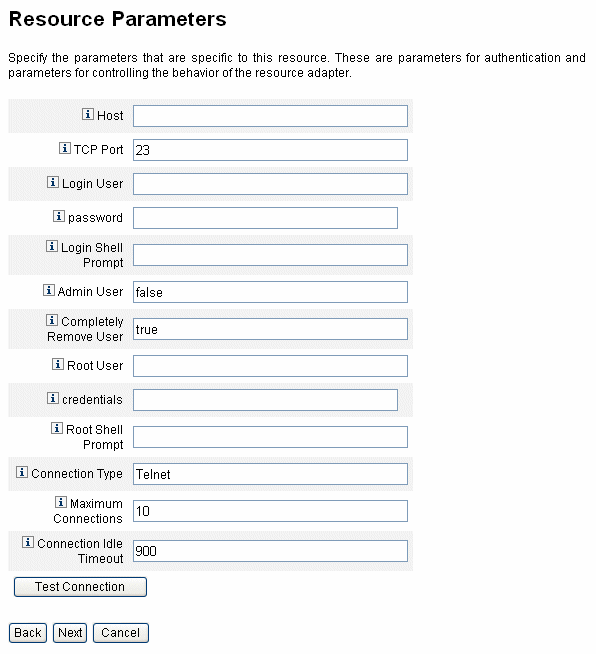
Resource Parameters. Set up resource-specific parameters that control authentication and resource adapter behavior. Enter parameters, and then click Test Connection to ensure the connection is valid. On confirmation, click Next to set up account attributes.
The following figure shows the Resource Parameters page for Solaris resources. The form fields on this page are different for different resources.

-
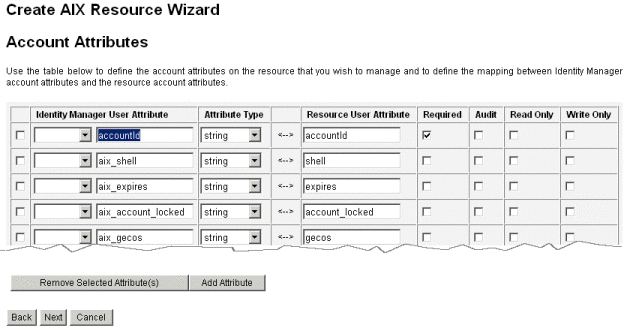
Account Attributes (schema map). Maps Identity Manager account attributes to resource account attributes. For more information about resource account attributes, see To View or Edit Resource Account Attributes.
-
To add an attribute, click Add Attribute.
-
To remove one or more attributes, select the boxes next to the attribute and click Remove Selected Attributes.
The next figure shows the Account Attributes page in the Resource Wizard.

Note –If you want to export attributes to the EXT_RESOURCEACCOUNT_ACCTATTR table, you must check the Audit box for each attribute to be exported.
When you are finished, click Next to set up the Identity Template.
-
-
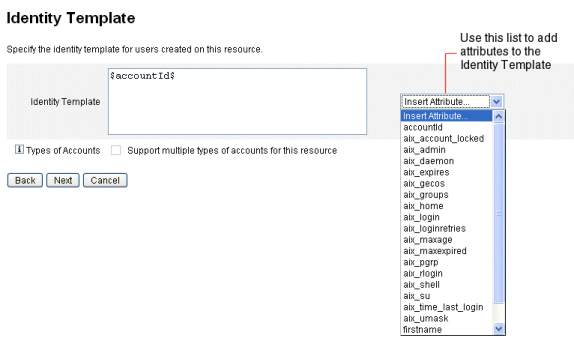
Identity Template. Defines account name syntax for users. This feature is particularly important for hierarchical namespaces.
-
To add an attribute to the template, select it from the Insert Attribute list.
-
To delete an attribute, highlight it in the string and use the delete key on your keyboard. Delete the attribute name, as well as the preceding and following $ (dollar sign) characters.
-
Type of accounts. Identity Manager provides the ability to assign multiple resource accounts to a single user. For example, a user may require an administrator-level account as well as a regular user account on a particular resource. To support multiple account types on this resource, select the Type of accounts check box.
Note –You cannot select the Type of accounts check box if you have not created one or more Identity Generation rules identified by the subtype IdentityRule. Because accountIds must be distinct, different types of accounts must generate different accountIds for a given user. Identity Generation rules specify how these unique accountIds should be created.
Sample identity rules are provided in sample/identityRules.xml.
You cannot remove an account type until it is no longer referenced by other objects within Identity Manager. Also, you cannot rename an account type.
For more information about completing the Type of accounts form, see the Identity Manageronline Help. For more information about creating multiple resource accounts for a user, see Creating Multiple Resource Accounts for a User.

-
-
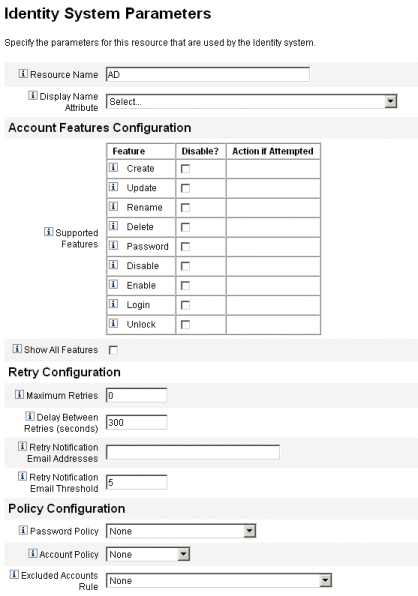
Identity System Parameters. Sets Identity Manager parameters for the resource, including retry and policy configuration, as shown in To Create a Resource.

-
-
Use Next and Back to move among the pages. When you complete all selections, click Save to save the resource and return to the list page.
- © 2010, Oracle Corporation and/or its affiliates
