| A P P E N D I X B |
|
Options for Experienced Users |
This chapter provides experienced users information about other Sun StorageTek Common Array Manager tools and installation options for the Sun Storage J4200, J4400, and J4500 arrays. It contains the following sections:
The recommended software installation in Chapter 2 did not detail the installation options. The section provides more information about the installation options in the following section:
This install option creates a management station that contains the full set of CAM services:
The full install can either be installed locally on a data host connected to the array or on a central management server that communicates with the array via a proxy agent.
This option creates a compact, standalone installation which can be as little as 25mb in size.
This light-weight management solution is installed on a data host attached to the array. The data host can also serve as a management host using the CLI only installation option and provides:
This option is also used to load the proxy agent that allows communication between the full management software on a central management server and the array.
The Cli-only management software will manage the array without using the proxy agent. Deactivate the proxy agent when the management host is directly attached.
FIGURE B-1 shows the CAM CLI-only option installed on a data host that is also acting as a management host.
FIGURE B-1 Using the CAM CLI-Only Option to Manage the Array

This option installs a thin scripting client that connects via secure HTTP (HTTPS) to the management host. Login to the management host and navigate to the CLI directory to manage the J4000 Array Family.
See the Sun StorageTek Common Array Manager Software Release Notes, Release 6.1.2 for a list of supported operating systems for the client.
The following tables show the location of the files and logs for the Sun StorageTek Common Array Manager software by Operating System.
/var/opt/CommonArrayManager/Host_Software_6.x.x.x/bin |
|
/var/sadm/install/se6000 |
|
TABLE B-4 summarizes the commands you need to install the management software using either a GUI wizard or a CLI script.
|
Uninstall the management software. Note: The Add/Remove Programs feature in Windows is supported |
||
If you are using the Solaris or Linux operating system and a path is not defined, use ./ to run the commands (./RunMe.bin).
If you are using a Windows platform, if the command alone does not work, add .\ to run the commands (.\RunMe.bat).
Chapter One recommended that using Sun StorageTek Common Array Manager’s browser interface option was the best option for new users. This section discusses the options available to use a Command Line Interface (CLI).
The CLI performs the same control and monitoring functions available through the browser interface. It is the interface for scripting tasks.
There are two forms of the CLI:
The only difference is that the local CLI requires a user has to run the command as administrator from a shell on the management host and because of this limitation the login and logout commands aren’t supported.
Both CLIs can manage any array that has been registered and added to the Common Array Manager inventory in the same way that the browser interface can manage any array in the inventory. The array type and array management path (in-band, out-of-band, proxy agents) has no limitations with local or remote CLI usage. Both CLIs manage the same arrays with the same command set.
The following explains how to log in to and out of a the management host using the CLI. The options for accessing the CLI are presented in the next section.
There are different CLI directories for the remote and local CLIs.
1. Access the local CLI directory:
2. Access the remote CLI directory:
3. Log into the remote CLI by typing the following command:
% sscs login -h cam-hostname -u username
| Note - The Local CLI on a data host does not require the login command. You will need the terminal window login to the host. |
You can now use CLI commands to perform the same software operations as those available in the browser interface.
For more information about CLI commands, see:
| Note - To locate the sscs(1M) man page, you must update your MANPATH variable or use the -m option with the man command. |
4. Log out by typing the following command:
The local and remote CLIs can be accessed remotely through the full management workstation using:
Navigate to the Local CLI directory to manage the J4000 arrays via the proxy agent.
This thin scripting client uses HTTPS to communicate with the management host. Login to the management host and navigate to the Local CLI directory to manage the J4000 arrays via the proxy agent.
Login to the management host and navigate to the Local CLI directory to manage the J4000 arrays via the proxy agent.
This section describes how to install the management software using a command line interface script and other options for experience users. It contains the following sections:
You can use a CLI script to install the Common Array Manager software with the same options as the GUI install wizard on a SPARC system running the Solaris 8, 9, or 10 Operating System, or on an X86 or X64 System running the Solaris OS.
The array installation files and installers are provided in a compressed .bin file on the CD.
The process unpacks the contents of the file on the host and then proceeds with the installation.
Before you continue, check that all of the requirements are met, as listed in Checking the Installation Requirements.
|
You can install from a CD or from a download of the install files from the Sun Software Download Center. If installing from a download, run tar xvf filename to unpack the file, then change to the Host_Software_6.x.x.x directory and begin the following procedure at Step 3.
1. Log in to the host’s Solaris OS as root.
2. Insert the host software installation CD into a drive on the management host.
If the compressed installation file does not appear in a directory window:
a. Change to the /cdrom/cdrom0 directory:
b. Display the contents of the CD:
3. Review the README.txt file for the latest information on the product and the installation process.
4. To unpack the contents of the compressed installation file, enter the following command:
The files are unpacked in the default directory - /var/opt/Common Array Manager.
The Host_Software_6.x.x.x directory is unpacked into the default directory. To use a different directory, enter the following command:
RunMe.bin -c /path-to-new-directory
The following message is displayed:
Initializing InstallShield Wizard
Launching InstallShield Wizard
The host software installer is launched automatically after the installation files are unpacked and the initial host installer prompt is displayed.
5. When prompted about the license agreement, accept the agreement and press Return.
6. When prompted to select the installation type, do one of the following:
If you select Custom, you will be prompted to choose:
This install option creates a management station that contains the full set of CAM services:
This option creates a compact, standalone installation which can be as little as 25mb in size. This light-weight management solution is installed on the data host provides:
This option is also used to load the proxy agent that allows communication between the full management software on the management workstation and the array.
Do not activate the proxy if the management host is directly connected to the array.
There is also an option to install array firmware using the CLI.
Same as the last option, but without firmware files. Use this option to install the proxy agent on a data host.
This option installs a thin scripting client that connects via secure HTTP (HTTPS) to the management host. Login to the management host and navigate to the Local CLI directory to manage the J4000 arrays via the proxy agent.
See the Sun StorageTek Common Array Manager Software Release Notes, Release 6.1.2 for a list of supported operating systems.
When the installation is complete, the host software installer Installation Summary screen is displayed.
7. During a custom install, choosing to install a CLI only install will display the Proxy for Remote Access screen.
Do not activate the proxy if the management host is directly connected to the array
a. Select the Enable button to enable remote access to the array via a proxy agent.
The proxy agent receives out-of band communication from the management software over Ethernet and delivers the information over an in-band SAS connection between the data host and the array. Access is over https and port 8653.
b. Enter and confirm a proxy agent password of up to 15 characters for remote access to this host.
Be sure to remember the password. You will need to enter the proxy agent password when registering the array.
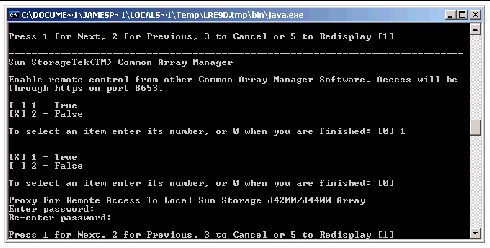
8. Press Return to complete the installation.
9. Eject the CD and remove it from the drive.
You can use a CLI script to install the Common Array Manager software with the same options as the GUI install wizard on a host system running the Red Hat or SUSE Linux Operating System.
The array installation files and installers are provided in a compressed .bin file on the CD.
The process unpacks the contents of the file on the host and then proceeds with the installation.
Before you continue, check that all of the requirements are met, as listed in Checking the Installation Requirements.
|
You can install from a CD or from a download of the install files from the Sun Software Download Center. If installing from a download, run tar xvf filename to unpack the file, then change to the Host_Software_6.x.x.x directory and begin the following procedure at Step 3.
1. Log in to the management host Linux OS as root.
2. Insert the host software installation CD into a drive on the management host.
If the compressed installation file does not appear in a directory window:
a. Change to the /media/cdrom directory:
cd /media/cdrom
b. Display the contents of the CD:
3. Review the README.txt file for the latest information on the product and the installation process.
4. To unpack the contents of the compressed installation file, enter the following command:
The files are unpacked in the default directory: /var/opt/CommonArrayManager/Host_Software_6.x.x.x
The Host_Software_6.x.x.x directory is unpacked into the default directory. To use a different directory, enter the following command:
RunMe.bin -c /path-to-new-directory
The following message is displayed:
Initializing Install Shield Wizard
Launching InstallShield Wizard
The host software installer is launched automatically after the installation files are unpacked and the initial host installer prompt is displayed.
5. When prompted about the license agreement, accept the agreement and press Return.
6. When prompted to select the installation type, do one of the following:
If you select Custom, you will be prompted to choose:
This install option creates a management station that contains the full set of CAM services:
This option creates a compact, standalone installation which can be as little as 25mb in size. This is light-weight management solution installed on the data host provides:
This option is also used to load the proxy agent that allows communication between the full management software on the management workstation and the array.
Do not activate the proxy if the management host is directly connected to the array
There is also an option to install array firmware using the CLI.
Same as the last option, but without firmware files. Use this option to install the proxy agent on a data host.
This option installs a thin scripting client that connects via secure HTTP (HTTPS) to the management host. Login to the management host and navigate to the Local CLI directory to manage the J4000 arrays via the proxy agent.
See the Sun StorageTek Common Array Manager Software Release Notes, Release 6.1.2 for a list of supported operating systems.
When the installation is complete, the host software installer Installation Summary screen is displayed.
7. During a custom install. choosing to install the CLI only management software will display the Proxy for Remote Access screen.
Do not activate the proxy if the management host is directly connected to the array
a. Select the Enable button to enable remote access to the array via a proxy agent.
The proxy agent receives out-of band communication from the management software over Ethernet and delivers the information over an in-band SAS connection between the data host and the array. Access is over https and port 8653.
b. Enter and confirm a proxy agent password of up to 15 characters for remote access to this host.
Be sure to remember the password. You will need to enter the proxy agent password when registering the array.
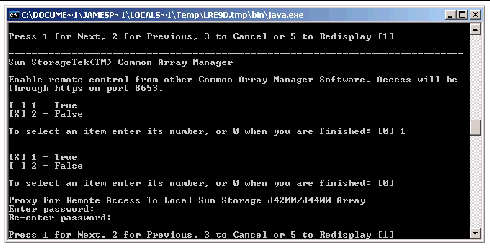
8. Press Return to complete the installation.
9. Eject the CD and remove it from the drive.
You can use a CLI script to install the Common Array Manager software with the same options as the GUI install wizard on a system running Windows 2000, 2003, or XP.
The array installation files and installers are provided in a compressed file on the CD.
The process unpacks the contents of the file on the host and then proceeds with the installation.
Before you continue, check that all of the requirements are met, as listed in Checking the Installation Requirements.
|
1. Log into Windows as Administrator.
2. Insert the host software installation CD into a local drive.
If the compressed installation file does not appear in a directory window, access the CD drive (example: D:).
3. Review the README.txt file for the latest information on the product and the installation process.
4. To unpack the contents of the compressed installation file in the default directory, enter the following command:
RunMe.bat -c
The following message is displayed:
Initializing Install Shield Wizard
Launching Install Shield Wizard
The files are unpacked in the default directory:
<system drive>:\Sun\CommonArrayManager\Host_Software_6.x.x.x
When the unpacking is complete, the host software installer begins automatically.
5. When prompted about the license agreement, accept the agreement and press Return.
6. When prompted to select the installation type, do one of the following:
If you select Custom, you will be prompted to choose:
This install option creates a management station that contains the full set of CAM services:
This option creates a compact, standalone installation which can be as little as 25mb in size. This light-weight management solution is installed on the data host provides:
This option is also used to load the proxy agent that allows communication between the full management software on the management workstation and the array.
Do not activate the proxy if the management host is directly connected to the array.
There is also an option to install array firmware using the CLI.
Same as the last option, but without firmware files. Use this option to install the proxy agent on a data host.
This option installs a thin scripting client that connects via secure HTTP (HTTPS) to the management host. Login to the management host and navigate to the Local CLI directory to manage the J4000 arrays via the proxy agent.
See the Sun StorageTek Common Array Manager Software Release Notes, Release 6.1.2 for a list of supported operating systems.
When the installation is complete, the host software installer Installation Summary screen is displayed.
7. During a custom install. choosing to install a CLI only management software will display the Proxy for Remote Access screen.
Do not activate the proxy if the management host is directly connected to the array
a. Select the Enable button to enable remote access to the array via a proxy agent.
The proxy agent receives out-of band communication from the management software over Ethernet and delivers the information over an in-band SAS connection between the data host and the array. Access is over https and port 8653.
b. Enter and confirm a proxy agent password of up to 15 characters for remote access to this host.
Be sure to remember the password. You will need to enter the proxy agent password when registering the array.
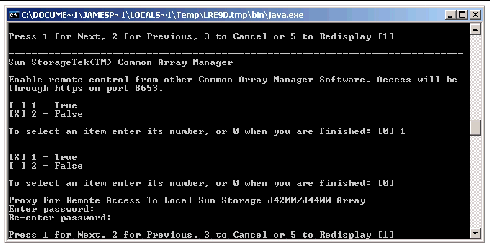
8. Press Return to complete the installation.
9. Eject the CD and remove it from the drive.
10. After the installation on a Windows platform, you will need to configure the Windows firewall.
Set the Windows firewall to allow an exception for port 6789. If you have a proxy agent, also allow an exception to port 8653.
Some firewall programs prompt for your agreement to allow new programs to communicate through the firewall, and set the port for you. Refer to your firewall documentation for instructions on how to open a port through the firewall.
If you need to remove the Common Array Manager software from your system, there are wizards and scripts to uninstall the software and its baseline firmware in the following prceedures:
|
1. Log in to the management host as root.
2. Change to the bin directory in the installation directory as described in Locating Files and Logs.
cd /var/opt/CommonArrayManager/Host_Software_6.x.x.x/bin
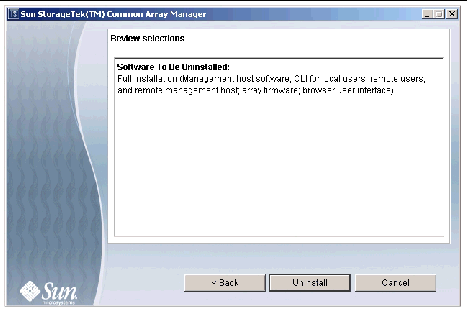
The Review Selections window is displayed.
5. Select the software to be uninstalled, and click the Uninstall button.
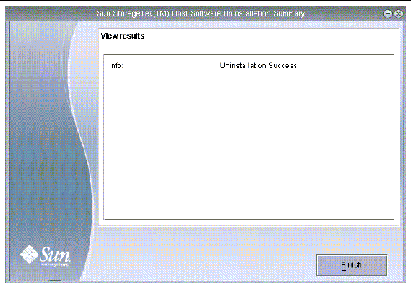
When the uninstall completes, the View Results screen is displayed.
|
1. Log in to the management host as root.
2. Change to the bin directory in the installation directory as described in Locating Files and Logs.
cd /var/opt/CommonArrayManager/Host_Software_6.x.x.x/bin
3. Execute the uninstall command
4. Follow the prompts in the install console dialog.
If for any reason the uninstallation has failed, run the uninstall script with the -f option:
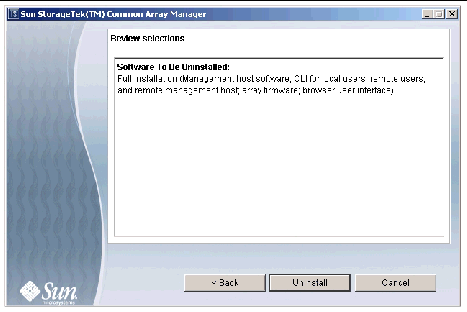
The Review Selections window is displayed.
6. Select the software to be uninstalled, and click the Uninstall button.
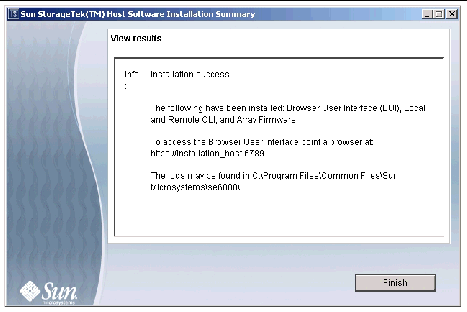
When the uninstall completes, the View Results screen is displayed.
|
1. Navigate to the host CD bin directory:
<system drive>:\Sun\CommonArrayManager\Host_Software_6.x.x.x\bin
2. Click on the uninstall.bat icon.
To run the uninstaller in console mode, enter: uninstall.bat -c
To clean up (remove all associated files), enter: uninstall.bat -f
Alternatively, you can remove the Common Array Manager using the Control Panel - Add/Remove Programs.
3. Follow the uninstall wizard steps as described in the To Uninstall the Management Software on Solaris or Linux Using the Uninstall GUI.
You can verify the installation by bringing up the CLI prompt, as discussed in Logging In and Out Using the CLI.
Review the installation logs as noted in Reviewing the Installation Logs
Copyright © 2008 Sun Microsystems, Inc. All Rights Reserved.