| Sun StorageTek Backup Manager Installation Guide |
| Sun StorageTek Backup Manager Installation Guide |
| A P P E N D I X B |
|
Configuring Backup Agent Connectivity |
This appendix provides instructions for remote configuration of backup agents. It contains the following sections:
The following matrix describes the SBM support for secure shell (SSH) and remote shell (RSH).
This section describes how to set up connectivity to enable backup agents to collect data from a NetWorker backup master server using secure shell (SSH) or remote shell (RSH). RSH for Windows is available from the Microsoft Windows Services for UNIX 3.5 (SFU 3.5) application.
The following procedures are provided in this section:
The following procedure describes how to set up secure shell (SSH) connectivity between the SBM server and a UNIX NetWorker backup master server. You will use two sessions to complete this procedure, one on the SBM server and one on the backup master server.
1. Log in as root user on the SBM server.
3. Change directory to ~/.ssh.
a. If the .ssh directory does not exist, run the following command:
b. Change directory to ~/.ssh.
4. Open another session and log in to the backup master server as root.
5. On the backup master server, create the SBM user account.
useradd -c "SBM account" -m -s /usr/bin/bash -d /export/home/sbm sbm
6. Set a password for the SBM user.
7. Log in to backup master server as the SBM user you just created.
8. On the backup master server, create the directory: ~/.ssh.
9. From the SBM server, copy the public key to the backup master server:
scp -p id_dsa.pub backup_masterserver_hostname:~sbm/.ssh/id_dsa.pub.sbm
10. On the backup master server, create the file: authorized_keys2
cat id_dsa.pub.sbm >> authorized_keys2
Verify the SBM server IP address or host name entry is added to the authorized_keys2 file.
11. Logged in as the SBM user on the SBM server, build the known host file and check the connectivity:
ssh backup server fully qualified domain name
You will be prompted to confirm authentication for each host identifier you add.
Result: After you perform this procedure, you will be able to log in as the SBM user to the backup master server without being prompted for a password.
The following procedure describes how to set up remote shell (RSH) connectivity between the SBM server and a NetWorker UNIX backup master server. You will use two sessions to complete this procedure, one on the SBM server and one on the UNIX backup master server.
1. Log in as root to the backup master server.
2. Set a password for the SBM user.
3. On the backup master server, create the file ~/.rhosts under the user's home directory.
4. On the backup master server, edit the ~/.rhosts file to add an entry for the SBM server:
where sbmserver_hostname is the IP address or host name of the SBM server.
5. Log in to the SBM server as SBM user, and check the connectivity:
rsh backup_server_hostname set
The following procedure describes how to set up remote shell (RSH) connectivity between the SBM server and a NetWorker Windows backup master server. You will use two sessions to complete this procedure, one on the SBM server and one on the Windows backup master server.
1. On the Windows backup master server, log in as administrator and create the SBM user account.
2. Add the SBM user to the remote desktop user group so that you can log in remotely to the Windows backup master server as sbm.
3. Install SFU 3.5 on the Windows backup master server as described in Installing and Setting Up RSH for Windows.
1. On the backup master server as root, log in as SBM user:
You will see output similar to the following:
If the permissions are set incorrectly, you will see output similar to the following:
You can enable the SBM user to run CLI commands on the EMC NetWorker (also known as Legato NetWorker) server by configuring the permissions on the NetWorker backup master server. You can add the SBM user using the CLI or NetWorker Console web interface.
Prerequisite: Before modifying the files in this section, make a backup copy of each file for easy rollback.
1. Open a web browser to connect to the NetWorker console and type the URL:
2. From the NetWorker Console web interface, click Enterprise and the name of the master server.
3. Double-click NetWorker to open a new page.
4. In the left pane, click User Groups.
5. Right-click Users and select Properties.
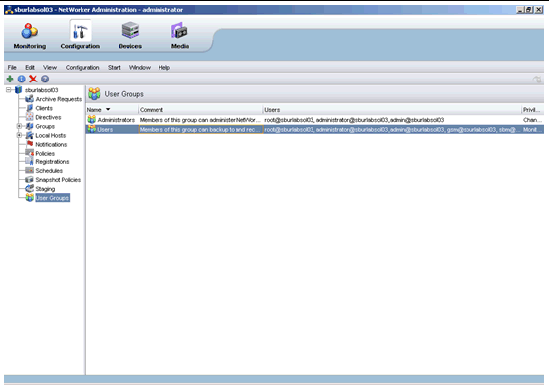
6. In the Properties window, add the sbm@hostname user and click OK.

Members of this group have the following default privileges:
1. Log in to the backup master server as user sbm.
You will see output similar to the following:
If the permissions are set incorrectly, you will see output similar to the following:
This section describes how to set up connectivity to enable backup agents to collect data from a NetBackup master server using secure shell (SSH) or remote shell (RSH). RSH for Windows is available from the Microsoft Windows Services for UNIX 3.5 (SFU 3.5) application.
The following procedures are provided in this section:
The following procedure describes how to set up secure shell (SSH) connectivity between the SBM server and a NetBackup UNIX master server. You will use two sessions to complete this procedure, one on the SBM server and one on the backup master server.
1. Log in as root user on the SBM server.
3. Change directory to ~/.ssh.
a. If the .ssh directory does not exist, run the following command:
b. Change directory to ~/.ssh.
4. Open another session and log in to the backup master server as root.
5. On the backup master server, create the directory: ~/.ssh.
6. From the SBM server, copy the public key to the backup master server:
scp -p id_dsa.pub root@backup_masterserver_hostname:~/.ssh/id_dsa.pub.sbms
7. On the backup master server, create the file: authorized_keys2
cat id_dsa.pub.sbm >> authorized_keys2
Verify the SBM server IP address or host name entry is added to the authorized_keys2 file.
8. Logged in as the SBM user on the SBM server, build the known host file and check the connectivity:
ssh root@backup server hostname
ssh root@backup server fully qualified domain name
You will be prompted to confirm authentication for each host identifier you add.
Result: After you perform this procedure, you will be able to log in as the SBM user to the backup master server without being prompted for a password.
The following procedure describes how to set up remote shell (RSH) connectivity between the SBM server and a NetBackup UNIX backup master server. You will use two sessions to complete this procedure, one on the SBM server and one on the UNIX backup master server.
1. Log in as root to the backup master server.
2. On the backup master server, create the file ~/.rhosts under the user's home directory.
3. On the backup master server, edit the ~/.rhosts file to add an entry for the SBM server:
where sbmserver_hostname is the IP address or host name of the SBM server.
4. Log in to the SBM server as SBM user, and check the connectivity:
rsh backup_server_hostname set
The following procedure describes how to set up remote shell (RSH) connectivity between the SBM server and a NetBackup Windows backup master server. You will use two sessions to complete this procedure, one on the SBM server and one on the Windows backup master server.
1. On the Windows backup master server, log in as administrator and create the SBM user account.
2. Add the SBM user to the administrators group. Doing so allows you to:
3. Install SFU 3.5 on the Windows backup master server as described in Installing and Setting Up RSH for Windows.
The following procedure describes how to set up remote shell (RSH) connectivity between the SBM server and a NetWorker or NetBackup Windows backup master server. You will use two sessions to complete this procedure, one on the SBM server and one on the Windows backup master server. RSH for Windows is available from the Microsoft Windows Services for UNIX 3.5 (SFU 3.5) application.
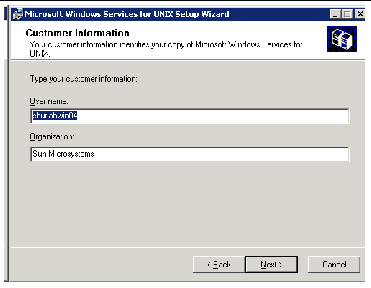
1. Download SFU 3.5 to the Windows backup master server using the following link:
http://www.microsoft.com/windowsserversystem/sfu/downloads/default.mspx
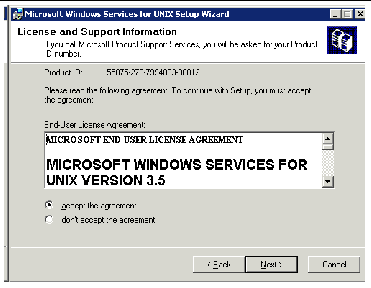
2. Follow the instructions provided by Microsoft to install RSH.
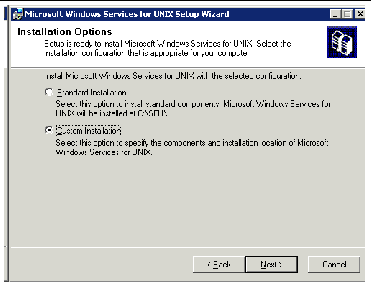
Use the following example as a guide to install RSH on Windows.
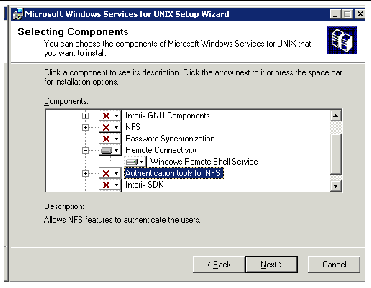
b. Choose Custom Installation to install the Remote Shell service.
c. Select Remote Connectivity > Windows Remote Shell Service from the list of components.
d. Select Windows Remote Shell Services and unselect all other default services.
e. Click Next to select the default selections.
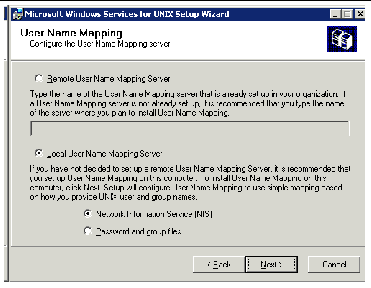
f. Click Next to select the default selections.

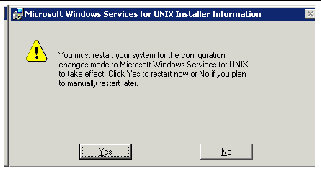
g. Select the drive on which to install the services.

h. If the installation prompts you to reboot your system, rstart the server.
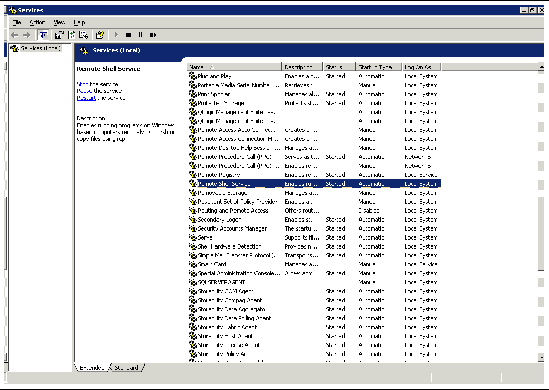
i. Open the Services console separately or as part of the console as shown below.
j. Then, enable the service to start automatically or manually, as appropriate for your system.
k. Verify that the Remote Shell Service has started. If it has not started, start the service.
3. Set up RSH on Windows as described in the instructions posted at the following link:
http://www.microsoft.com/technet/interopmigration/unix/sfu/sfu35rsh.mspx
4. Set up RSH using the instructions provided by Microsoft.
Use the following example as a guide to set up RSH on Windows.
a. On the Windows backup master server, log in as administrator.
b. Create a .rhosts file in the following directory on the Windows backup master server:
c. Edit the .rhosts file to add an entry for the SBM server. If the file does not exist, create it.
sbmserver_hostname is the IP address or host name of the SBM server.
d. Log in to the Windows backup master server as SBM user.
e. Run rshpswd to store the user password.
f. From the SBM server, log in as SBM user.
g. Run the rsh command to check the connectivity.
rsh backup_server_hostname set
backup_server_hostname is the IP address or host name of the backup master server.
After you verify the agent can communicate with the backup master server, you are ready to log in to the SBM browser interface and configure the agent as described in Chapter 3.
| Sun StorageTek Backup Manager Installation Guide | 820-2327-10 |
Copyright © 2007, Sun Microsystems, Inc. All Rights Reserved.