Preconfiguration for the Atlanta and Berlin Environments
This section explains the preconfiguration operations you must perform for the Atlanta and Berlin Environments.
Creating and Starting the Domains
This section explains how to create and start the Logical Host Domains for the Atlanta and Berlin Environments.
See the eGate Integrator User’s Guide for more information about eGate logical hosts, domains, and the Domain Manager feature.
 To Create and Start the Sample Domains
-
Create the domains.
-
To create the Atlanta domain, run the following script in the \logicalhost directory:
C:\ …
 logicalhost\createdomain --dname dmnA
-
To create the Berlin domain, run the following script in the \logicalhost directory:
C:\ …
 logicalhost\createdomain --dname dmnB --startingport 28000
This script creates the domain name dmnB and designates the default ports 2800x.
-
-
If the repository is not already running, start it by running the following script:
C:\ ... repository\startserver.bat
-
Start the domains.
-
Use the Domain Manager interface to make sure the new domains are started and running.
Adding a New User to ePM and Message Tracking
You must add two new ePM users, one for Atlanta and one for Berlin, using the eGate Integration Server Security Gateway.
 To Add a New User To the ePM and Message Tracking Groups
-
With the Repository running, start a new browser session.
-
Access the appropriate URL.
-
Log in to Integration Server Security Gateway using with the username Administrator and the password STC.
-
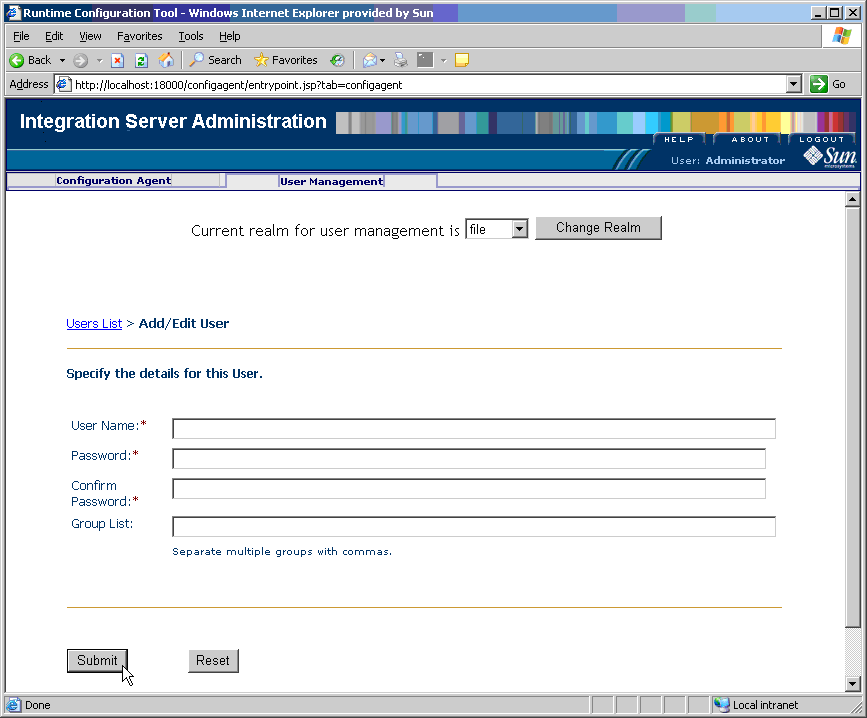
In the Integration Server Administration window, click the User Management tab.
Figure 6–2 Screen capture of Integration Server Administration, User Management tab

-
Select Add New User and supply the user name and password for the new user.
-
For Group List, type PartnerManager, MessageTracking
This step provides the following user privileges:
-
The PartnerManager role allows the specified user to log in to and use ePM.
-
The MessageTracking role allows the specified user to use the Message Tracking Web client.
-
-
When you are finished, click Submit.
-
Log out of Integration Server Administration and close the window.
Adding the Application Server Instances
You must add two new instances of the Application Server using the eGate Enterprise Manager, one for Atlanta and one for Berlin. Therefore, perform this procedure twice, once for Atlanta and once for Berlin.
 To Add Two New Application Server Instances
-
With the Repository running, install Enterprise Manager by running the following script:
C:\ …
 \emanager\install.bat
-
In the installation wizard, follow the prompts and accept the license agreement and default port (15000).
-
After the installation is complete, start Enterprise Manager server by running the following script:
C:\ …
 \emanager\startserver.bat
-
Start a new browser session and access the appropriate URL:
http://localhost:15000
-
Log in to Enterprise Manager with the user name Administrator and the password STC.
-
Select J2EE.
-
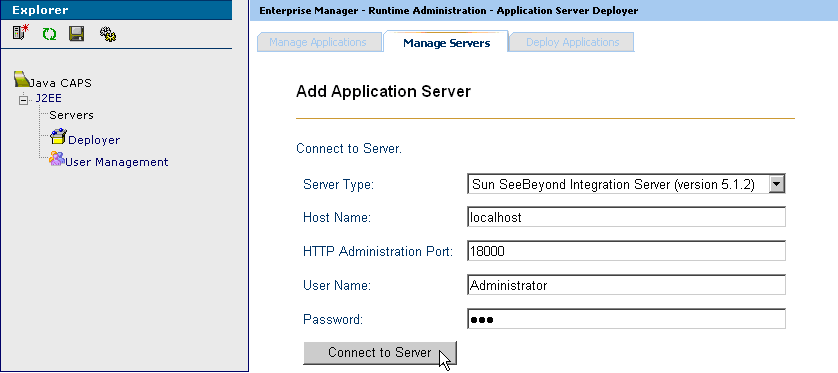
Click the Manage Servers tab, and add a new application server.
-
Server Type:Sun SeeBeyond Integration Server
-
Host Name:localhost
-
User Name:Administrator
-
Password:STC
Figure 6–3 Enterprise Manager Window

-
-
Click Connect to Server.
-
Save your changes and exit the window.
Initializing and Running Enterprise Designer
This section describes operations to perform once you have initialized and run the Enterprise Designer.
Note –
Using Enterprise Designer, increase the eDesigner_heap_size property to 1024. For more information, see the eXchange Integrator User’s Guide.
 To Initialize and Run Enterprise Designer
-
With the Repository running, start Enterprise Designer by running the following script:
C:\ …
 \edesigner\bin\runed.bat
-
Choose Update Center from the Tools menu.
-
In the Update Center wizard, follow the steps to check for updates, and to add all available updates and new modules.
-
When you are done, restart Enterprise Designer (referred to as IDE in the user interface).
Note –For more information, see the eGate Integrator User’s Guide.
-
Log in to Enterprise Designer with the user name Administrator and the password STC.
Next Steps
Patch each Logical Host domain with .jar files to ensure message validation using the EDIFECS service.
 To Patch the Domains With Files For Validation
-
To ensure correct third-party validation of messages, you must locate the following files in Enterprise Designer’s Project Explorer under Sun SeeBeyond ⇒ eXchange ⇒ Protocol Managers ⇒ HIPAA Manager ⇒ Validations ⇒ EDIFECS ⇒ Files:
-
xengine.jar
-
xe_extensions.jar
-
-
Export these files to the following locations in your installation:
-
For Atlanta:
C:\ …
 \logicalhost\is\domains\dmnA\lib\
-
For Berlin:
C:\ …
 \logicalhost\is\domains\dmnB\lib\
Note –For more information, see Third-party Validation.
-
- © 2010, Oracle Corporation and/or its affiliates
