Building and Deploying the GUI Projects
These procedures build and deploy Deployment Profiles that map the resources named in the cmEpm and cmTracker Connectivity Maps to the externals in an Environment. The cmEpm map associates the epm application with an LDAP server. The cmTracker map associates the epm application with an Oracle server. See Figure 4–21.
Figure 4–21 Connectivity Maps for ePM and Tracker
 Before you begin
-
With the Project Explorer tab active, in the project tree, open the eXchange⇒GUI project.
-
If you have not already done so, start the domain associated with the Environment’s Integration Server.
 To build and deploy the Deployment Profile for the ePM
Project
-
In the project tree, under eXchange⇒GUI⇒ePM, open cmEpm and configure its LDAP eWay appropriately for your operating environment.
-
Right-click the ePM project.a
-
On the context menu, point to New and click Deployment Profile.
-
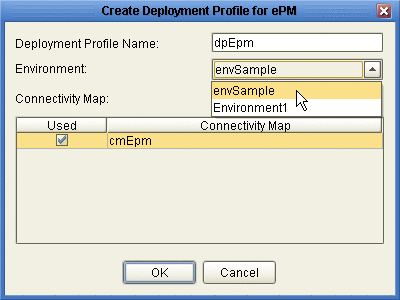
In the Create Deployment Profile dialog box, name the Deployment Profile to dpEpm, and point it at the correct Environment.
-
Make sure that it is referencing cmEpm (the Connectivity Map for the ePM GUI), and then click OK.
See Figure 4–22.
Figure 4–22 Deployment Profile for ePM Project

-
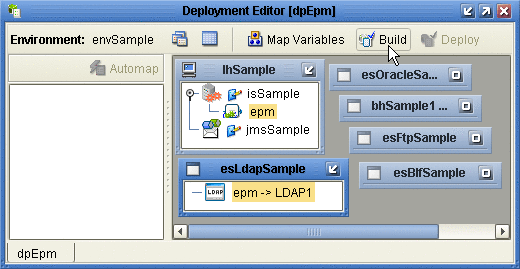
In the Deployment Editor, click Automap to map the two components to their respective external systems, and then click Build.
See Figure 4–23.
Figure 4–23 Deployment Profile dpEpm Being Built

-
After the build step completes successfully (creating the EAR file), click Deploy.
The ePM GUI project is built and deployed,. You can now use eXchange Partner Manager. Message Tracker becomes available only after you build and deploy its Project.
 To build and deploy the Deployment Profile for the Tracker
Project
-
In the project tree, under eXchange⇒ GUI, right-click the Tracker project.
-
On the context menu, point to New and click Deployment Profile.
-
In the Create Deployment Profile dialog box, name the Deployment Profile to dpTracker and point it at the correct Environment.
-
Make sure that it is referencing cmTracker (the Connectivity Map for the Message Tracker GUI), and then click OK.
-
In the Deployment Editor, click Automap to map the two components to their respective external systems, and then click Build.
-
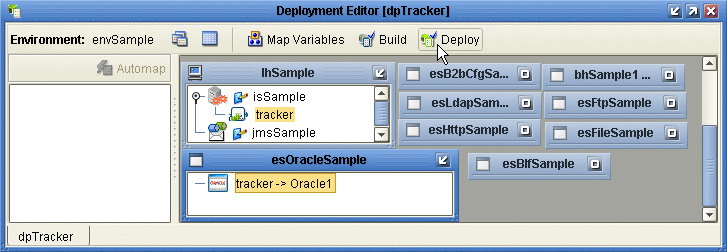
After the build step completes successfully (creating the EAR file), click Deploy.
See Figure 4–24.
Figure 4–24 Deployment Profile dpTracker Being Deployed

The Message Tracker GUI project is built and deployed, and the Message Tracker application is now able to store and retrieve messages.
- © 2010, Oracle Corporation and/or its affiliates
