To Set Up for Installation
-
Do you intend to install the Solaris software through a tip(1) line?
-
If no, go to the next step.
-
If yes, make sure your window display is at least 80 columns wide and 24 rows long.
Note -To determine the current dimensions of your tip window, use the stty(1) command.
-
-
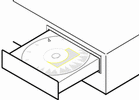
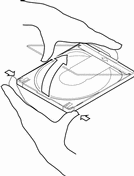
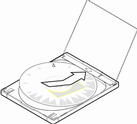
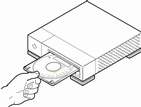
Insert the CD labeled Solaris 8 Installation English SPARC Platform Edition or Solaris 8 Installation Multilingual SPARC Platform Edition into the system's CD-ROM drive:
-
Boot the system:
-
If you're using the CD labeled Solaris 8 Installation English SPARC Platform Edition, information similar to this is displayed:
Boot device: /sbus/espdma@e,8400000/esp@e,8800000/sd@6,0:f  File and args:
SunOS Release 5.8 Version Generic 32-bit
Copyright 1983-2000 Sun Microsystems, Inc.  All rights reserved.
Configuring /dev and /devices
Using RPC Bootparams for network configuration information.
le0: No carrier - cable disconnected or hub link test disabled?
Solaris Web Start 3.0 installer

English has been selected as the language in which to perform the install.
Starting the Web Start 3.0 Solaris installer

Solaris installer is searching the system's hard disks for a
location to place the Solaris installer software.

Your system appears to be upgradeable.
Do you want to do a Initial Install or Upgrade?

  1) Initial Install
  2) Upgrade
  Please Enter 1 or 2 >
-
If you're using the CD labeled Solaris 8 Installation Multilingual SPARC Platform Edition, information similar to this is displayed:
Boot device: /sbus/espdma@e,8400000/esp@e,8800000/sd@6,0:f  File and args:
SunOS Release 5.8 Version Generic 32-bit
Copyright 1983-2000 Sun Microsystems, Inc.  All rights reserved.
Configuring /dev and /devices
Using RPC Bootparams for network configuration information.
le0: No carrier - cable disconnected or hub link test disabled?
Solaris Web Start 3.0 installer

The Solaris Installer can be run in English, or any of the following languages:

  1) English           6) Japanese
  2) German            7) Korean
  3) Spanish           8) Swedish
  4) French            9) Simplified_Chinese
  5) Italian          10) Traditional_Chinese
 Select the language you want to use to run the installer:
-
-
Which installation CD are you using?
-
If the Solaris 8 Installation English SPARC Platform Edition CD, go to the next step.
-
If the Solaris 8 Installation Multilingual SPARC Platform Edition CD, type the number to select the language in which to display prompts, messages, and other installation information.
Information similar to this is displayed (in the language you selected):
language_you_selected has been selected as the language in which to perform the install.
Starting the Web Start 3.0 Solaris installer

Solaris installer is searching the system's hard disks for a
location to place the Solaris installer software.

Your system appears to be upgradeable.
Do you want to do a Initial Install or Upgrade?

  1) Initial Install
  2) Upgrade
  Please Enter 1 or 2 >
-
-
At the prompt, type 1 for initial installation and press Return.
Information similar to this is displayed:
The default root disk is /dev/dsk/c0t0d0.
The Solaris installer needs to format
/dev/dsk/c0t0d0 to install Solaris.

WARNING: ALL INFORMATION ON THE DISK WILL BE ERASED!


Do you want to format /dev/dsk/c0t0d0?  [y,n,?,q]
-
At the prompt, type y and press Return.
Information similar to this is displayed:
NOTE: The swap size cannot be changed during filesystem layout.


Enter a swap slice size between 384MB and 2027MB, default = 512MB [?]
-
At the prompt, press Return to accept the default swap slice size, or type the swap slice size you want and press Return.
Information similar to this is displayed:
The Installer prefers that the swap slice is at the beginning of the
disk. This will allow the most flexible filesystem partitioning later in the installation.

Can the swap slice start at the beginning of the disk  [y,n,?,q]
-
Do you want to place the swap space at the beginning of the disk (and thus improve the flexibility of partitioning the file system and the efficiency with which the disk is accessed)?
-
If yes, type y, press Return, and go to Step 10.
-
If no, type n and press Return.
Information similar to this is displayed:
WARNING: Placing the swap slice at a cylinder location other than cylinder 0
requires expert knowledge about disk layout. This choice may affect
disk layout choices later in the installation.

Enter a starting cylinder between 0 and 2043, default = 0 [?]
-
-
Press Return to accept the default starting cylinder (0), or type the starting cylinder you want and press Return.
Information similar to this is displayed:
You have selected the following to be used by the Solaris installer: Disk Slice : /dev/dsk/c0t0d0 Size : 512 MB Start Cyl. : 0 WARNING: ALL INFORMATION ON THE DISK WILL BE ERASED! Is this OK [y,n,?,q] -
At the prompt, type y and press Return.
Information similar to this is displayed:
The Solaris installer will use disk slice, /dev/dsk/c0t0d0s1.
After files are copied, the system will automatically reboot, and
installation will continue.
Please Wait...

Copying mini-root to local disk....done.


Copying platform specific files....done.

Preparing to reboot and continue installation.
Rebooting to continue the installation.
Syncing file systems... 41 done
rebooting...
Resetting ...

            Sun Ultra 1 SBus (UltraSPARC 143MHz), Keyboard Present
            OpenBoot 3.5, 64 MB memory installed, Serial #9058749.
            Ethernet address 8:0:20:8d:35:a5, Host ID: 808d35a5.


Rebooting with command: boot /sbus@1f,0/espdma@e,8400000/esp@e,8800000/sd@0,0:b
Boot device: /sbus@1f,0/espdma@e,8400000/esp@e,8800000/sd@0,0:b  File and args:
SunOS Release 5.8 Version Generic 32-bit
Copyright 1983-2000 Sun Microsystems, Inc.  All rights reserved.
Configuring /dev and /devices
Using RPC Bootparams for network configuration information.
le0: No carrier - cable disconnected or hub link test disabled?
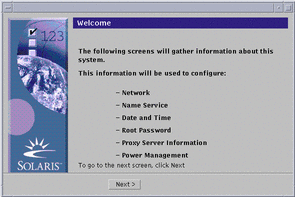
After a few seconds, the Welcome screen is displayed:
- © 2010, Oracle Corporation and/or its affiliates

