IA: To Identify the System
-
On the Identify This System dialog box, click Continue.
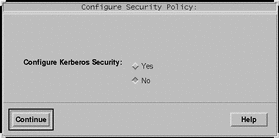
The Configure Security Policy dialog box is displayed:
-
Do you want to configure Kerberos security for the system?
-
If yes, select Yes and click Continue.
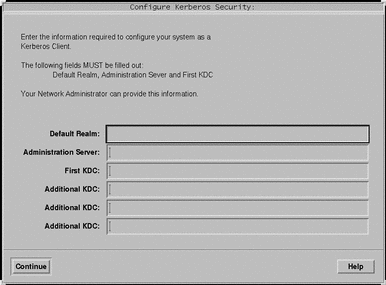
The Configure Kerberos Security dialog box is displayed:
-
If no, select No and click Continue.
The Confirm Information dialog box is displayed.
-
-
Did you choose to configure Kerberos security in the preceding step?
-
If no, go to the next step.
-
If yes, fill in the Configure Kerberos Security dialog box and click Continue.
The Confirm Information dialog box is displayed.
-
-
On the Confirm Information dialog box, click Continue.
-
If your system is already networked or you have preconfigured the system configuration (as described in Chapter 4, Preconfiguring System Configuration Information) and the Solaris 8 Interactive Installation Program is able to identify your system completely, the Solaris Interactive Installation dialog box is displayed.
-
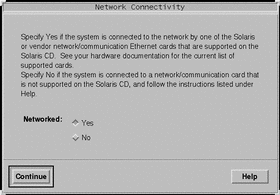
If your system is not currently networked or it cannot identify your system completely, the Solaris 8 Interactive Installation Program displays the dialog boxes that enable you to provide the information, starting with the Network Connectivity dialog box:
-
-
Was the Solaris 8 Interactive Installation Program able to identify your system completely?
-
If yes, go to Step 1.
-
If no, go to the next step.
-
-
-
If no, on the Network Connectivity dialog box, select No, click Continue, and go to Step 9.
-
If yes, select Yes and click Continue.
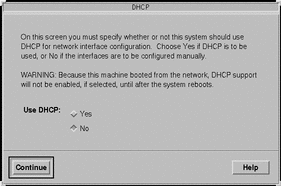
The DHCP dialog box is displayed:
-
-
Do you want to use DHCP for the network interface configuration?
-
If no, select No, click Continue, and go to Step 9.
-
If yes, select Yes and click Continue.
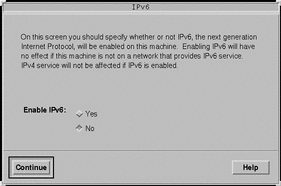
The IPv6 dialog box is displayed:
-
-
On the Host Name dialog box, type the host name you want and click Continue.
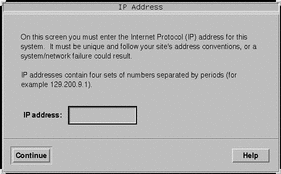
If your system is networked (that is, you selected Yes on the Network Connectivity dialog box in Step 6), the IP Address dialog box is displayed:
If your system is not networked, the Confirm Information dialog box is displayed.
-
-
If no, go to Step 19.
-
If yes, did you specify that you want DHCP used for the network interface configuration (that is, did you select Yes on the DHCP dialog box in Step 7)?
-
If yes, go to Step 12.
-
If no, on IP Address dialog box, type the IP address of your networked system and click Continue.
-
The IPv6 dialog box is displayed.
-
-
-
If yes, select Yes and click Continue.
-
If no, select No and click Continue.
The Confirm Information dialog box is displayed.
-
-
Is the information shown on the Confirm Information dialog box correct?
-
If no, click Change and repeat the preceding steps starting from Step 6 until the information is correct.
-
If yes, click Continue.
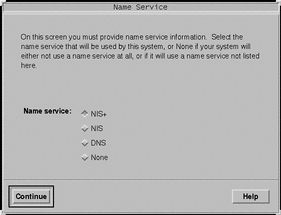
The Name Service dialog box is displayed:
-
-
On the Name Service dialog box, select the name service the system will use or None, and click Continue.
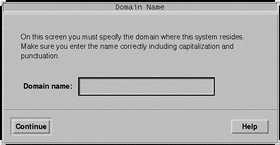
If you selected NIS, NIS+, or DNS, the Domain Name dialog box is displayed:
If you selected None, the Confirm Information dialog box is displayed.
-
Did you select None in Step 13?
-
If yes, go to Step 19.
-
If no, on the Domain Name dialog box, type the name of the domain in which the system is located and click Continue.
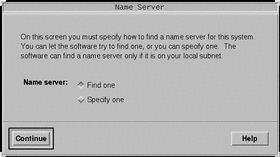
If you selected NIS+ or NIS, the Name Server dialog box is displayed:
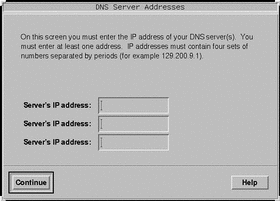
If you selected DNS, the DNS Server Addresses dialog box is displayed:
-
-
Are you using NIS+/NIS or DNS?
-
If NIS+ or NIS, select "Find one" or "Specify one" and click Continue.
-
If you selected "Find one," the Confirm Information dialog box is displayed.
-
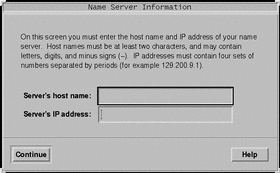
If you selected "Specify one," the Name Server Information dialog box is displayed:
-
-
If DNS, type the IP address of the DNS server or servers you want and click Continue.
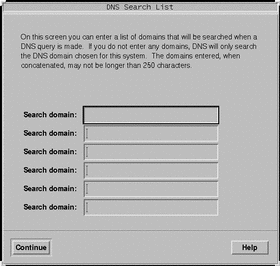
The DNS Search List dialog box is displayed:
-
-
Are you using NIS+/NIS or DNS?
-
If NIS+ or NIS, did you select "Specify one" or "Find one" in the previous step?
-
If "Find one," go to Step 19.
-
If "Specify one," type the server's host name and IP address, and click Continue.
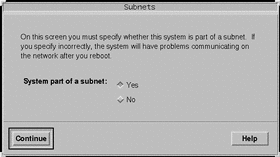
The Subnets dialog box is displayed:
-
-
If DNS, type the name of the domain or domains you want searched when a DNS query is made, if any, click Continue, and go to Step 19.
-
-
Is the name server you specified part of a subnet?
-
If yes, select Yes and click Continue.
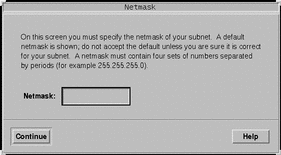
The Netmask dialog box is displayed:
-
If no, click Continue and go to Step 19.
-
-
Type the netmask you want and click Continue.
The Confirm Information dialog box is displayed.
-
Is the information shown on the Confirm Information dialog box correct?
-
If yes, click Continue.
The Time Zone dialog box is displayed.
-
On the Time Zone dialog box, select how you want to set your default time zone and click Set.
The Geographic Region, Offset From GMT, or Time Zone File dialog box is displayed, depending on the method you chose.
-
Use this decision table to determine what to do next:
If you chose
Then
Geographic Region
Select the region you want in the left window and the time zone in the right, and click Continue.
Offset From GMT
Drag the slider toward the left (for west of Greenwich, England) or right (for east of Greenwich, England), and click Continue.
Time Zone File
Specify the name of a file in /usr/share/lib/zoneinfo, or click Select to choose a file in this directory, and click Continue.
The Date and Time dialog box is displayed.
-
If necessary, correct the date and time and click Continue.
The Confirm Information dialog box is displayed.
-
Is the information shown on the Confirm Information dialog box correct?
-
If no, click Change and repeat the steps starting from Step 20 until the information is correct.
-
If yes, click Continue.
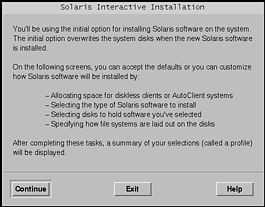
If the Solaris operating environment is not installed on the system, this version of the Solaris Interactive Installation dialog box is displayed:
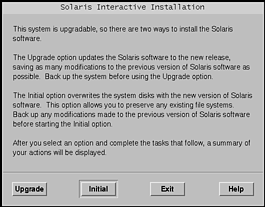
If the Solaris operating environment is already installed on the system, this version of the Solaris Interactive Installation dialog box is displayed (if not, see Chapter 12, Troubleshooting):
-
- © 2010, Oracle Corporation and/or its affiliates
