| A P P E N D I X G |
|
Early-Production Slide Rail and CMA Information |
This appendix describes information pertaining to an early-production release of the slide rail and Cable Management Assembly (CMA).
If your X4500 system has the J slide rails installed, see Sun X4500-J Slide Rail Installation Guide for details on removing and replacing the CMA.
This procedure covers the removal of the Cable Management Arm (CMA) with the Accuride slide rails installed.
| Note - To access some components, you need to remove the cable management arm. |
| Tip - Label your cables so they are easy to identify when you need to reconnect them. |
1. Unplug power and data cables from the server.
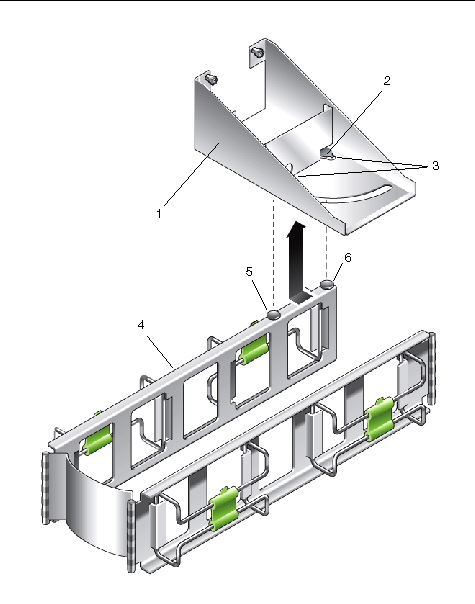
2. Lift the small tab on the CMA-to-chassis bracket to release the right pinhead. See FIGURE G-1.

3. Push the CMA toward the chassis.
4. Remove the CMA from the rear of the chassis.
5. Remove the CMA from the slide rail extension by loosening the captive screw and pulling it outwards.
1. Mount the CMA to the CMA-to-chassis bracket.
a. Align the two pinheads on the CMA with the keyholes in the bracket.
b. Support the CMA by placing your hand under it. Push the CMA upward into the bracket until the pinheads on the CMA are secured into the keyholes of the bracket.
c. Pull the CMA toward you until the CMA left and right pinheads lock into the keyholes with an audible snap.
2. Insert the other end of the CMA into the slide rail extension and hand-tighten the knurled fastener found on the CMA.
3. Install cables to your server, as required, and route the cables through the CMA cable hangers.
Copyright © 2010, Oracle and/or its affiliates. All rights reserved.