| C H A P T E R 3 |
|
Installing the RFID Event Manager (UNIX) |
This chapter describes how to install the Sun Java System RFID Event Manager (RFID Event Manager) on the Solaris Operating System (Solaris OS) and Linux platforms. To install this software on the Microsoft Windows platform, see Chapter 6. The following sections are included in this chapter:
Before beginning your installation of the RFID Event Manager, decide whether you are using the Typical Installation or Custom Installation option.
Use the Typical Installation option to install the minimum required event manager components to run the RFID Event Manager.
This option installs all RFID Event Manager components on one machine. Therefore, do not use this option when you need to install the Execution Agent and Control Station components in a distributed system. To create a distributed installation, see Creating a Distributed RFID Software Installation.
You do not need to have an application server installed to perform this type of installation.
The typical installation option installs the following basic components:
Use the custom installation option in the following scenarios:
To install the SAP plug-in or the web services components, you need the following:
The custom installation option installs one or more (as you choose) of the following components:
An alternative configuration to a typical installation of the RFID Event Manager is to deploy the RFID Event Manager's Control Station on a different host in the subnet from that used for the Execution Agent. An RFID Event Manager can be distributed over multiple computer nodes so that there is no single point of failure.
The RFID Event Manager is designed to process streams of tag or sensor data (event data) coming from one or more reader devices. To localize reader traffic, an enterprise may have numerous instances of the RFID Event Manager's Execution Agent at each geographically remote site, such as a store, distribution center, or warehouse. A typical store or warehouse is likely to have many readers. Given the amount of network traffic from readers, it is important to localize data by enabling the RFID Event Manager's Execution Agents to filter the tag data at each site, instead of sending the data over the Internet. See To Install the RFID Event Manager Components for a Distributed Environment.
Use the installation wizard, to install the components of the RFID Event Manager.
|
This procedure does not walk through each wizard panel. It does cover panels that need additional explanation.
|
Note - You do not need to have an application server to do a typical installation of the RFID Event Manger. |
See Getting the RFID Software and the RFID Documentation.
2. Enable access to the X server.
4. Set the DISPLAY environment variable to display to your machine name.
For example, using the csh shell, you would type:
a. Change to the appropriate directory.
For example, /linux/rfidem/setup.
6. From the Welcome panel, click Next and follow the instructions on the panels to perform the installation.
7. When specifying the location of your Java 2 Standard Edition, version 1.4.2 installation, be sure to select only the top level of the installation path.
For example, if your J2SE version is located in /usr/j2se, JAVA_HOME should be /usr/j2se. If your J2SE version is located in /usr/jdk1.4.2/bin/java, JAVA_HOME should be /usr/jdk1.4.2.
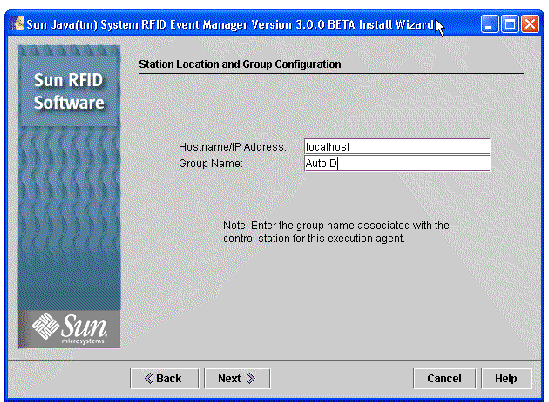
8. On the Station Location and Group Configuration panel, complete the required fields.
|
Note - When installing multiple Control Stations in the same subnet, verify that the Jini Group Name is consistent among files and is unique for your deployment. |
The following screen capture shows this panel of the installer wizard.
9. When the installation is complete, click Close to dismiss the wizard.
10. (Optional) Start the RFID Event Manager.
See To Start the RFID Event Manager.
|
Prerequisite - If you choose to install the ALE web service or the plug-in for SAP AII, you must have either Sun Java System Application Server Enterprise Edition 8.1 2005Q1 (Application Server Enterprise Edition) or Sun Java System Application Server Platform Edition 8.1 2005Q2 UR2 (Application Server Platform Edition) installed and running before you start the RFID Event Manager installer.
1. Verify that your Application Server is running.
2. Begin the installation as described for performing a typical installation.
See To Install RFID Event Manager Using Typical Installation.
3. On the Select Type of Installation panel, select Custom Installation, and click Next.
The Select Components panel appears.
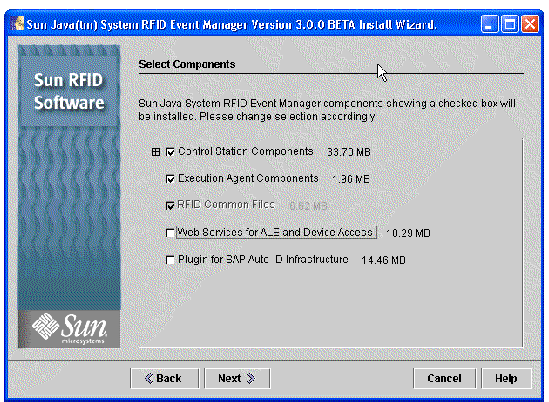
4. Select the components to install and click Next.
When you select the web services for ALE and device access or the plug-in for SAP Auto-ID Infrastructure, the Application Server Selection Panel appears during the installation.
5. When prompted, specify the location of your installation of Java 2 Standard Edition, version 1.4.2.
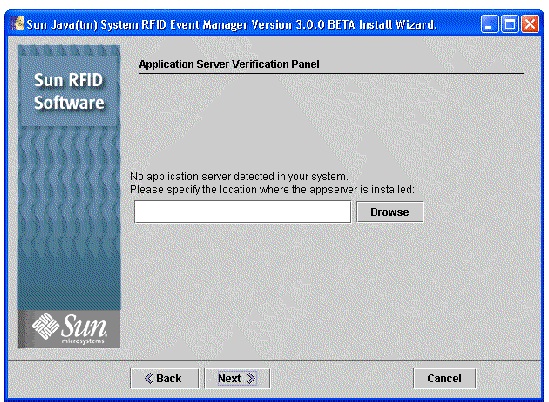
6. When the Application Server Verification panel appears, select the application server that you are using and click next.
If the installer cannot detect your application server, use the Browse button to find and specify your application server location.
The Application Server Configuration panel appears as shown in the following screen capture.
7. Type the parameters specific to your application server and click Next.
The following screen capture shows sample values for Application Server Platform Edition.
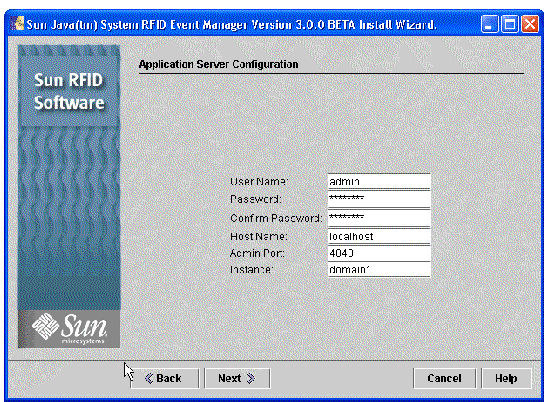
For Sun Java System Application Server 8.1, the parameters and default values are as follows:
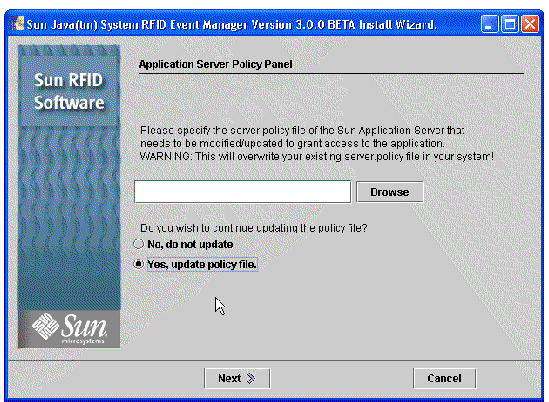
8. On the Application Server Policy panel, indicate if the installer should update the server.policy file during installation.
Selecting this option causes the installer to overwrite the existing application server's server.policy file.
When the installer has completed the installation, you can review the log message by clicking Details.
10. When installation is complete, click Close to dismiss the installer.
11. (Optional) Verify that the web services were deployed to the application server.
See To Verify the Deployment of RFID Event Manager Services.
12. (Plug-in for SAP AII only) To complete the setup of the plug-in for SAP AII, you must configure the RFID Event Manager and the SAP AII system in order to establish the proper communication between these systems.
Follow the procedures in Chapter 4 of the Sun Java System RFID Software 3.0 Administration Guide.
|
In configuring a distributed installation, you need at least one Control Station on one machine, and multiple Execution Agents installed on one or more different machines.
|
Note - When installing multiple Control Stations in the same subnet you should verify that the Jini Group is consistent amongst files and unique for your deployment. |
1. To create a distributed installation of the RFID Event Manager, begin the installation as described for performing a Typical Installation.
See To Install RFID Event Manager Using Typical Installation. Perform Step 1 through Step 6 as needed.
2. Select Custom Installation and install only the Control Station on one machine, machine A.
3. On machine B, use the custom installation option to install only the Execution Agent.
When prompted, specify the IP address and the host name for machine A where you have installed the Control Station.
4. When you have finished installing the distributed components, you can start each component on its respective machine.
See Appendix A for the location of the start scripts and their descriptions.
|
Also see Appendix A for the location and description of the start and stop scripts related to the RFID Event Manager and its related components, such as the Tag Viewer and PML Reader utilities. For additional information on using the Tag Viewer, see the Sun Java System RFID Software 3.0 Administration Guide.
1. After you install the RFID Event Manager, change to the installation directory that contains the start script.
2. (Linux) Enable the multicast option.
The Execution Agent and the Control Station cannot start properly unless the multicast option is enabled. For Linux systems, this option needs to be enabled before starting the RFID Event Manager. Use a command similar to the following where eth0 is the network device of the system. This can be eth0, eth1, or some other value and depends on the specifications of your machine.
3. Execute the script to start all the components of the RFID Event Manager.
4. (Optional) To verify proper installation, start the pmlreader.
You see output similar to the following:
5. (Optional) To display the Tag Viewer, execute the script to start the viewer.
You see the generated tags appearing in the Tag Viewer.
|
1. If it is not already started, start your application server.
2. Access the application server's Admin Console.
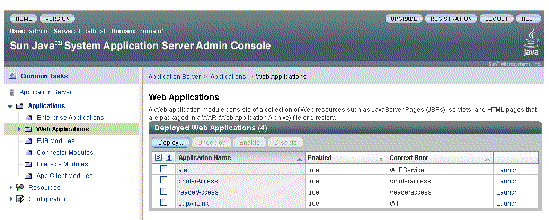
3. Expand the Applications node, then expand the Web Applications node.
Web application entries corresponding to the components you selected for installation are displayed. The following list and screen capture show those entries. The screen capture represents an installation of all RFID Event Manager components deployed to Application Server Platform Edition.
Reason: The Jini group name must be unique.
Solution: Specify a unique group name. See Sun Java System RFID Software 3.0 Administration Guide for details on how to correct this situation.
Copyright © 2006, Sun Microsystems, Inc. All Rights Reserved.