Creating and Connecting to Data Mashup Services
If you want to use more than one data source for the data integration process, you can create a Data Mashup Service. Data mashup allows you to select multiple data sources of varying types and combine them into one target database. Source data can reside in files on your network or on the web in HTML, RSS, or Web Row Set format.
Note –
New in Java CAPS Release 6 Update 1, you can specify multiple data sources using the Data Integrator Wizard. If you are using multiple source files, you can either create the mashup here or you can use the Data Integrator Wizard to specify the sources directly.
 To Create a Mashup Database for Source Data
-
In the NetBeans main menu, select Tools, point to Virtual Database, and then select Create Virtual Database.
-
On the New Virtual Database wizard, enter a name for the database and then click Finish.
-
Click OK on the confirmation dialog box that appears.
-
In the NetBeans main menu, select Tools, point to Virtual Database, and then select Add External Tables.
The Add External Tables Wizard appears.
-
Select the database you just created and then click Next.
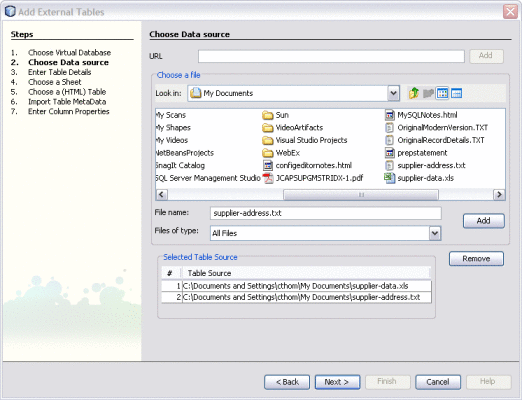
The Choose Data Source window appears.
-
To add data sources, do any of the following:
-
If the data source is on the web (such as HTML or Web Row Set), enter a URL for the data source and click Add.
-
If the data source is a file on your network, brows to and select the input file. Click Add.
-
Repeat the above steps for each data source.
Tip –If you add a data source in error, highlight it in the table and then click Remove.
-
Click Next.
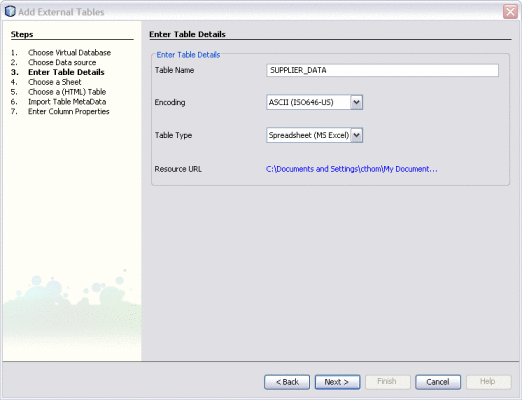
The Enter Tables Details window appears.
-
-
Enter table information for the table specified in the Table Name field, and then click Next.
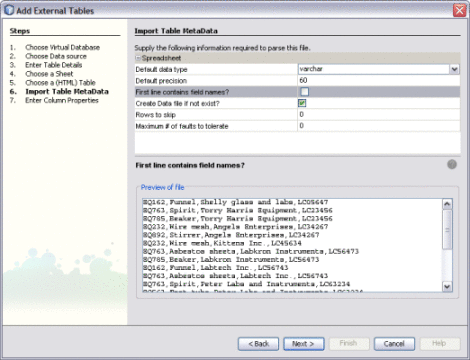
Depending on the type of file you selected, the Choose a Sheet, Choose a (HTML) Table, or Import Table MetaData window appears.
-
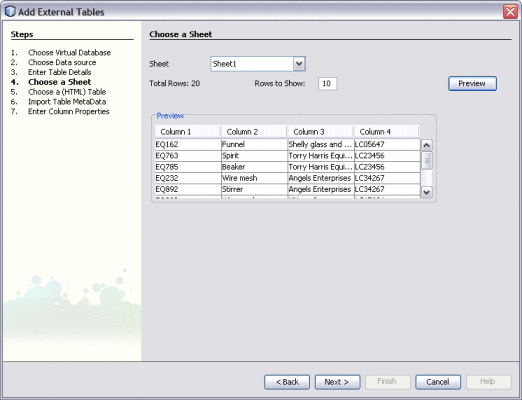
If the Choose a Sheet or Choose a (HTML) Table window appears, do the following:
-
If necessary, modify the information required to parse the data source.
The available options on this window vary depending on the type of data source. For more information about the properties you can modify, see Virtual Database Table Metadata Options.
-
Click Next.
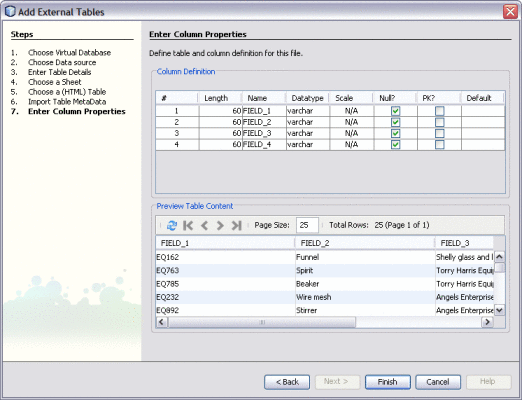
The Enter Column Properties window appears.
-
Modify the properties for the database columns in the upper portion of the window.
Tip –For more information about column properties, see Virtual Database Column Properties. If your data source does not contain field names, you should customize the column names for clarity.
-
Preview the source data in the lower portion of the window.
-
Do one of the following:
-
Right–click the new database and select Connect.
- © 2010, Oracle Corporation and/or its affiliates

