Connecting to Source and Target Databases
Before you can select databases and database tables to extract data from and load data to, you need to create and connect to the databases to use. Sun Data Integrator supports JDBC-compliant databases, flat files, and data mashup services. You only need to define the connections for relational databases. If you are using flat files as your source, you do not need to create or connect to a database. The wizard provides the ability to connect to multiple source files.
Connecting to a JDBC-Compliant Database
This step requires that the database drivers for the database platforms you are working with are installed. Some database drivers are already installed by default, but you might need to add the database driver depending on which database platform you are using. For example, if you are using Oracle or Microsoft SQL Server, you need to copy the driver to the application server and add it to the Services window.
 To Connect to a JDBC-Compliant Database
Before You Begin
Make sure the database you are connecting to has already been created and is running. If the database drivers for the platforms you are using have not been installed to app_server/lib, copy the drivers to that location.
-
In the NetBeans Services window, expand Databases.
-
If you do not see the driver for the database you are using, copy the driver from your database installation to AppServer_Home/lib and then do the following:
-
Right-click Drivers, and select New Driver.
-
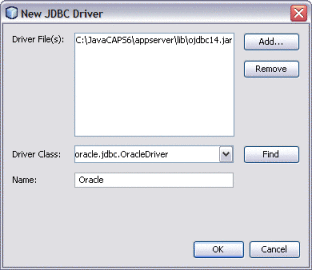
On the New JDBC Driver dialog box, click Add.
-
Browse to and open the JAR or ZIP file you copied to the application server libdirectory.
-
Accept the default driver class or type in a new one. If no driver is entered, click Find to have the wizard search for an appropriate class.
-
Enter a name for the driver.
-
Click OK.
The new database driver appears under Drivers in the Services window.
-
-
Right-click the new driver, and select Connect Using.
-
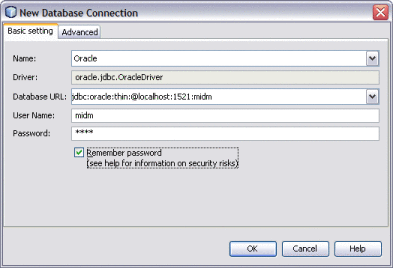
In the New Database Connection dialog box, do the following:
-
Enter the database connection URL.
Note –Different database platforms use different connection URLs. Refer to your database documentation for the format to use.
-
Enter the user name and password to use to log on to the database.
-
Select Remember Password.
-
To select a specific schema in the database, click the Advanced tab and then click Get Schemas.
A list of available schemas appears for you to choose from.
-
Click OK.
A new database connection appears under Databases.
-
-
Right-click the new database, and select Connect.
Creating and Connecting to Data Mashup Services
If you want to use more than one data source for the data integration process, you can create a Data Mashup Service. Data mashup allows you to select multiple data sources of varying types and combine them into one target database. Source data can reside in files on your network or on the web in HTML, RSS, or Web Row Set format.
Note –
New in Java CAPS Release 6 Update 1, you can specify multiple data sources using the Data Integrator Wizard. If you are using multiple source files, you can either create the mashup here or you can use the Data Integrator Wizard to specify the sources directly.
 To Create a Mashup Database for Source Data
-
In the NetBeans main menu, select Tools, point to Virtual Database, and then select Create Virtual Database.
-
On the New Virtual Database wizard, enter a name for the database and then click Finish.
-
Click OK on the confirmation dialog box that appears.
-
In the NetBeans main menu, select Tools, point to Virtual Database, and then select Add External Tables.
The Add External Tables Wizard appears.
-
Select the database you just created and then click Next.
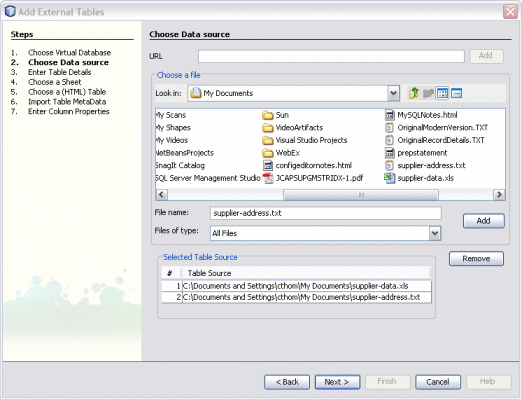
The Choose Data Source window appears.
-
To add data sources, do any of the following:
-
If the data source is on the web (such as HTML or Web Row Set), enter a URL for the data source and click Add.
-
If the data source is a file on your network, brows to and select the input file. Click Add.
-
Repeat the above steps for each data source.
Tip –If you add a data source in error, highlight it in the table and then click Remove.
-
Click Next.
The Enter Tables Details window appears.
-
-
Enter table information for the table specified in the Table Name field, and then click Next.
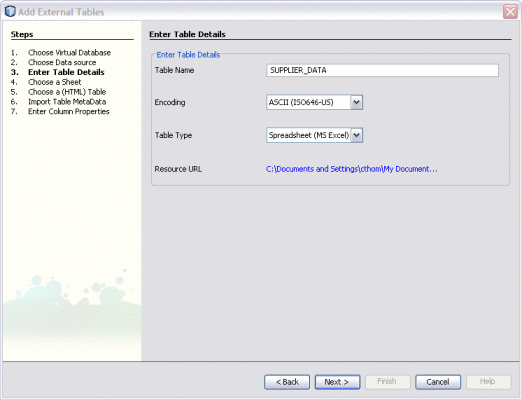
Depending on the type of file you selected, the Choose a Sheet, Choose a (HTML) Table, or Import Table MetaData window appears.
-
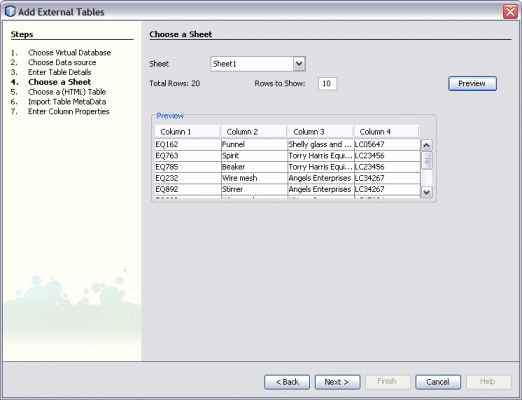
If the Choose a Sheet or Choose a (HTML) Table window appears, do the following:
-
If necessary, modify the information required to parse the data source.
The available options on this window vary depending on the type of data source. For more information about the properties you can modify, see Virtual Database Table Metadata Options.
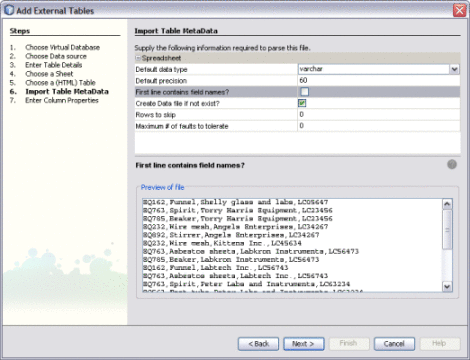
-
Click Next.
The Enter Column Properties window appears.
-
Modify the properties for the database columns in the upper portion of the window.
Tip –For more information about column properties, see Virtual Database Column Properties. If your data source does not contain field names, you should customize the column names for clarity.
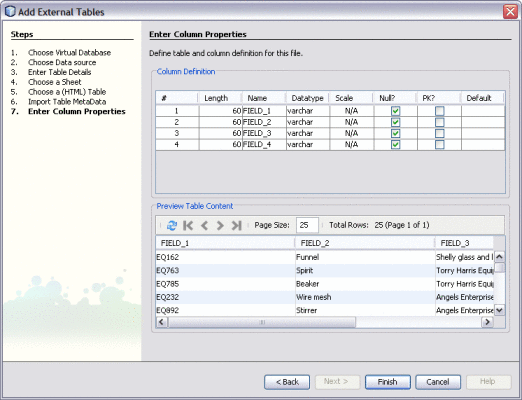
-
Preview the source data in the lower portion of the window.
-
Do one of the following:
-
Right–click the new database and select Connect.
- © 2010, Oracle Corporation and/or its affiliates

