 To Join Source Tables
-
Open the ETL collaboration in the ETL Collaboration Editor.
-
In the ETL Collaboration Editor toolbar, click Create New Join.
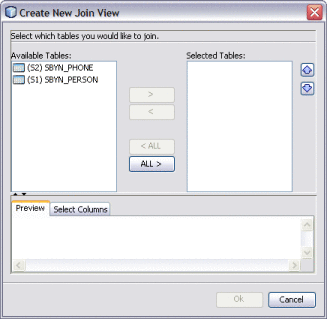
The Create New Join View dialog box appears.
-
Under Available Tables, select the tables you want to join and then click the right arrow.
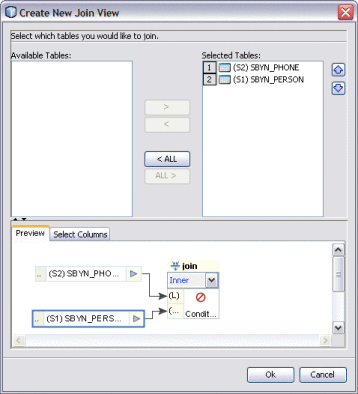
The tables move to the Selected Tables column, and the join is represented graphically in the Preview panel.
-
In the Preview panel, click the down arrow in the join condition and select the type of join to use from the following options.
-
Inner – Use this if all tables to be joined contain the same column.
-
Left Outer – Use this if the results should always include the records from the left table in the join clause.
-
Right Outer – Use this if the results should always include the records from the right table in the join clause.
-
Full Outer – Use this if the results should always include the records from both the right and left tables in the join clause.
-
-
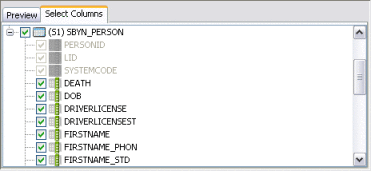
By default, all columns are selected for the join condition. To deselect any columns, click the Select Columns tab and then deselect any columns you do not want to include in the join.
-
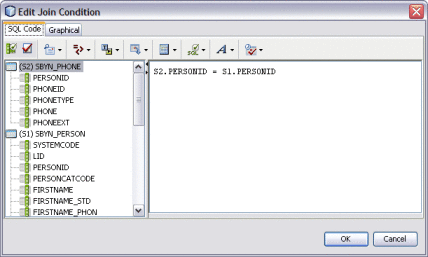
To define the join condition, click inside the join box. On the Edit Join Condition dialog box, do the following:
-
To view the SQL code while you create the join condition, click the SQL Code tab. To view the join condition graphically, click the Graphical tab.
-
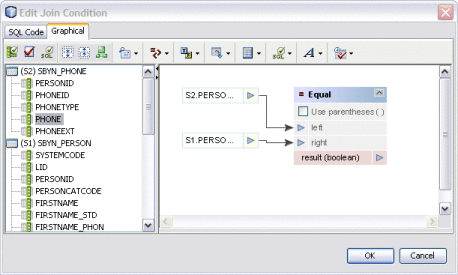
Define the join condition by dragging column names from the list in the left panel. Join the column names by dragging operators from the toolbar.
In the example below (shown in both source code and graphical views), PERSONID was dragged from the SBYN_PHONE table first. Then the equals operator, located in the Comparison Operators menu, was dragged next to PERSONID. To complete the condition, PERSONID was dragged from the SBYN_PERSON table.
-
Define as many conditions as needed.
-
When you are done defining conditions, click OK.
-
-
Click OK on the Edit Join View dialog box.
- © 2010, Oracle Corporation and/or its affiliates
