Displaying Web Applications Manager
The following tabs appear below the Web Applications Manager tab.
-
Auto-Install from Repository
-
Manage Applications
-
Manage Alert Codes
Automatically Install From the Repository
Perform the following steps.
-
From Enterprise Manager, navigate to the Auto-Install from Repository tab.
-
Connect to the Repository, select the application, and deploy it.
The Auto-Install from Repository tab enables you to install components that are available from the Repository. Typically, the components are the Enterprise Manager plug-ins for various Java CAPS products. You should first connect to the Repository, and then specify, which components to install.
Note –
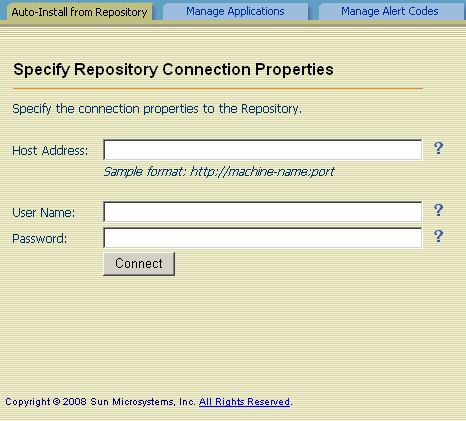
This page allows you to specify the connection properties to the Repository.
Figure 1–4 Auto-Install From Repository Tab

 To Automatically Install Components From the Repository
-
In the Host Address field, enter the URL that is used to connect to the Repository.
Note –For example, http://machine-name:port
-
In the User Name field, enter the Repository user name.
Note –The default User Name is admin
-
In the Password field, enter the corresponding password.
Note –The default Password is adminadmin
-
Click Connect.
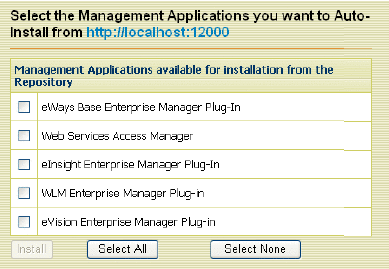
The available management applications are displayed.
Note –The list includes any management applications that are already installed.
Figure 1–5 Available Management Applications

-
In the row that lists the application, select the check box.
Note –You can select more than one check box. This enables you to install more than one application.
-
Click Install.
After the installation process is complete, the Results area indicates whether the installation is successful.
- © 2010, Oracle Corporation and/or its affiliates
