Creating an Oracle Applications OTD
The Oracle Applications Adapter uses a wizard-based OTD builder to create OTDs based on your Oracle tables. The wizard queries the Oracle tables to determine the hierarchies of the interface tables for a particular module, and creates a corresponding OTD. It also sets up the necessary staging table and the stored validation procedures to be run against the table.
Figure 1–18 Oracle Applications OTD
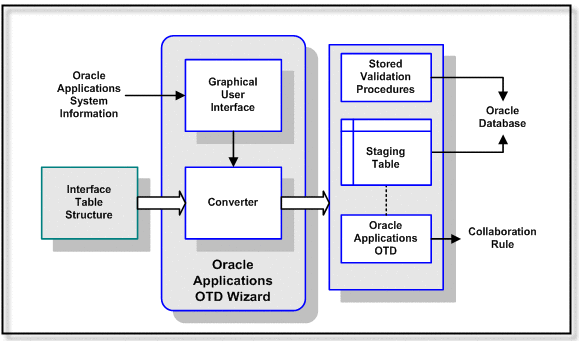
When building an OTD, the wizard calls many JDBC APIs (for example, getProcedureColumns()) which in turn queries the database and returns the resultset. While the Adapter itself doesn’t issue the queries directly, it is the Oracle driver that translates the API into multiple queries. In a situation where there is a lot of data in the database, it may take a while to return all the resultsets to the wizard. The performance of the queries is dependent on the execution path which is formulated when a SQL call is prepared. Not having good stats in the data dictionary could produce a long running query.
Oracle recommends doing the following to gather vital stats to improve performance:
-
Set the following in either the init.ora file or spfile (whichever is appropriate for their install):
_table_lookup_prefetch_size=0
-
Analyze the SYS schema for the system as follows:
-
Start sqlplus
-
Connect as sys user
-
exec dbms_stats.gather_schema_stats(’SYS’);
Keep in mind that significant changes to the database would affect the data dictionary (like new tables, indexes, etc). You should consider running the analysis regularly.
Note –Please consult your Database Administrator or Oracle before taking these steps as it may impact other applications.
-
The following steps are required to create a new OTD for the Oracle Applications adapter.
Select Wizard Type
Select the type of wizard required to build an OTD in the New Object Type Definition Wizard.
 To Select the Oracle Applications OTD Wizard
-
In the Enterprise Designer Project Explorer, right-click your Project, click New, and then click Object Type Definition.
The Object Type Definition Wizard appears.
-
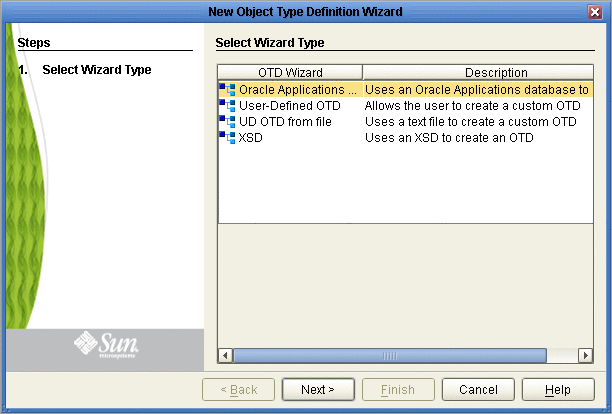
From the New Object Type Definition Wizard window, select the Oracle Applications Wizard and click Next.
Figure 1–19 OTD Wizard Selection
Connect To Database
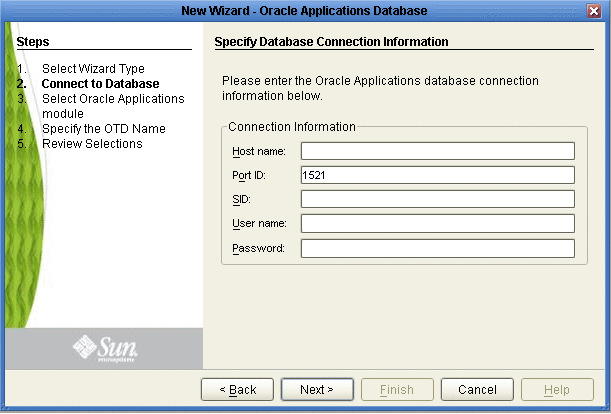
Enter the Oracle Applications connection information in the Connection Information frame.
 To Connect to the Database
-
Specify the applicable connection information for your database including:
-
Host Name - The server where Oracle Applications resides.
-
Port ID- The port number of Oracle Applications.
-
SID - The name of the Oracle instance (equivalent to the database name).
-
User Name - The user name that the Adapter uses to connect to the database.
-
Password - The password used to access the database.
-
-
Click Next.
The Select Oracle Applications module window appears.
Select Oracle Applications Module
Select the type of Oracle Applications Module you want included in the OTD.
 To Select the Oracle Applications Module
-
In the Select Oracle Applications Module dialog box (shown below), select the Business Function and Module and choose whether to use fully-qualified names and to replace existing stored procedures.
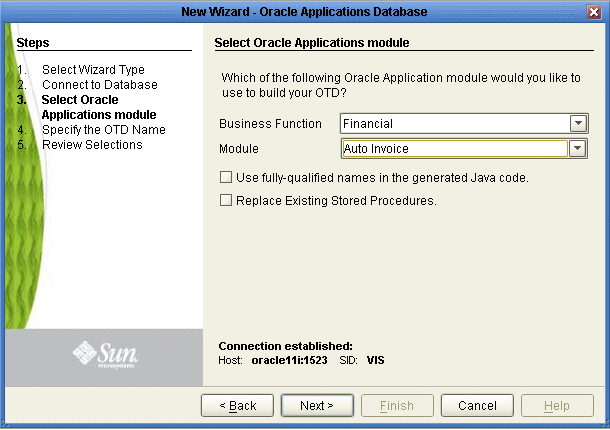
Note –A set of stored procedures are installed with the Oracle Applications Adapter. Unless these stored procedures are somehow deleted, the only way to create the OTD is by selecting Replace Existing Stored Procedures, otherwise, the existing stored procedures are not overwritten, an error appears, and the wizard stops.
-
Click Next to continue.
The Specify the OTD Name window appears.
Specify the OTD Name
Specify the name that your OTD will display in the Java CAPS IDE.
 To Specify the OTD Name
-
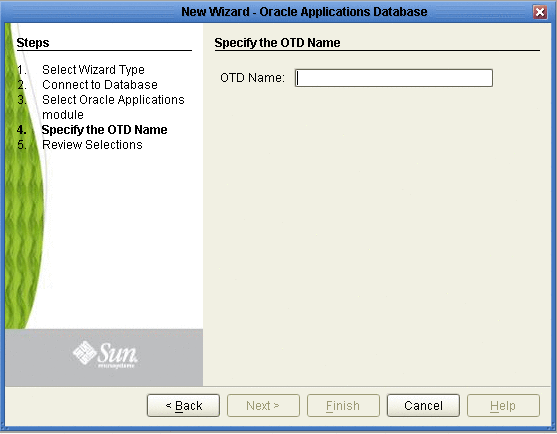
Enter a name for the OTD.
Figure 1–20 Naming an OTD
-
Click Next.
The Review Your Selections dialog box is displayed.
Review Selections
Review the selections made for the new OTD.
 To Review Your OTD Selections
-
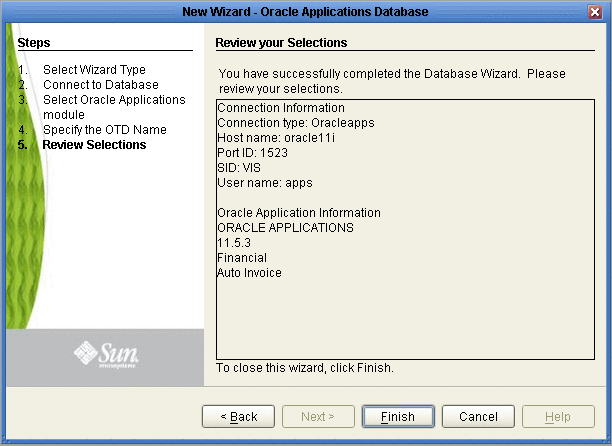
View the summary of the OTD. If you find you have made a mistake, click Back and correct the information.
-
If you are satisfied with the OTD information, click Finish to begin generating the OTD.
 Caution –
 If the Oracle Applications DDL Scripts have not been properly installed, an error message will be generated before the OTD can be successfully generated.
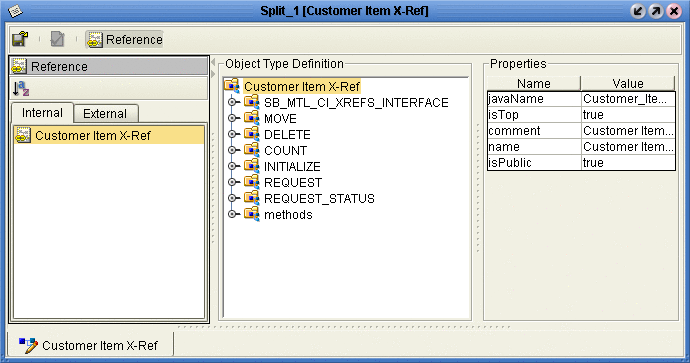
The resulting OTD appears in the Java CAPS IDE. The time it takes the OTD to generate depends on the module you selected and your system performance.
Figure 1–21 Database Wizard - Summary
The generated OTD appears in the OTD Editor. Nodes and methods for your OTD depend on the module you selected and the configuration of your tables.
Figure 1–22 OTD Editor
- © 2010, Oracle Corporation and/or its affiliates
