Adding and Editing OTD Segments
HL7 Library OTDs are made up of various OTDs that correspond to the HL7 message segments. The main HL7 message OTDs contain references to the segment OTDs, which are located in the same HL7 directory.
Editing a Segment
The following example uses the HL7_25_ADT_A02 OTD. To edit the properties for the specific segment of an OTD, perform the following:
-
Edit, copy and paste the segment OTD from the Project Explorer’s Sun ⇒ OTD Library ⇒ HL7 folder to your Project.
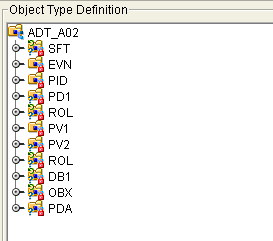
Note –Make a note of the segment OTD order in the Editor’s Object Type Definition pane. It is important to retain the original OTD structure. In the following step you will be deleting a segment OTD from this list, so it is important to make a note of the original segment OTDs location so that you can relocate the edited segment OTD to it’s original position in the OTD structure as illustrated in the figure.

-
Right-click to delete the SFT segment the segment from the Internal tab of the Reference pane. Select Delete.
-
Delete the SFT segment from the OTD tree in the Object Type Definition pane. Right-click the segment and select Delete from the shortcut menu.
-
Delete any one reference of the segment OTD from the External tab of the Reference pane.
This removes all other references to the segment OTD.
-
Click the Import OTD to External Template icon to import the segment OTD to your main OTD.
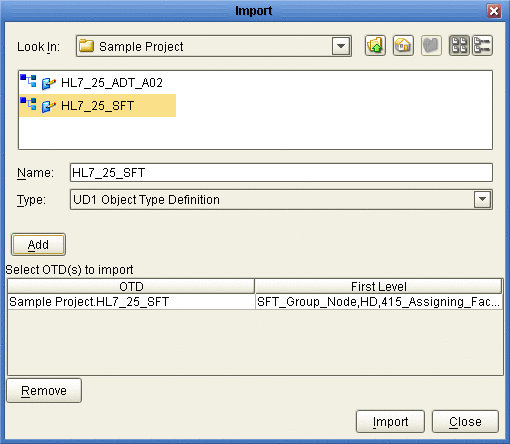
The Import dialog box appears.
-
Locate and select the OTD you want to import from your Project file from the Import dialog box.
-
Click the Add button to add the OTD to the Select OTD(s) to import field. Click Import.
The OTD is added to the editor’s External tab of the Reference pane.

-
Drag and drop the imported segment reference (for this example HL7_25_SFT/SFT) onto the Root Node of the Object Type Definition pane from the External tab of the Reference pane.
The segment is added to the Object Type Definition tree.
-
Right click the segment and select Level Up from the shortcut menu to move the segment up the tree from the Object Type Definition tree.
Repeat this step until the new segment is in the same position as that of the segment being replaced.
-
Save the changes to the Repository.
You can now open the segment OTD, located in your Project, and edit the properties.
Adding a Segment OTD to a Message OTD
You can also modify an OTD by adding additional segment OTDs to your OTD’s external template.
-
Copy and save your OTD and any segment OTDs you wish to import, to your Project.
This opens the OTD in the OTD Editor.
-
Click the Import OTD to External Template icon from the OTD Editor toolbar.
The Import dialog box appears.
-
Locate and select the OTDs you want to import from your Project file from the Import dialog box.
-
Click the Add button to add the OTD to the Select OTD(s) to import field.
-
Click Import.
The OTD is added to the editor’s External tab of the Reference pane.
-
Drag and drop the segment OTD reference onto the Root Node in the Object Type Definition pane from the External tab of the Reference pane.
The segment OTD is added to the Object Type Definition tree.
-
Save the changes to the Repository.
- © 2010, Oracle Corporation and/or its affiliates
