Adding Prepared Statements
A Prepared Statement OTD represents a SQL statement that has been compiled. Fields in the OTD correspond to the input values that users need to provide. Prepared statements can be used to perform insert, update, delete and query operations. A prepared statement uses a question mark (?) as a place holder for input. For example: insert into EMP_TAB (Age, Name, Dept No) values (?, ?, ?)
 To Add Prepared Statements
To execute a prepared statement, set the input parameters and call executeUpdate() and specify the input values if any.
Note –
When using a Prepared Statement, the ”ResultsAvailable()’ method will always return true. Although this method is available, you should not use it with a ”while’ loop. Doing so would result in an infinite loop at runtime and will stop all of the system’s CPU. If it is used, it should only be used with the ”if’ statement.You can process a resultset by looping through the next() method.
-
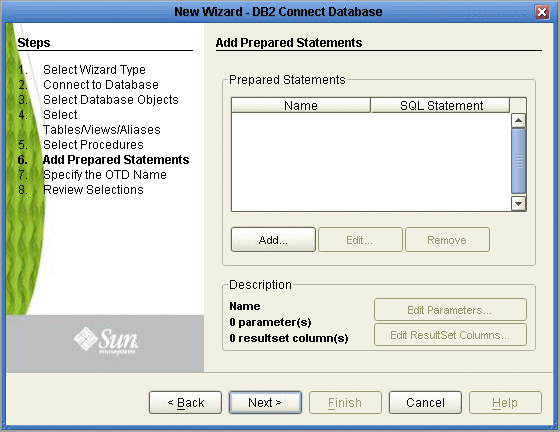
On the Add Prepared Statements window, click Add.

-
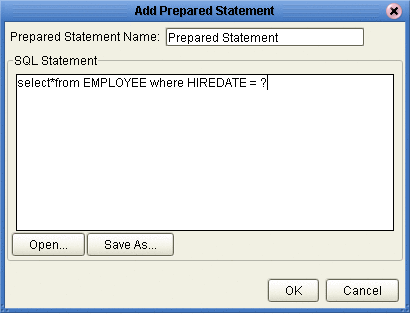
Enter the name of a Prepared Statement or create a SQL statement by clicking in the SQL Statement window. When finished creating the statement, click Save As giving the statement a name. This name will appear as a node in the OTD. Click OK (see the following figure).

-
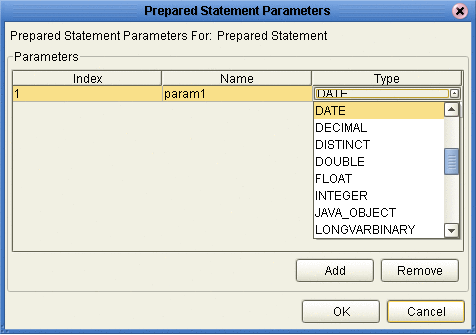
On the Add Prepared Statement window, the name you assigned to the Prepared Statement appears. To edit the parameters, click Edit Parameters. You can change the data type by clicking in the Type field and selecting a different type from the list.
Note –When doing a Prepared Statement with two or more tables, where multiple tables have the same column name, you must put the table name qualifier in the Prepared Statement to build the OTD.
-
Click Add if you want to add additional parameters to the Statement or highlight a row and click Remove to remove it. Click OK. (see the following figure).

-
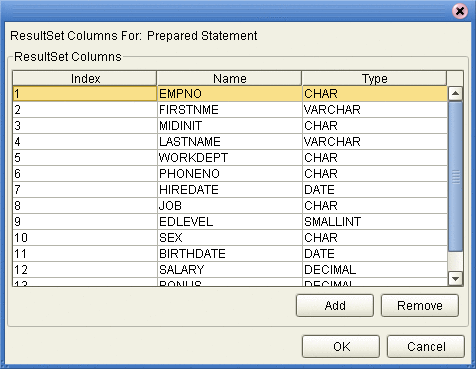
To edit the Resultset Columns, click Edit Resultset Columns. Both the Name and Type are editable but it is recommend you do not change the Name. Doing so will cause a loss of integrity between the Resultset and the Database. Click OK (see the following figure).
Note –The OTD Wizard fails to create OTDs with complex prepared statements that use the same column name in different tables. This problem is resolved by modifying the SQL statement to use column name aliases.

-
On the Add Prepared Statements window, click OK.
- © 2010, Oracle Corporation and/or its affiliates
