 To Select Table/Views/Aliases
-
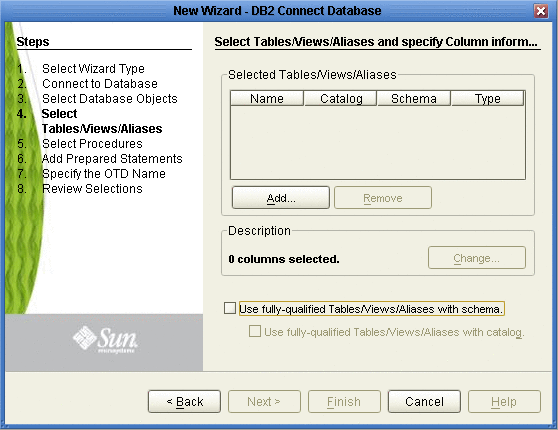
In the Select Tables/Views window, click Add (see the figure below).

-
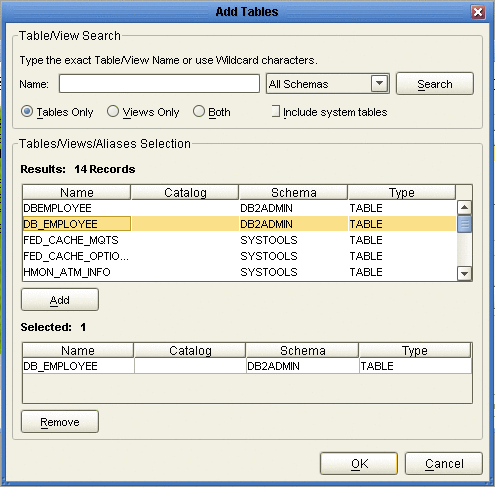
In the Add Tables window, select the type of criteria to be used for your search, consisting of table data, view only data, or both. You can include system tables in your search by selecting the checkbox.
-
From the Table/View Name drop down list, select the location of your database table and click Search (see the following figure). You can search for Table/View Names by entering a table name. The use of wildcard characters of ”?’, and ”*’ as part of your Table/View name search allow for greater search capabilities. For example, “AB?CD” or “AB*CD”.
-
Select the table of choice and click OK. The table selected is added to the Selected window (see the following figure).

-
On the Selected Tables/Views window, review the table(s) you have selected. To make changes to the selected Table or View, click Change. If you do not wish to make any additional changes, click Next to continue.
-
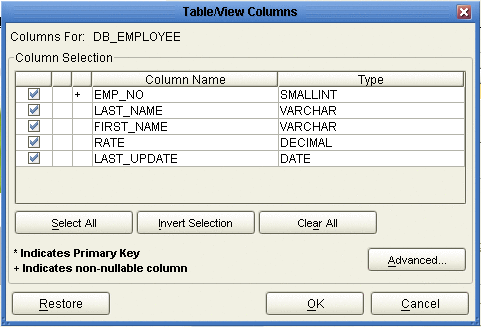
If you clicked Change on the Selected Tables/Views window, you can select or deselect your table columns on the Table/View Columns window. You can also change the data type for each table by highlighting the data type and selecting a different one from the drop down (see the following figure).

-
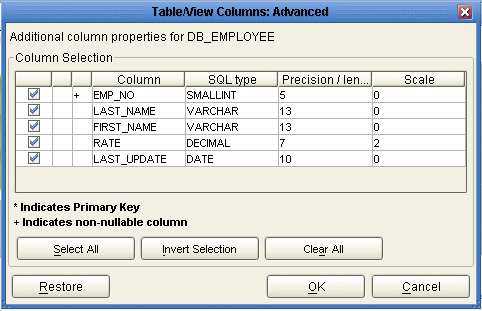
Click Advanced to change the data type, precision/length, or scale. In general, do not change the precision/length or the scale. Once you have finished your table choices, click OK (see the following figure).

-
When using Prepared Statement packages, select Use fully qualified table/view names in the generated Java code.
- © 2010, Oracle Corporation and/or its affiliates
