Creating the Deployment Profile
A Deployment Profile is used to assign the connectivity components to the Environment components, including the application server and message server. You only need to create a Deployment Profile for the sample projects that you will run. The following procedure describes how to create a Deployment Profile for the HL7 outbound sample. Connectivity Map and Environment combinations for the other samples are listed at the end of this procedure.
 To Create the Deployment Profile
-
On the Projects window, right-click prjHL7Outbound Project, point to New, and then select Deployment Profile.
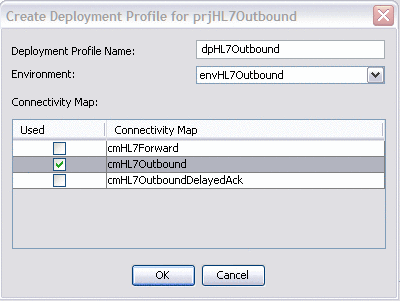
The Create Deployment Profile dialog box appears.

-
For the Deployment Profile Name, enter dpHL7Outbound.
-
For the Environment, select envHL7Outbound.
-
For the Connectivity Map, select cmHL7Outbound and deselect all other Connectivity Maps.
-
Click OK.
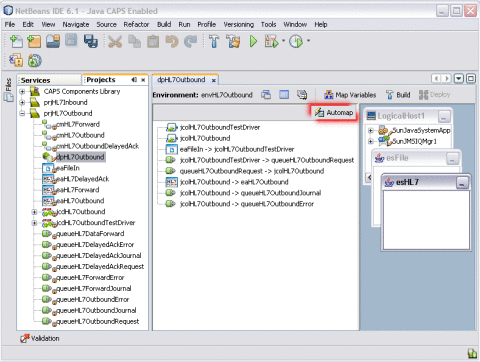
The Deployment Editor appears.
-
Click Automap.

-
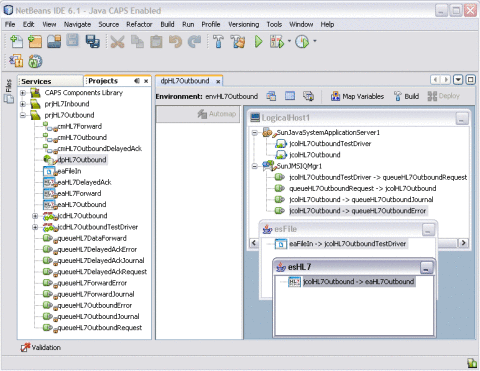
On the Automap confirmation dialog box, click Close.
The tree structure of the mapped Environment appears, as shown. below

-
Save the Deployment Profile.
Creating Deployment Profiles for the HL7 Inbound and Outbound Samples
Create Deployment Profiles for the remaining TCP/IP HL7 samples following the procedure above and using the following combinations of Environments and Connectivity Maps.
HL7Inbound Inbound Sample
Use the following to create the dpHL7Inbound Deployment Profile:
-
Environment: envHL7Inbound
-
Connectivity Map: cmHL7Inbound
HL7Inbound ForwardMSG Sample
Use the following to create the dpHL7InboundForwardMSG Deployment Profile:
-
Environment: envHL7InboundForwardMSG
-
Connectivity Map: cmHL7InboundForwardMSG
HL7Outbound OutboundDelayedACK Sample
Use the following to create the dpOutboundDelayedACK Deployment Profile:
-
Environment: envOutboundDelayedACK
-
Connectivity Map: cmOutboundDelayedACK
HL7Outbound Forward Sample
Use the following to create the dpHL7OutboundForward Deployment Profile:
-
Environment: envHL7OutboundForward
-
Connectivity Map: cmHL7OutboundForward
- © 2010, Oracle Corporation and/or its affiliates
