Monitoring HL7 External System Connection Status : Inbound Mode
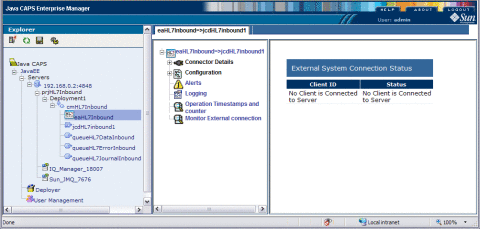
This feature describes monitoring the external system connection status from the Enterprise Manager GUI when the HL7 Adapter is deployed in an inbound mode.
-
HL7 Adapter emr plugin is extended to provide the monitoring external system connection status
-
Provision is included in the Enterprise Manager GUI for monitoring the HL7 external system connection status
-
Click the Monitor HL7 External Connection link. The user will see all the external systems (HL7 clients) connected to the HL7 inbound adapter (HL7 Server)
-
When the connection with the external system is lost, its status information will not appear in the status table shown in the Enterprise Manager GUI.
Managing the Repository
This section explains the method to manage the Repository.
 To Download EMR Files from Java Composite
Application Platform Suite
-
Enter the Host Address http://localhost:portnumber
The default portnumber is 12000.
-
Enter the User Name and Password.
The default User Name is Administrator and Password is STC.
-
Click Downloads tab and select the following from the list.
-
Save the emr files to the local directory.
Note –User can also locate the emr files from the local directory, if these are installed during Java CAPS installation.
Follow the path to pick the already installed HL7eWay.emr from the local directory,
Drive:/JavaCAPSR6U1/repository/repository/data/files/InstallManager/HL7eWay/downloadables/com.stc.HL7eWay.emr
The emr file is installed during Java CAPS installation.
 To Upload EMR Files to Enterprise Manager
-
Start the eManager from the following location: Drivename:/JavaCAPSR6U`/eManager/startserver.bat
Double-click startserver.bat.
-
Invoke any Web Browser and enter the URL to start the Java CAPS Enterprise Manager.
http://localhost:port number
For example, the port number is 15000
-
Enter the User ID and Password.
The default User ID is admin and default Password is adminadmin.
-
Install the HL7eWay.emr from the Java CAPS Repository to the Enterprise Manager.
-
Click Web Application Manager from Java CAPS Enterprise Manager —> Manage Applications.
-
Click Browse to select the com.stc.HL7eWay.emr from the local directory.
This file is downloaded from the Java Composite Application Platform Suite.
-
Click Deploy.
-
Click Web Application Manager.
Enter all the required credentials like Host Name, User Name, and Password.
-
Click Connect.
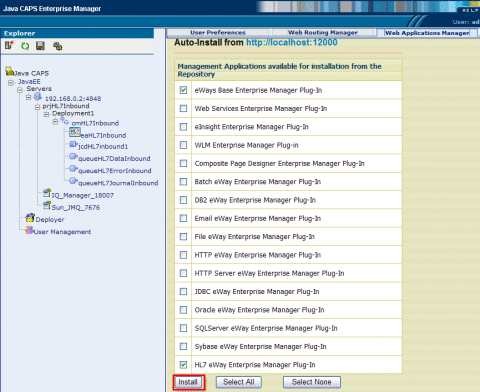
The list of Management Applications available for installation from the Repository is displayed.
-
Select eWays Base Enterprise Manager Plug-in and HL7 eWay Enterprise Manager Plug-in.
Note –Ensure to select eWay Base Enterprise Manager Plug-in. If not installed the application generates an error message.
Select an appropriate eWay Monitor Plug-in and check the version of the .sar file.
-
Click Install.
See Using Enterprise Manager Management Application in Java CAPS for detailed procedures.
This installs the eWay Base Enterprise Manager Plug-in and HL7eWay Enterprise Manager Plug-in from Java CAPS Repository to the Enterprise Manager.
-
Executing a Sample Project : Inbound Mode
Create a sample project to use the uploaded HL7eWay.sar
 To Execute a Sample Project for the Inbound
Mode
-
Install HL7eWay.sar file to the Sun Java CAPS Repository.
For steps, see Installing the TCP/IP HL7 Adapter and Sample Projects in Sun Adapter for TCP/IP HL7 Tutorial.
-
Start the NetBeans IDE and use the NetBeans Plugins Manager to install the HL7 adapter nbms to NetBeans IDE.
-
Re-start the Netbeans IDE and establish connection to the Sun Java CAPS Repository.
-
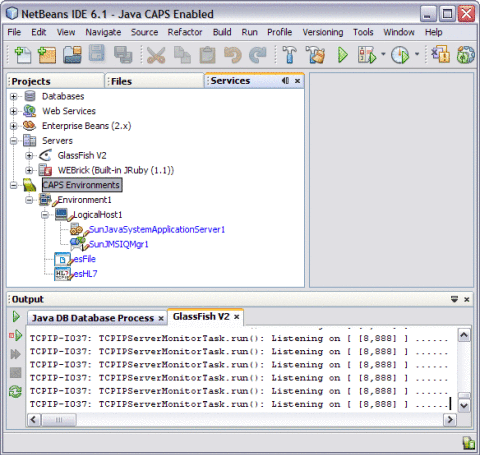
Create a CAPS Environment for the prjHL7Inbound project.
-
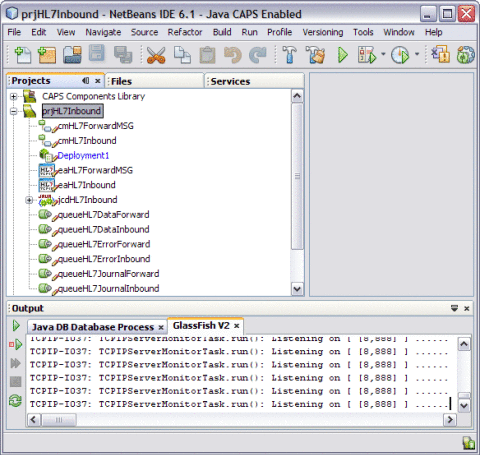
Import the HL7 project prjHL7Inbound.zip that is bundled with HL7eWay.sar into NetBeans IDE
-
Create the Deployment Profile and select Check Out...
The Check Out... option enables users to modify the created Deployment Profile for prjHL7Inbound.
-
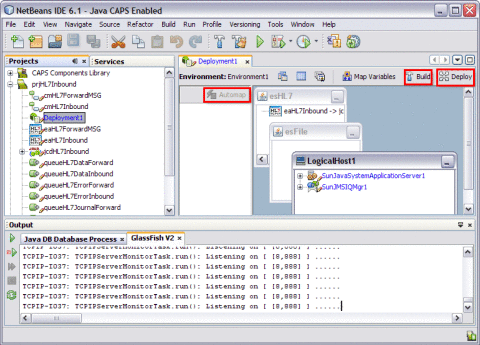
Click the Automap button to map the created environment files.
Note –Ensure to start the GlassFish V2 sever before deploying.
-
Click Build to build the project.
The following message is displayed after the build is successful.
Project buld was successful (elapsed time: 120.562 seconds).
-
Click OK.
-
Click Deploy button to deploy the project onto GlassFish V2 Application Server from the NetBeans IDE.
This action displays the following message.
Project deployment successful (elaspsed time: 49 seconds).
-
Open a Web Browser and login to the Enterprise Manager at the following path:
http://localhost:portnumber
The default portnumber is 15000.
-
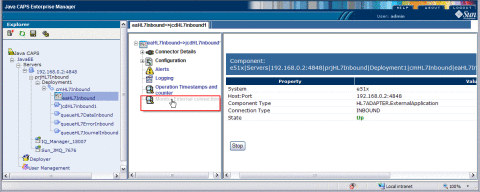
Expand the tree from the Explorer frame of the eManager GUI and select the prjHL7Inbound/Deployment1/cmHL7Inbound/eaHL7Inbound external system.
-
Select the Monitor external Connection action of the tree from the eaHL7Inbound => jcdHL7inbound1 frame.
This action displays the screen as shown below.
-
Start multiple HL7 external system and continue to send requests to the HL7 inbound project. Follow the Monitor External Connection link to observe the status of the external systems connection.
-
Terminate one of the external systems and observe that the status information of the terminated system does not appear in the status table
-
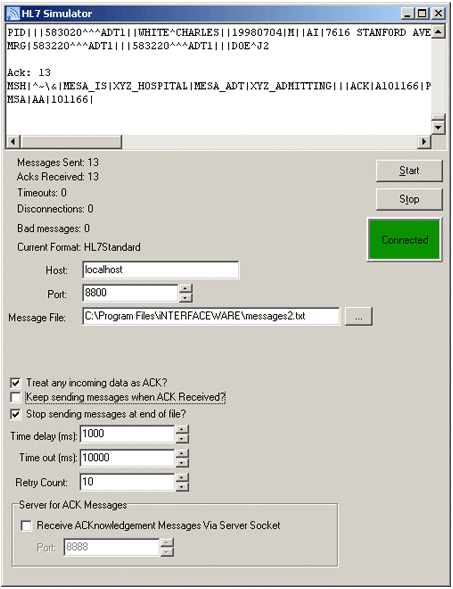
Execute the sample project using HL7 Simulator.
Here, is a sample illustration.
- © 2010, Oracle Corporation and/or its affiliates
