Working With the Sample Project
This sample project receives a HL7 V3 message PRPA_IN403001UV01 and sends a HL7 V3 ACK or NAK (MCCI_IN000004UV01). This project is same as prjHL7V3Inbound except that the schematron validation for the input xml.
 To Import the Sample Project
-
Create CAPS Environment in the Services tab.
See To Create a HL7 V3 External System for procedural description.
-
Import the project file.
For steps to import the sample Project ZIP file, see Importing the Sample TCP/IP HL7 Adapter Projects in Sun Adapter for TCP/IP HL7 Tutorial.
In the current example, prjHL7V3Inbound_WithSchematron.
-
Expand the tree node.
The illustration is as shown.
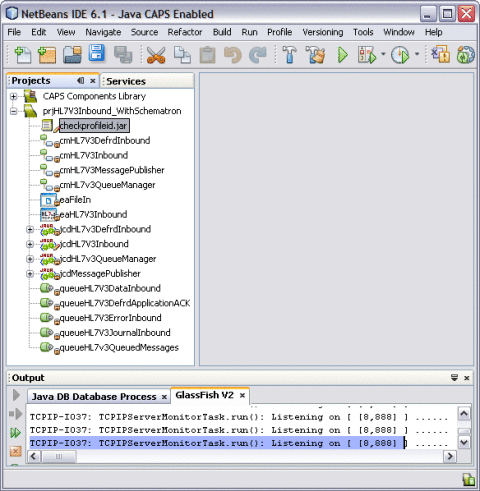
Note –The JAR file is bundled in the project.
For example, checkprofileid.jar
In the current example, the JAR file (checkprofileid.jar) is bundled along with the sample project file imported from Java CAPS Repository, prjHL7V3Inbound_WithSchematron.
 To Check Out... the Project
-
Select prjHL7V3Inbound_WithSchematron —> cmHl7V3Inbound.
SeeChecking Out the Imported Projects in Sun Adapter for TCP/IP HL7 Tutorial for steps to check out project components.
-
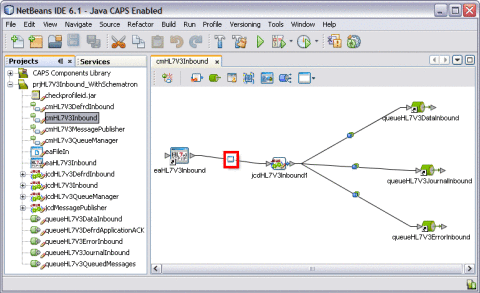
Double-click cmHL7V3Inbound.
The action displays the screen shown below.
-
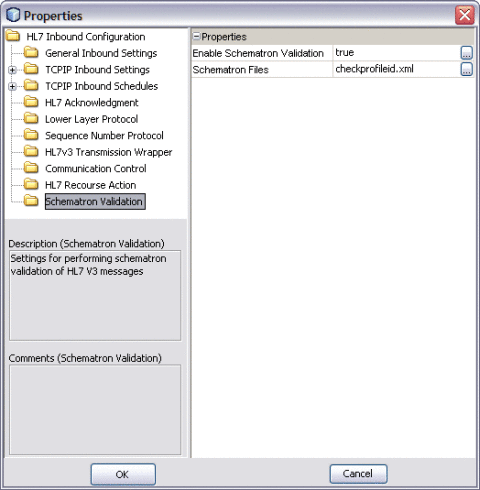
Double-click on the node found between eaHL7V3Inbound and jcdHL7V3Inbound1.
This action opens the properties screen for the Schematron.
-
Click the ellipses (...) to modify the Properties.
Editing the JCD
The JCD is edited as described in the steps below.
 To Invoke the Collaboration Editor
-
Select the node jcdHL7V3Inbound and double-click on it.
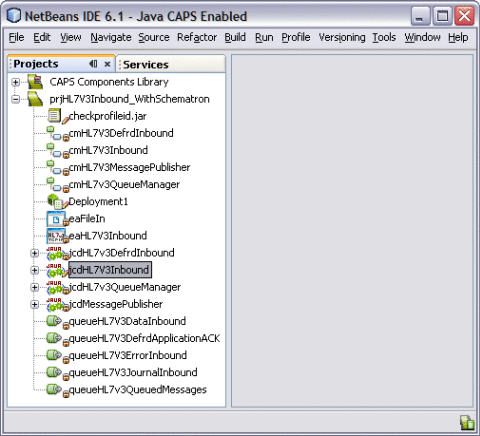
This action invokes the Collaboration Editor and displays the Java source.

Schematron Validation Inside the JCD
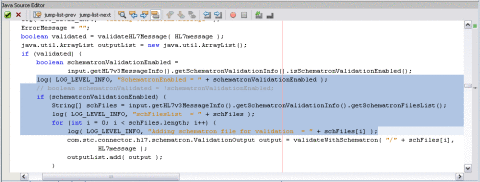
The schematron validation API is invoked from the JCD. This validation follows the normal HL7 V3 validation. It is invoked only when the Enable Schematron Validation property is true. This validation scans the schematronfiles list and invokes the method validateWithSchematron() depending on the value set forth for the property.
Validating the Code Snippet
boolean validated = validateHL7Message( HL7message );
java.util.ArrayList outputList = new java.util.ArrayList();
if (validated) {
boolean schematronValidationEnabled =
input.getHL7v3MessageInfo().getSchematronValidationInfo().
isSchematronValidationEnabled();
log( LOG_LEVEL_INFO, "SchematronEnabled = " + schematronValidationEnabled );
if (schematronValidationEnabled) {
String[] schFiles =
input.getHL7v3MessageInfo().getSchematronValidationInfo().getSchematronFilesList();
log( LOG_LEVEL_INFO, "schFilesList  = " + schFiles );
for (int i = 0; i < schFiles.length; i++) {
log( LOG_LEVEL_INFO, "Adding schematron file for validation  = " + schFiles[i] );
com.stc.connector.hl7.schematron.ValidationOutput output =
validateWithSchematron( "/" + schFiles[i], HL7message );
outputList.add( output );
}
|
for (int i = 0; i < outputList.size(); i++) {
com.stc.connector.hl7.schematron.ValidationOutput output =
(com.stc.connector.hl7.schematron.ValidationOutput) outputList.get( i );
if (!output.isValid()) {
validated = false;
schematronValidationError = true;
log( LOG_LEVEL_INFO, "Schematron Validation failed." );
break;
} else {
validated = true;
}
}
|
The illustrations are as shown.

Validating With Schematron Method
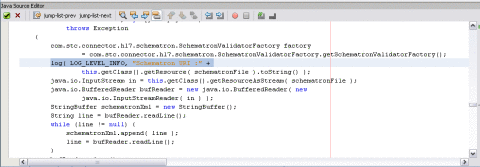
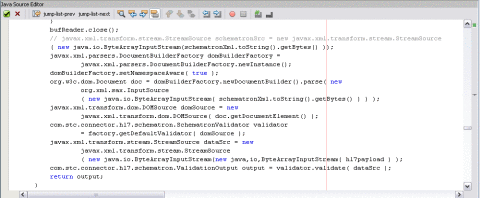
The Schematron method invokes the Schematron API. It reads the schematron files from classpath and constructs a DOM source. The DOM source passes it to obtain the SchematronValidator object. The object invokes the validate() method to pass the hl7payload.
validateWithSchematron() method
private com.stc.connector.hl7.schematron.
ValidationOutput validateWithSchematron( String
 schematronFile, byte[] hl7payload )
throws Exception
{
com.stc.connector.hl7.schematron.SchematronValidatorFactory
factory =
com.stc.connector.hl7.schematron.SchematronValidatorFactory.
getSchematronValidatorFactory();
log( LOG_LEVEL_INFO, "Schematron URI :" +
this.getClass().getResource( schematronFile ).toString() );
java.io.InputStream in = this.getClass().
getResourceAsStream( schematronFile );
java.io.BufferedReader bufReader = new java.io.
BufferedReader( new
java.io.InputStreamReader( in ) );
StringBuffer schematronXml = new StringBuffer();
String line = bufReader.readLine();
while (line != null) {
schematronXml.append( line );
line = bufReader.readLine();
}
|
bufReader.close(); |
javax.xml.parsers.DocumentBuilderFactory domBuilderFactory = javax.xml.parsers.DocumentBuilderFactory. newInstance(); domBuilderFactory.setNamespaceAware( true ); org.w3c.dom.Document doc = domBuilderFactory. newDocumentBuilder().parse( new org.xml.sax.InputSource( new java.io.ByteArrayInputStream ( schematronXml.toString().getBytes() ) ) ); javax.xml.transform.dom.DOMSource domSource = new javax.xml.transform.dom.DOMSource( doc. getDocumentElement() ); com.stc.connector.hl7.schematron.SchematronValidator validator = factory.getDefaultValidator( domSource ); javax.xml.transform.stream.StreamSource dataSrc = new javax.xml. transform.stream.StreamSource( new java.io.ByteArrayInputStream( hl7payload ) ); com.stc.connector.hl7.schematron.ValidationOutput output = validator.validate( dataSrc ); return output; } |
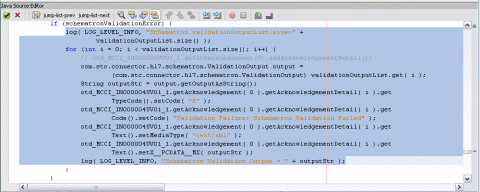
The illustrations are as shown.
Retrieving the Resultant XML Document
The makeNAK() method retrieves the Resultant XML document generated from the Schematron validation. The XML document is embedded in the AcknowledgementDetail section of HL7V3 Acknowledgement XML.
makeNAK() method
if (schematronValidationError) {
log( LOG_LEVEL_INFO, "Schematron validationOutputList.size="
+ validationOutputList.size()
);
or (int i = 0; i < validationOutputList.size(); i++) {
// otd_MCCI_IN000004UV01_1.getAcknowledgement(0).
addAcknowledgementDetail();
com.stc.connector.hl7.schematron.ValidationOutput output =
(com.stc.connector.hl7.schematron.ValidationOutput)
validationOutputList.get( i );
String outputStr = output.getOutputAsString();
otd_MCCI_IN000004UV01_1.getAcknowledgement( 0 ).
getAcknowledgementDetail( i ).getTypeCode().setCode( "E" );
otd_MCCI_IN000004UV01_1.getAcknowledgement( 0 ).
getAcknowledgementDetail( i ).getCode().setCode
( "Validation Failure: Schematron Validation Failed" );
otd_MCCI_IN000004UV01_1.getAcknowledgement( 0 ).
getAcknowledgementDetail( i ).getText().setMediaType( "text/xml" );
otd_MCCI_IN000004UV01_1.getAcknowledgement( 0 ).
getAcknowledgementDetail( i ).getText().setX__PCDATA__MX( outputStr );
log( LOG_LEVEL_INFO, "Schematron Validation Output = "
+ outputStr );
}
}
|
Sample Schematron
<?xml version="1.0" encoding="UTF-8"?><sch:schema xmlns:sch="http://www.ascc.net/xml/schematron"><sch:ns prefix="hl7v3" uri="urn:hl7-org:v3"/><sch:pattern name="Check structure"><sch:rule context="hl7v3:PRPA_IN403001UV01"><sch:assert test="count(hl7v3:profileId) = 1">The profileId should be present. It is missing.</sch:assert></sch:rule></sch:pattern></sch:schema>
This schematron checks for the presence of the <profileId> tag under PRPA_IN403001UV01 tag.
Sample Input Document
<PRPA_IN403001UV01 xmlns="urn:hl7-org:v3" xmlns:xsi="http://www.w3.org/2001/XMLSchema-instance" xsi:schemaLocation="urn:hl7-org:v3 PRPA_IN403001UV01.xsd"><id root="1.1.2.3.4.6" extension="5929" assigningAuthorityName="Litware Inc."/><creationTime value="20050303180027"/><versionCode code="V3PR1"/><interactionId root="1.1.6.7.8" extension="PRPA_IN403001UV01" assigningAuthorityName="HL7"/><profileId root="1.1.1.1"/><processingCode code="D"/><processingModeCode code="T"/><acceptAckCode code="AL"/>.........
 To Import a Schematron XML and Using it Inside
the JCD
This is for users who want to create the checkprofileid.jar.
-
Create a JAR file containing the Schematron XML.
-
Import the ZIP file from File —> Import.
-
Open the JCD Editor and click Add JAR.
This will add the JAR file to the JCD.

 To Create a HL7 V3 External System
-
Click the CAPS Environment from the Services tab.
-
Right-click and select New Environment.
A new environment is created and is added to the CAPS Environment tree.
-
Rename the new environment to envHL7V3Outbound or retain the default name.
-
Right-click envHL7V3Outbound or Environment1 and select New. Choose LogicalHost from the drop-down menu.
It takes few seconds to process the LogicalHost into the Environment.
-
Right-click LogicalHost1 and select New. Choose Sun Java System Application Server from the drop-down menu.
A new Application Server (SunJavaSystemApplicationServer1) is added to the Environment Explorer tree under LogicalHost1.
-
Right-click LogicalHost1 and select New. Choose Sun JMS IQ Manager from the drop-down menu.
A new JMS IQ Manager (SunJmsIQMgr1) is added to the Environment Explorer tree under LogicalHost1.
-
-
Right-click envHL7V3Outbound or Environment1 and select New. Choose File External System.
A new node esFile is added to the Environment Editor.
-
Right-click envHL7V3Outbound or Environment1 and select New. Choose HL7V3 External System.
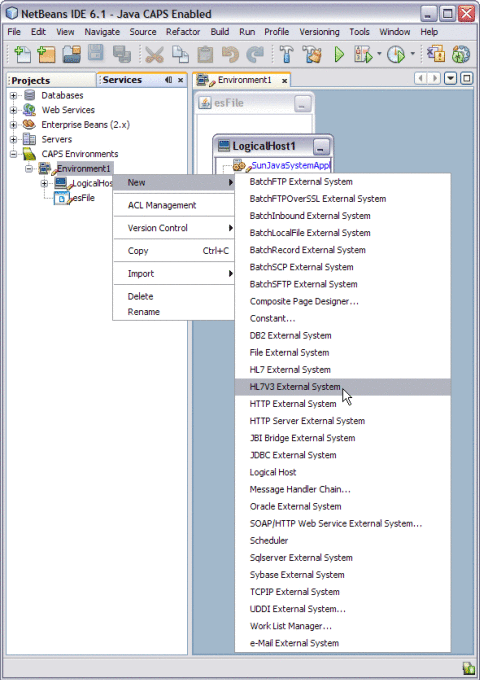
A new node esHL7V3 is added to the Environment Editor.
-
Click envHL7V3Outbound or Environment1 on the right pane to view the complete structure of the new nodes.
-
Click on File menu and select Save All to save all the changes made to the environment.
 To Import a Schematron XML Into the Project
-
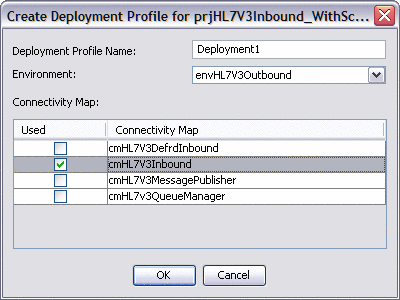
Create a Deployment Profile.
See Building and Deploying the Sample Project in Sun Adapter for TCP/IP HL7 Tutorial for steps on creating a deployment profile.
Note –Make sure that the selected Environment: is envHL7V3Outbound and the selected Connectivity Map: is cmHL7V3Inbound.
The illustration is as shown.
-
Click OK.
-
Click Automap.
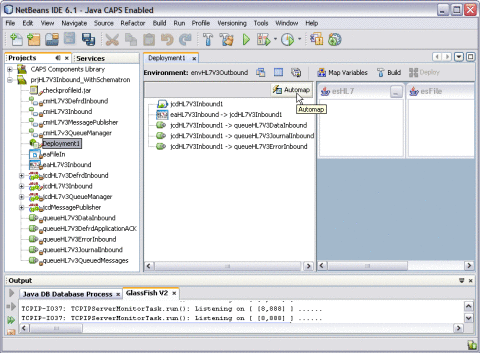
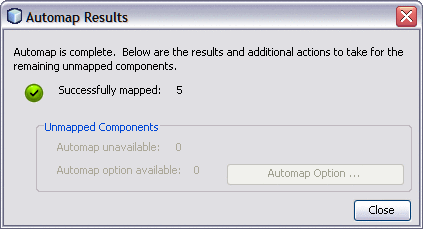
This displays the Automap Results dialog box.
-
Click Close.
-
Click Save All.
-
Click the Build button.
See Building and Deploying the Sample Project in Sun Adapter for TCP/IP HL7 Tutorial for steps on building the project.
This action displays the Project build confirmation message.

-
Click OK.
-
Click the Deploy button.
Tip –Make sure the GlassFish server is started before deploying.
Executing a Sample Project
The steps describe the method to build and deploy the compressed (.zip) project files, prjHL7V3Inbound_WithSchematron.zip and prjHL7V3Outbound.zip.
 To Build and Deploy the Project ZIP Files
-
Upload the latest HL7eWay.sar from the Java Composite Application Platform Suite Uploader.
-
Install the new NBMs into the NetBeans IDE from the CAPS Repository.
-
Import the project prjHL7V3Inbound_WithSchematron.zip and prjHL7V3Outbound.zip.
Follow the steps described in Schematron Validation Inside the JCD.
-
Create the Deployment Profiles.
-
Build and Deploy both the projects.
-
Use the sample HL7V3 message to trigger the project. Use Copy and Paste. Copy the file into C:\temp. Name the file as PRPA_IN403001UV01.xml:
Note –Copy and Paste the content to Notepad File and name the file as PRPA_IN403001UV01.xml. Ensure to change the extension from TXT to XML.
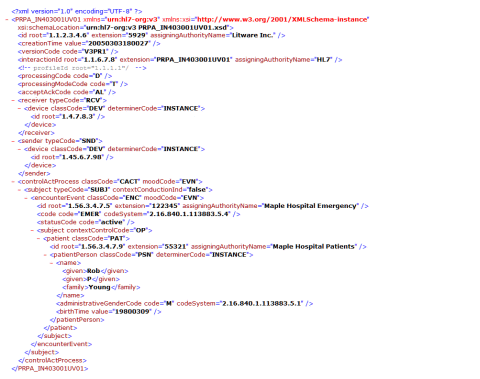
Sample XML File
<?xml version="1.0" encoding="UTF-8"?><PRPA_IN403001UV01 xmlns="urn:hl7-org:v3" xmlns:xsi="http://www.w3.org/2001/XMLSchema-instance" xsi:schemaLocation="urn:hl7-org:v3 PRPA_IN403001UV01.xsd"><id root="1.1.2.3.4.6" extension="5929" assigningAuthorityName="Litware Inc."/><creationTime value="20050303180027"/><versionCode code="V3PR1"/><interactionId root="1.1.6.7.8" extension="PRPA_IN403001UV01" assigningAuthorityName="HL7"/><!--profileId root="1.1.1.1"/--><processingCode code="D"/><processingModeCode code="T"/><acceptAckCode code="AL"/><receiver typeCode="RCV"><device classCode="DEV" determinerCode="INSTANCE"><id root="1.4.7.8.3"/></device></receiver><sender typeCode="SND"><device classCode="DEV" determinerCode="INSTANCE"><id root="1.45.6.7.98"/></device></sender><controlActProcess classCode="CACT" moodCode="EVN"><subject typeCode="SUBJ" contextConductionInd="false"><encounterEvent classCode="ENC" moodCode="EVN"><id root="1.56.3.4.7.5" extension="122345" assigningAuthorityName="Maple Hospital Emergency"/><code code="EMER" codeSystem="2.16.840.1.113883.5.4"/><statusCode code="active"/><subject contextControlCode="OP"><patient classCode="PAT"><id root="1.56.3.4.7.9" extension="55321" assigningAuthorityName="Maple Hospital Patients"/><patientPerson classCode="PSN" determinerCode="INSTANCE"><name><given>Rob</given><given>P</given><family>Young</family></name><administrativeGenderCode code="M" codeSystem="2.16.840.1.113883.5.1"/><birthTime value="19800309"/></patientPerson></patient></subject></encounterEvent></subject></controlActProcess></PRPA_IN403001UV01>
The logical processing is as follows:
- © 2010, Oracle Corporation and/or its affiliates
