Using Scheduler Binding Component Application Configuration
To configure your projects Scheduler Binding Components for application configuration, do the following:
 Defining the Scheduler Application Configuration for
a Project
-
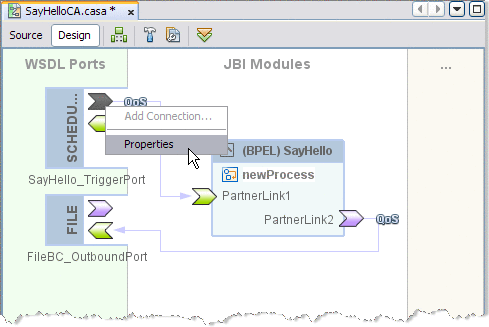
To associate a Configuration Extension profile with the Scheduler endpoint, Open your project service assembly in the CASA Editor. To do this, from the Project window, right-click your composite application's Service Assembly node, and choose Edit from the pop-up menu.
The CASA Editor opens.
-
Right-click the Scheduler consumer port icon, and choose Properties from the pop-up menu.
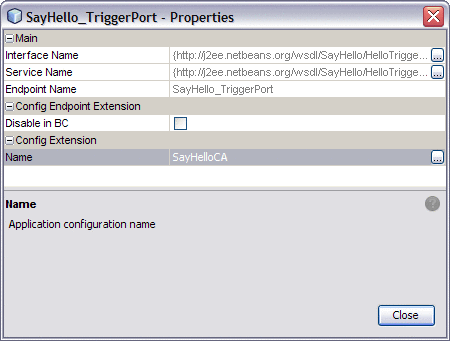
The Scheduler TriggerPort Properties Editor appears.
-
From the Properties Editor, under Config Extension, enter a name for your profile, such as the name of the Scheduler WSDL. Click Close.
-
From the NetBeans Services window, make sure that GlassFish V2 server is started. If the GlassFish server is not started, right-click GlassFish V2 and choose Start from the pop-up menu. In the same way, make sure that the Scheduler Binding Component (sun-scheduler-binding) is also started.
-
Right-click the sun-scheduler-binding and select Properties from the pop-up menu.
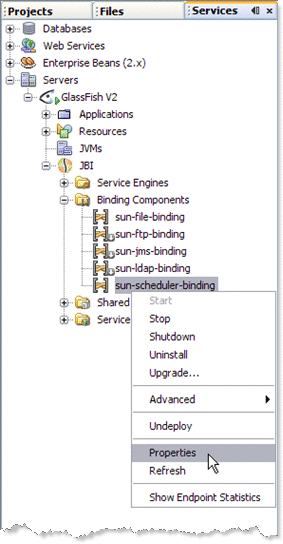
The sun-scheduler-binding Properties Editor appears.
-
From the sun-scheduler-binding Properties Editor, click the edit button for the Application Configuration property.
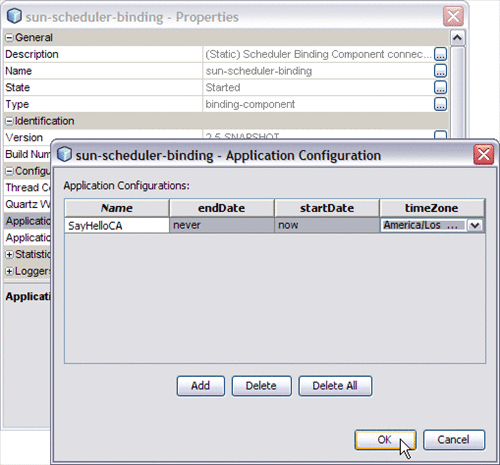
The sun-scheduler-binding Application Configuration Editor appears.
-
Click Add to add a new row to the Application Configuration Editor, representing all of the application configurable parameters for the Scheduler Binding Component.
-
Enter the parameters for your binding
-
Name: Specifies the name of your binding profile
-
endDate: Specifies the trigger end date as a String literal, either never, or the date, conforming to the format specified in the Scheduler Control and Triggers Wizard.
-
startDate: Specifies the trigger start date as a String literal, either now, or the date, conforming to the format specified in the Scheduler Control and Triggers Wizard.
-
timeZone: Specifies the appropriate time zone for the environment where the deployed scheduler runs.
-
-
Click OK and Close to save properties.
When the composite application is deployed, the Scheduler Binding Component will use the new application configuration that has been defined for the respective endpoint.
Other Tools Used to Edit the Application Configuration
In addition to the NetBeans IDE, you can also use these other tools to edit the Scheduler Binding Component Application Configuration.
-
GlassFish Admin Console: To access the Admin Console, from the NetBeans Services window, right-click GlassFish V2 under Servers and choose View Admin Console from the pop-up menu. You can also access the Admin Console at http://localhost:4848/login.jsf, if this setting was retained during installation.
To open the Application Configuration window from the Admin Console, select the sun-scheduler-binding, under Common Tasks -> JBI -> Components. Select the Application tab and the Configuration sub-tab.
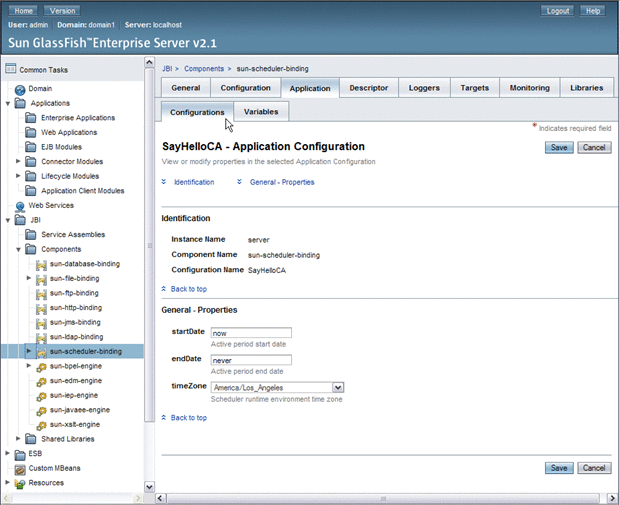
-
asadmin Command Line Interface: For information on using the Command Line Interface (CLI) to create, edit, or delete and application, see create-jbi-application-configuration, update-jbi-application-configuration, or delete-jbi-application-configuration.
- © 2010, Oracle Corporation and/or its affiliates
