 Accessing the Configure Scheduler Binding Wizard
-
Open your Composite Application in the CASA Editor: From the NetBeans Projects window, right-click your project's Service Assembly and choose Edit from the pop-up menu.
The CASA Editor opens to your project.
-
If the project has not yet been built, click the Build icon located on the CASA Editor toolbar.
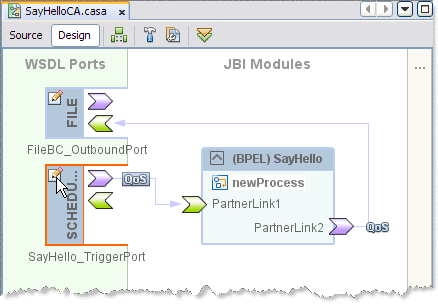
The CASA Design view now shows the project's JBI Modules and WSDL Ports.
-
If your Scheduler Port has not been cloned, right-click the Scheduler WSDL Port and choose Clone WSDL Port to edit from the pop-up menu. This creates a copy of the WSDL file in the Composite Application Project source directory to allow editing.
An edit icon appears in the corner of the Scheduler Port.

-
Click the edit icon on the Scheduler Port.
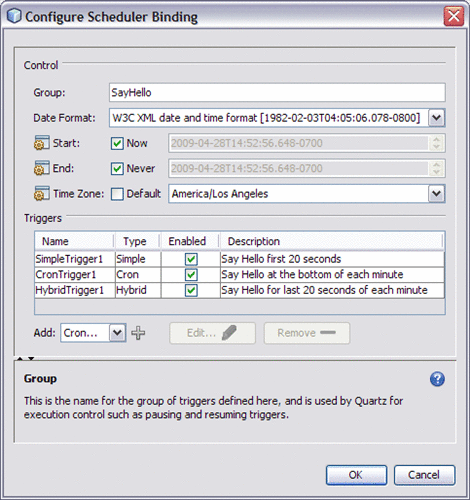
The Configure Scheduler Binding Wizard appears.

The Configure Scheduler Binding Wizard is a twin to the Scheduler Binding Component Wizard, and can be configured in the same way. See Understanding the Scheduler Wizard more information.
-
Once you have completed your changes, redeploy your project for the updates to take affect.
- © 2010, Oracle Corporation and/or its affiliates
