 Test the HelloWorldApplication Composite Application
project
-
In the Projects window, expand the HelloWorldApplication project node, right-click the Test node, and choose New Test Case from the pop-up menu.
The New Test Case wizard opens.
-
Accept the default test case name, TestCase1, and click Next.
-
From the Select the WSDL Document page, expand the HelloWorld - Proecss Files node, select Synchronous.wsdl, and click Next.
-
From the Select the Operation to Test page, select the Operation1 and click Finish.
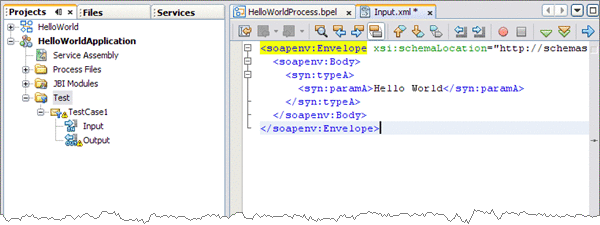
A new TestCase1 node is added under the project's Test node in the Projects window, containing two subnodes, Input and Output.
The Source Editor appears containing the Input file, Input.xml
Note –If the Source Editor does not contain a tab for Input.xml, double-click the Input node in the Projects window to open the file.
-
From the Input.xml tab of the Source Editor, do the following:
-
Locate the line:
<syn:paramA>?string?<syn:paramA>
-
Replace ?string? with Hello World, so that the line appears as follows:
<syn:paramA>Hello World<syn:paramA>
-
From the NetBeans IDE menu bar, click the Save All button.

-
-
In the Projects window, double-click the Output node under Test -> TestCase1.
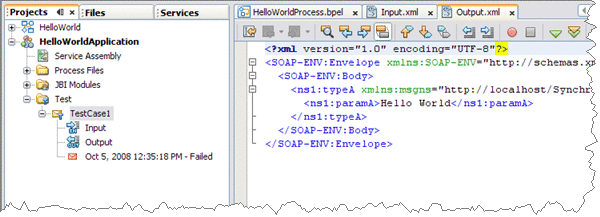
Output.xml is opened in the Source Editor. Initially, Output.xml is empty until the first test run populates the file.
-
In the Projects window, right-click the TestCase1 node and choose Run from the pop-up menu.
When the Overwrite Empty Output dialog box appears, click Yes to accept new output. The first test run populates the Output.xml file displayed in the Source Editor.

The test compares the output to the contents of the output file. Because the first run of the test has nothing to compare itself to, the first test fails. Subsequent test runs will compare their output with the contents of Output.xml and should succeed.
-
Run the test again.
The testcase is compared to the current output file and succeeds.
- © 2010, Oracle Corporation and/or its affiliates
