Using the TCP/IP HL7 Predefined Templates
The TCP/IP HL7 Adapter provides several sample Projects to help you customize a solution using either HL7 V2.x or HL7 V3 messaging. In addition to the HL7 Adapter, these Projects include several Collaborations that define processing logic in addition to the rules configured for the Adapter. You can use these Collaborations as a template for the Projects you create for your own HL7 system.
The following topics provide instructions for copying and customizing HL7 Collaborations:
The following topics provide information about how the Collaborations are defined and the functional flow of the Collaborations:
Prerequisites for the HL7 V3 Sample Projects
The predefined Collaborations are designed to be extended and modified, however, for HL7 V3 compliant systems this is not necessary. If you need to modify an HL7 V3 Collaboration, it is strongly suggested that you use these template Collaborations as the basis for any new Collaborations. Therefore, it is important to maintain the original predefined jcdHL7V3Inbound and jcdHL7V3Outbound Collaborations in their initial form for future use.
Before working with the HL7 V3 sample Projects, be sure that the required HL7 V3 SAR files are uploaded to the repository. The required files are listed below:
-
HL7eWay.sar
-
HL7OTDLibrary.sar
-
HL7V32006ACCTBilling.sar
-
HL7V32006ClaimsAndReimb.sar
-
HL7V32006ClinicalGenomics.sar
-
HL7V32006MedicalRecords.sar
-
HL7V32006MsgContActInfra.sar
-
HL7V32006PatientAdmin.sar
-
HL7V32006PersonnelManagement.sar
-
HL7V32006PublicHealthRepot.sar
-
HL7V32006QueryInfra.sar
-
HL7V32006RegulateStudies.sar
-
HL7V32006Scheduling.sar
-
HL7V32006SharedMessages.sar
-
HL7V32006TransInfra.sar
Creating a Copy of an HL7 Sample Project
It is recommended that you retain the sample Projects as they are and create copies of the Projects to use as a basis for your new customized Projects. To create a copy of a Project, you first export the original Project to a file, change the name of the original Project, and import the exported Project back into the Repository.
 To Create a Copy of a Project
-
Start the CAPS Repository.
-
Start the NetBeans IDE.
-
On the NetBeans toolbar, click Tools, point to CAPS Repository, and then select Connect.
The Connect to CAPS Repository dialog box appears.
-
Enter the connection information and click Connect.
Note –When connected the icon in the status bar turns from red to green.
-
Export the Project you want to copy:
-
On the Projects window, right-click the Project to copy, click Export, and then click Project.
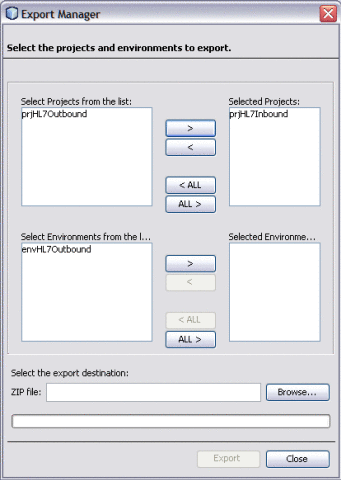
The Export Manager dialog box appears.
Figure 2 Export Manager
-
Select the Projects and Environments to export.
The selected Project appears in the Selected Projects: pane of the Export Manager.
-
Select the Project or the Environment from the left pane and click the right-arrow button to add the Project to the Selected Projects pane.
Tip –Click the left-arrow button , if you want to move the selected projects from the right pane to the left pane.
-
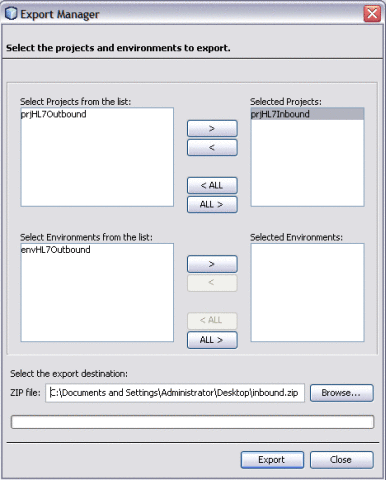
Click Browse and select an appropriate directory to save the exported Project.
Figure 3 Export Manager — Browse Option
-
Click Export.
The Project is compressed and saved to the specified directory and file name.
-
-
Rename the original Project in the NetBeans IDE.
Note –The NetBeans IDE will not import identically named Projects to the same root, so you must perform this step before importing the Project back in.
-
On the NetBeans IDE, click Save All.
-
Import the Project back in to the Repository.
-
On the NetBeans menu bar, select Tools, point to CAPS Repository, and then select Import Project from the drop-down menu.
A confirmation dialog box appears asking if you need to save any changes.
-
Click Yes to proceed with importing a project.
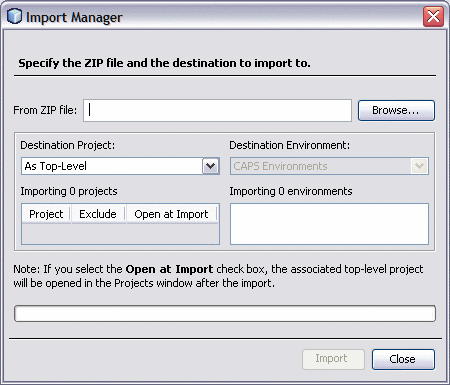
The Import Manager appears.
-
Click Browse, navigate to the location you specified for the export, and select the Project you just exported.
-
Click Import.
It may take a few seconds to import the project. When the project is imported, the Import Status dialog box appears.
-
Click OK on the dialog box.
The CAPS Repository is refreshed, and you now have two copies of the same Project in the Repository.
-
Customizing Predefined Collaborations for HL7
The predefined Collaborations are designed to be extended and modified, however, for HL7 compliant systems this is not necessary. If you need to modify an HL7 Collaboration, it is strongly suggested that you use the template Collaborations as the basis for any new Collaborations. You should always keep a copy of the sample Projects in their original form for this use.
The following steps describe creating copies of the HL7 Collaborations and adding a new Message Library to an existing Collaboration:
Creating Copies of HL7 Collaborations
Production Projects contain several Collaborations. To create multiple copies of the HL7 Collaborations for your Project, copy and paste the original Collaborations into your project.
 To Create Copies of HL7 Collaborations
-
On the Projects window of the NetBeans IDE, expand the Project containing the Collaboration you want to copy until you see the Collaboration.
-
Right-click the Collaboration you want to copy, and select Copy.
-
Right-click the Project to which you want to copy the Collaboration, and select Paste.
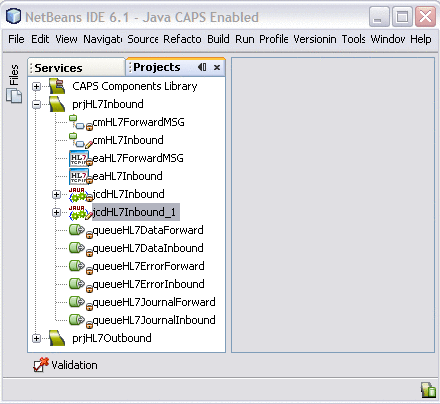
Note –A copy of the Collaboration appears in your Project. The Collaboration can be copied within the Project or to another Project. If you copy it to the same Project, a number is appended to the Collaboration name.
Figure 4 Collaboration — Copied to Project Tree
-
Repeat this step for additional copies of the Collaboration.
-
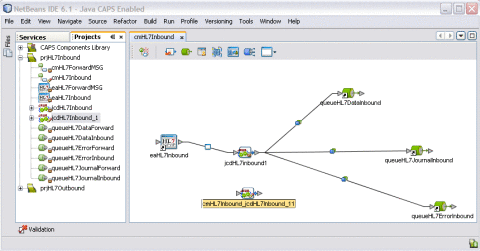
To add each new Collaboration to a Project's Connectivity Map, drag and drop the Collaboration from the Projects Explorer tree to the Connectivity Map Editor.
The new Collaborations can now be associated with the Project's components.
Figure 5 Connectivity Map — Newly Added Collaborations
Adding an HL7 Message Library to an Existing Collaboration
In some cases, a specific HL7 message or messages might need to be added to the Collaboration. Perform the following to add a HL7 Message Library to an existing Collaboration.
Note –
Make sure you are using the correct version of the Message Library for the Collaboration you are working with.
 To Add HL7 Message Library to an Existing
Collaboration
-
On the NetBeans Project window, right-click the Collaboration to which you want to add the HL7 Message Library.
-
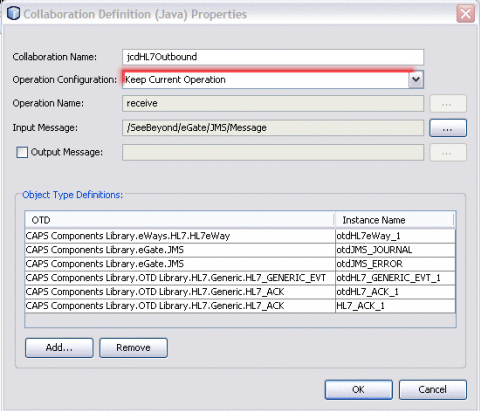
Select Properties from the drop-down menu.
The Collaboration Definition (Java) Properties dialog box appears.
-
Select Keep Current Operation as the value for the Operation Configuration field.
Figure 6 Collaboration Definition (Java) Properties
-
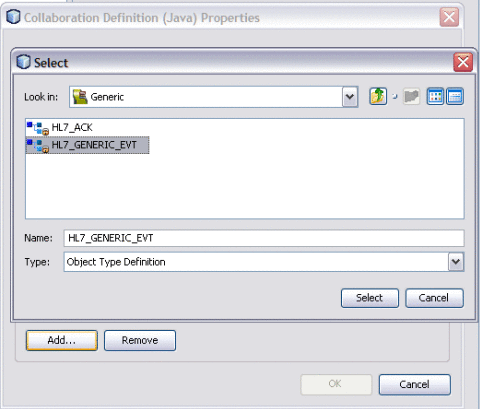
Click Add to select the object type definition.
A dialog box appears where you can select the Message Library to add.
Figure 7 Select Object Type Definition
-
In the Look In field, navigate to the location of the Message Library.
The HL7 Message Libraries are located in CAPS Components Library > Message Library > HL7.
-
Select the Message Library and then click Select.
The Message Library is added to the list.
Figure 8 Message Library Added to the List
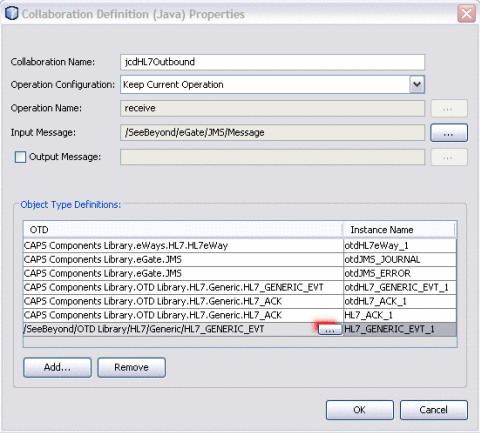
Tip –You can also modify an existing HL7 V2 Message Library by clicking the Message Library to change, clicking the ellipsis that appears, and selecting the appropriate Message Library.
-
On the Collaboration Definition Properties dialog box, click OK.
- © 2010, Oracle Corporation and/or its affiliates
